Brier Pants by Daughter Judy

It is no secret that I love pants and I love Daughter Judy patterns, so you can imagine my excitement when they asked me to help test their latest pattern, the Brier pants. Of course the answer was an immediate yes. In today’s post, I’ll review the pattern and share some tips for making it. In a future post, I’ll compare the Briers to a few other popular wide leg pants patterns.

Design and Inspo

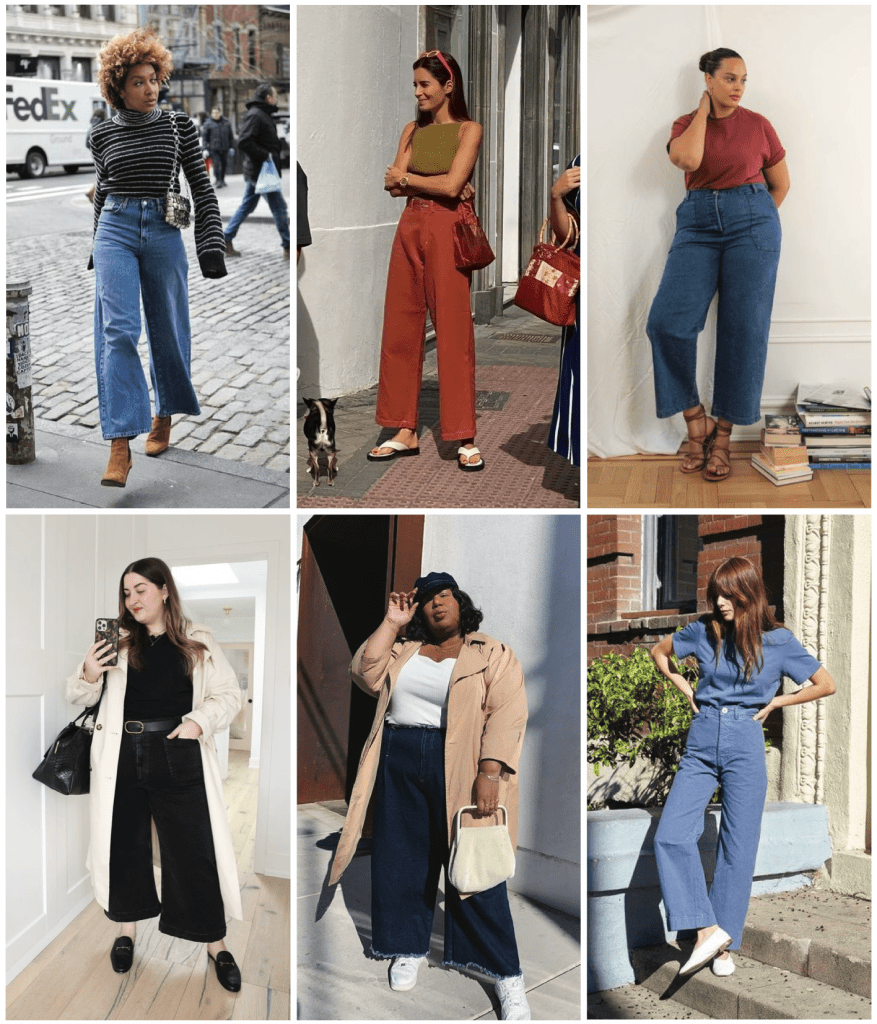
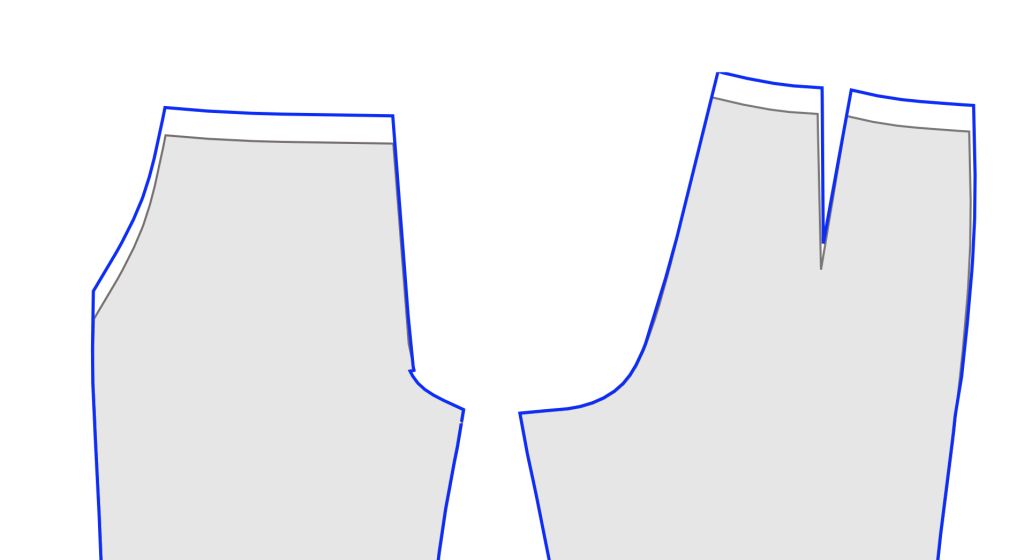
Daughter Judy is one of the few indie pattern companies that shares their design inspiration, which I find hugely helpful in understanding the intended fit. The testing group received the images below to help us understand the design:

Brier inspo

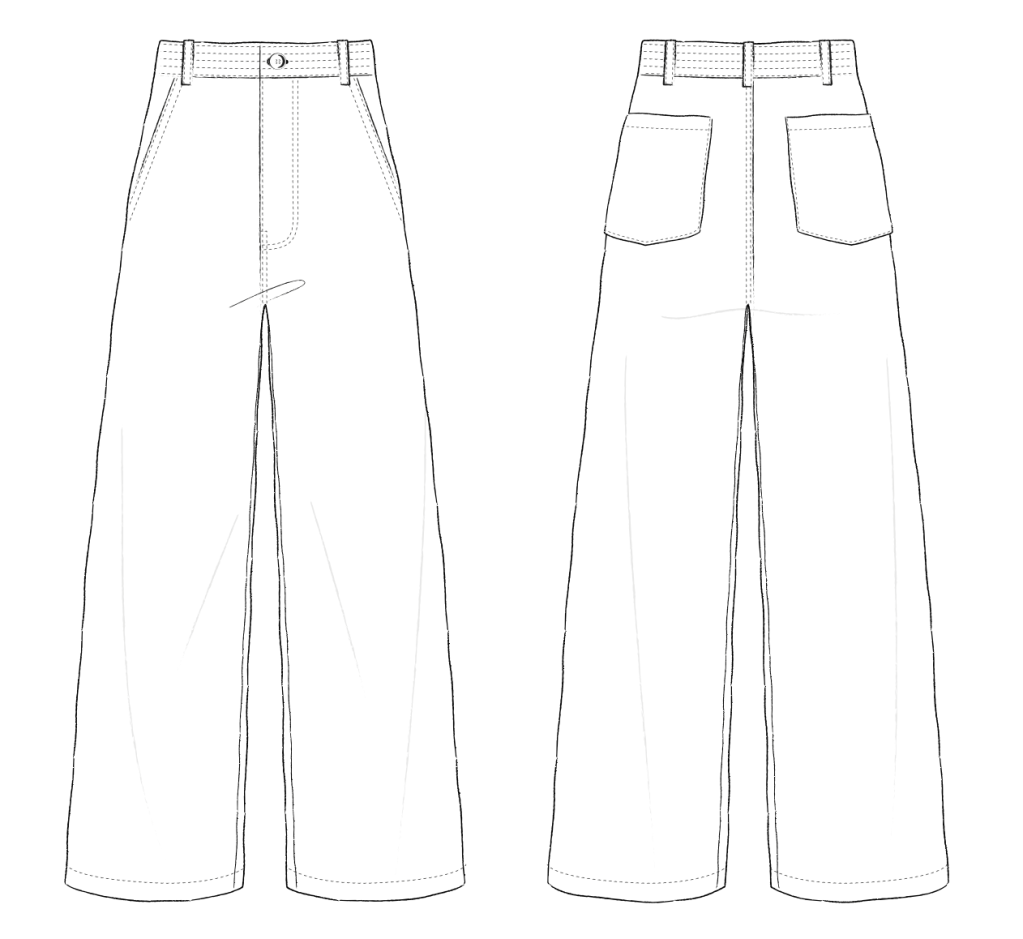
The Brier pants are an interpretation of the classic sailor pant; a curved waistband that sits high on the natural waist, snug through the hips, front slash pockets, and with a wide leg that finishes around the ankle.

The Brier Pants

These design elements are similar to a number of other indie patterns, most notably the Persephone pants. I’ll take a deep dive into the drafting differences between these two patterns in a future post, but — spoiler alert — while they aim for the same overall look, these two patterns use completely different drafting approaches to get there. Daughter Judy also discusses some key drafting differences between Brier and an unnamed sailor pants with no side seam, as well as the impact on fit in this newsletter. The Persephone pants are notoriously challenging to fit, and I predict the Briers will be a welcome and better-fitting alternative.

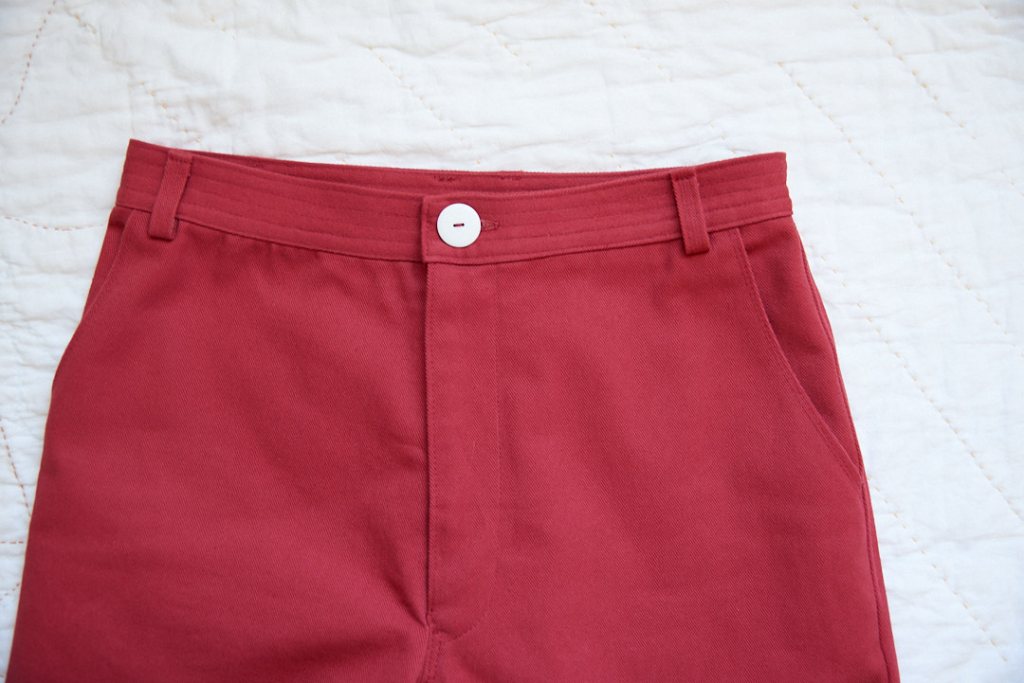
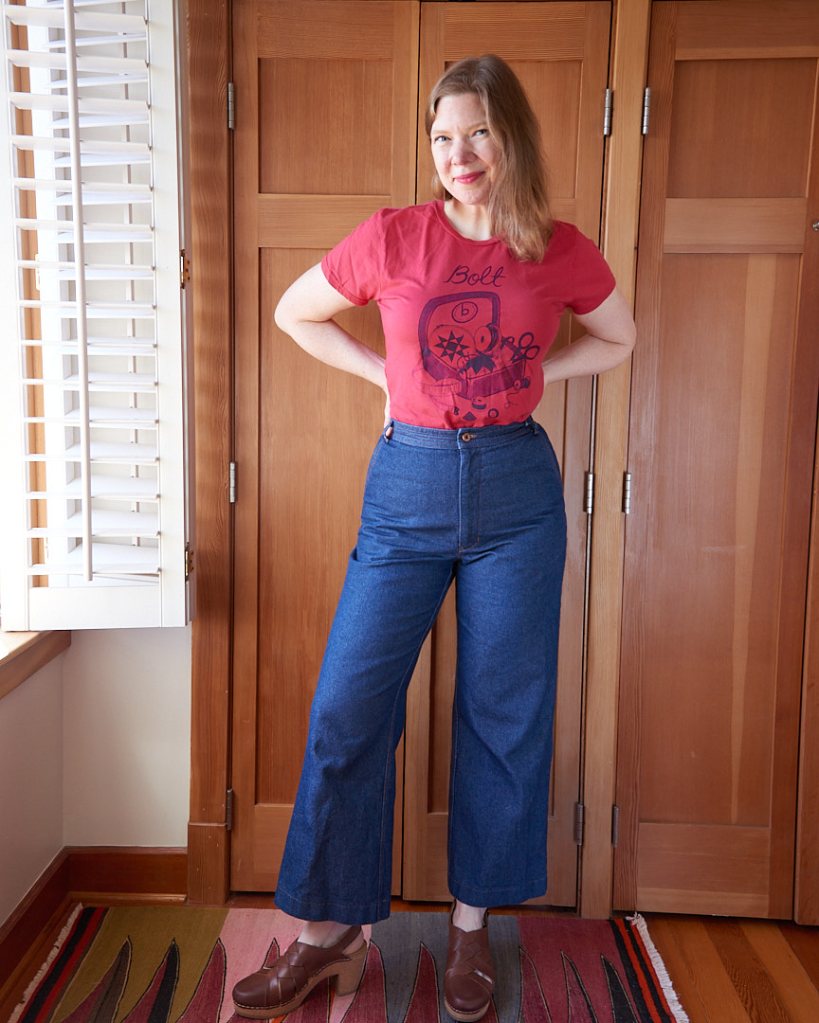
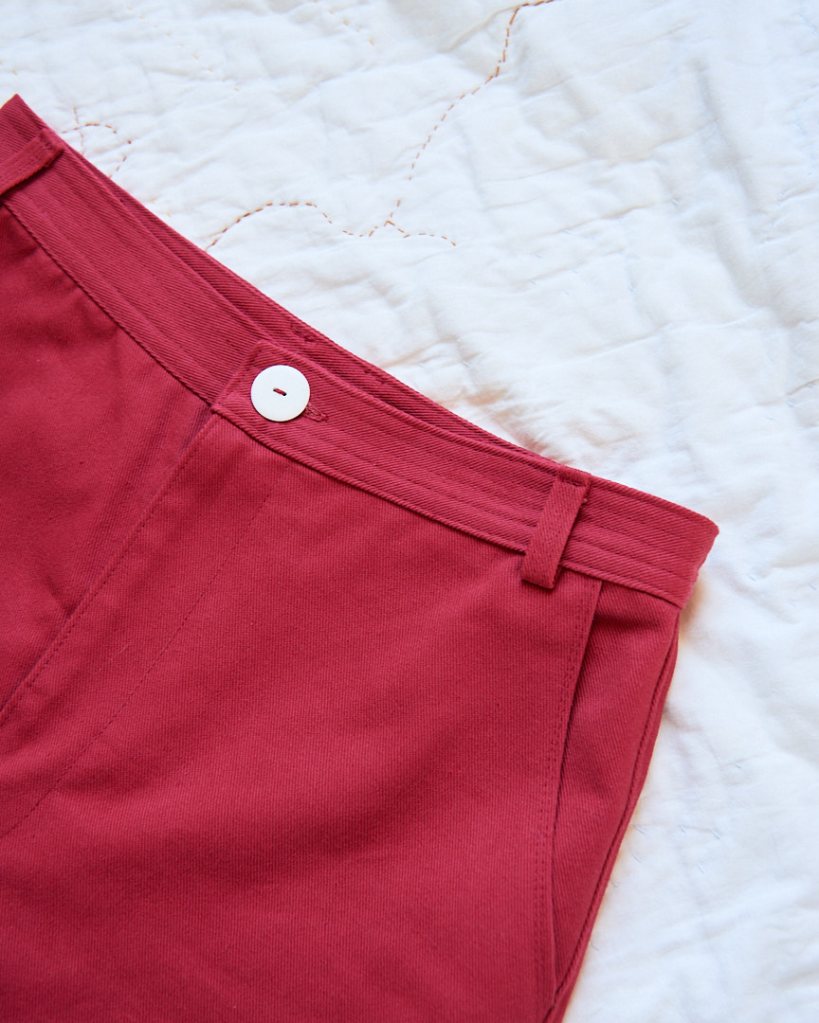
My favorite design element on the Brier pants is the topstitched waistband. It requires some care and precision to construct, but it’s a unique detail that sets these pants apart from other designs.

Sizing and Fit

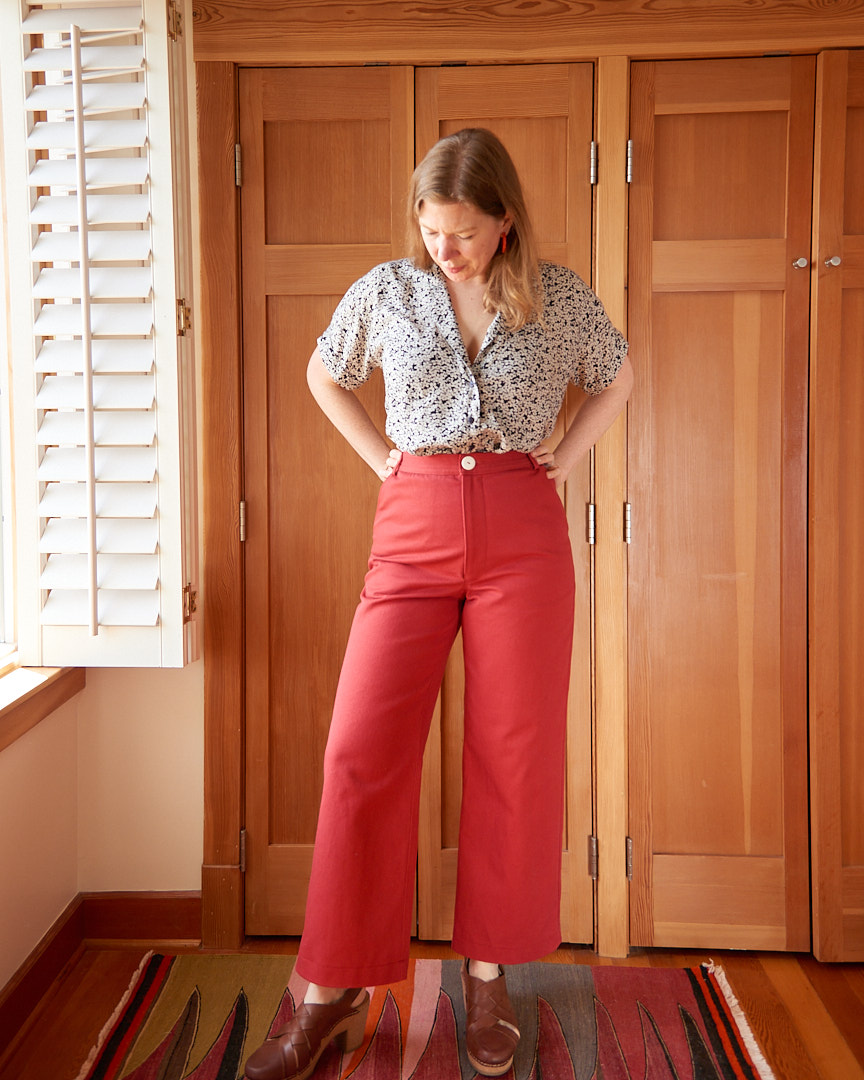
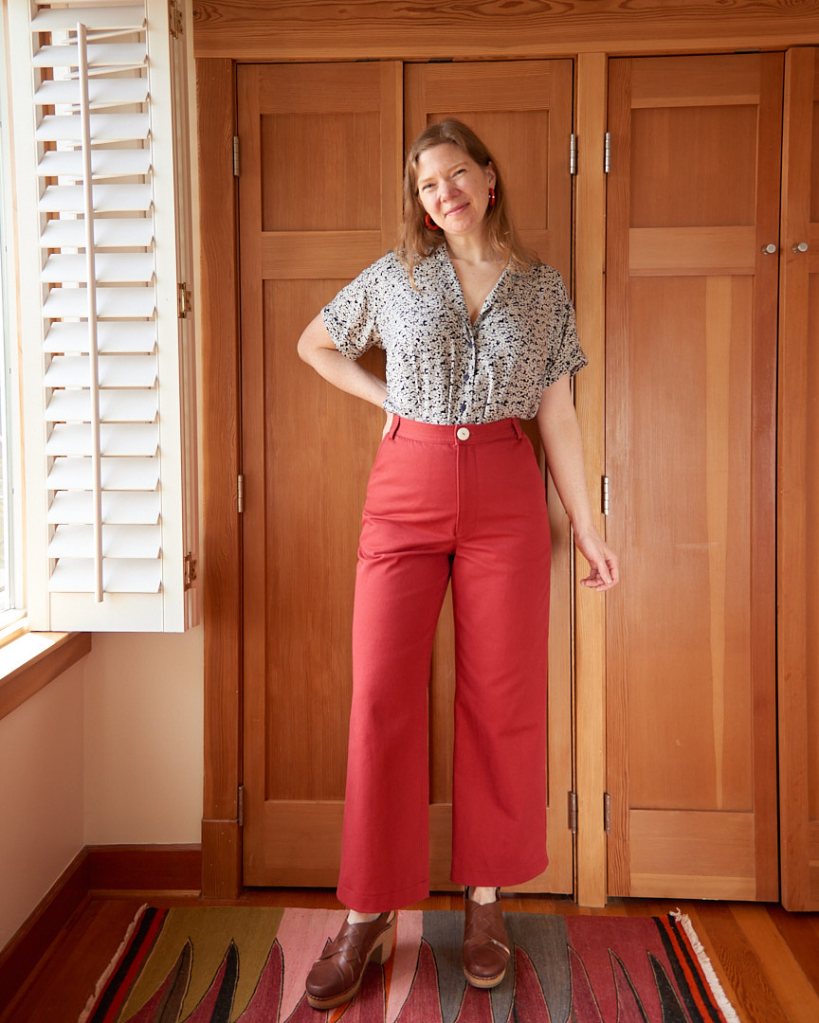
The pattern comes in two size ranges and goes up to a 66.5 inch (169 cm) hip. My measurements are 32″ waist and 42″ hip, which put me at a size 12 in the DD range. The only modifications I made were for my height; using Top Down Center Out, I added an inch to the rise (front and back equally) and 3 inches to the hem.

Brier pants adjustments to the rise: my changes in blue, original pattern in gray
After adjusting the rise using TDCO, I was satisfied with the fit. The toile pulls away from my center front and center back *slightly* at high hip, but because my final garment will be in heavyweight twill, this area will stretch and relax as the fabric breaks in.

As mentioned above, Brier has a snug fit through the hips and crotch curve. Looking across the size range, the intended fit is 1.5 inches (3.8 cm) of ease at the hip in the DD range, and 1.75 inches (4.4 cm) of ease in the JJ range. So these numbers place the Brier pant in between the Worship jeans and the Coe trousers in terms of how they will feel on the body: Not as snug as Worship, not as roomy as Coe.

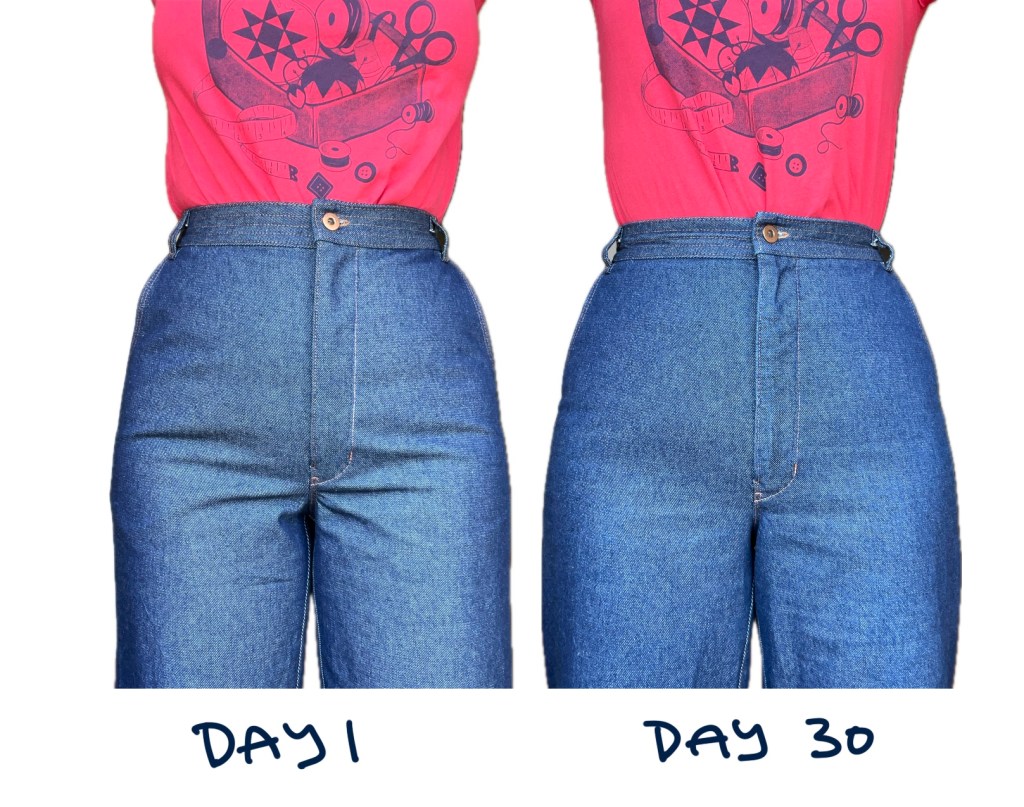
Like the Worship jeans, the Brier will feel snug when you first put them on, but will probably loosen up faster than Worship. Both of my Brier pants were immediately comfortable, which I’ve come to expect as a signature of Daughter Judy pants. They pass the squat test easily.

My Briers initially were a bit stiff, but both pairs broke in beautifully in a day or two. On first wear, the fabric around the crotch was whiskering a little (a totally normal feature of a snug denim pant, btw). But after a month of washing and wearing, these wrinkles essentially disappeared.

Fabric choice

This pattern is intended for mid to heavyweight fabrics like denim, twill, and canvas. I made both pairs of my Briers using 12 oz denim, and they grew a little and softened a lot after a wear or two. I think 10-12 oz is the sweet spot for this pattern.

If you are using canvas, which is a plain weave and less likely to relax on the body, you may want to add a little extra seam allowance along the side seam, or consider sizing up a half size or more for comfort.

Construction

The instructions for Brier are easy to follow with clear diagrams. Like all Daughter Judy patterns, Brier is best suited to intermediate sewists who are familiar with the basics of making pants. The fly construction is similar to the Coe trousers, but the instructions for Brier are enhanced with more detail and a few extra tips and tricks. I daresay these are the most comprehensive instructions from Daughter Judy yet, and I really like them.

For topstitching the waistband, the instructions give some useful tips for how to stitch each row of stitching for best results. I used a heavy duty topstitching thread, and set my stitch length to 4mm. I also used my semi-industrial Juki machine for maximum control and precision over the bulkiest areas. Once I completed all of the top stitching, I pulled the top thread through to the underside, knotted threads, and buried the thread tails. I also applied a dot of fray check to the knots for some extra security.

If you are using a domestic sewing machine, you will want to use a hump jumper for getting over thick seams, and you may also find it’s easier to hand crank your machine through the thickest parts of the waistband. Slow and steady is the key for even, unwavering top stitching lines.

As an added bonus, the top stitching provides some extra sturdiness to the waistband. I found that this waistband didn’t roll or become crushed after weeks of wear.

Final Thoughts

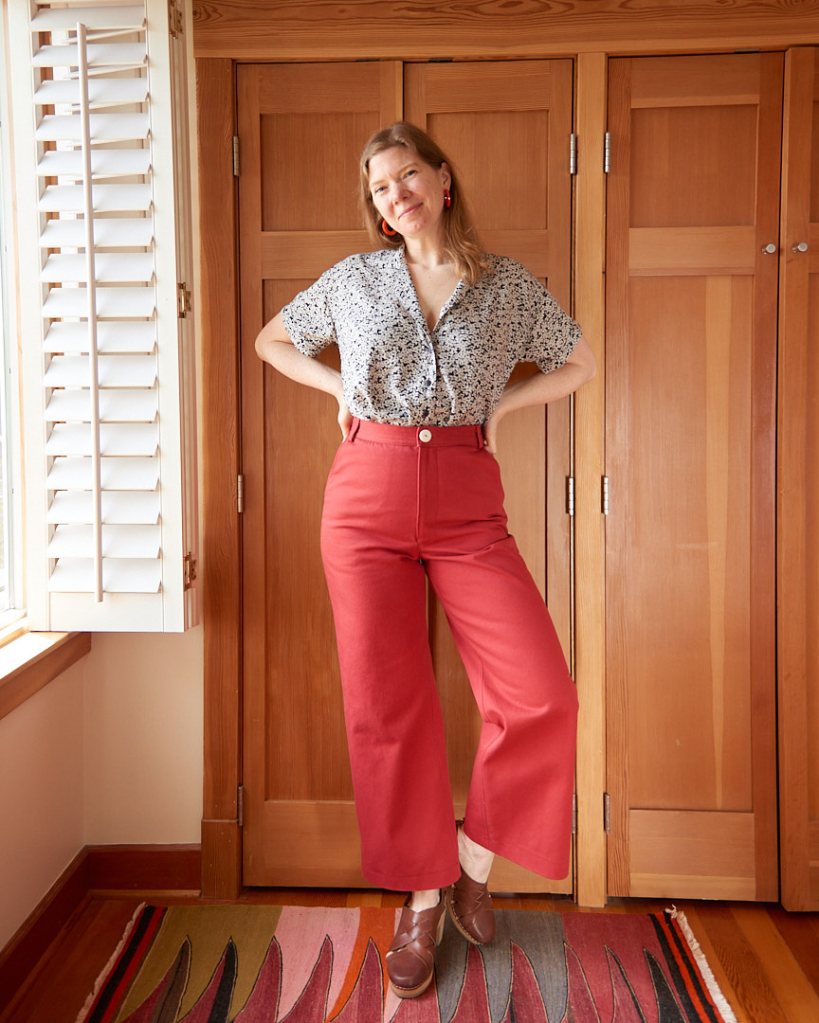
No surprises here, I love this pattern. After my initial pattern test in classic denim, I immediately cut out a second version in a precious red denim that I’d been saving for just the right wide leg. Daughter Judy knows their way around a pants pattern, and Brier delivers.

I’m still mulling over the details of a few pattern comparisons, so stay tuned for part two of the Brier deep dive, where I will look at how Brier stacks up against some other popular wide leg patterns.

18 responses to “Brier Pants by Daughter Judy”

  1. The Briers look fantastic on you! Thanks for giving us a run down of your experience with the pattern and it will be valuable to read your comparison with other wide leg styles.

    Liked by 2 people

  2. I may not sew the same patterns but I always appreciate all of your thorough and informative reviews….its clearly the scientist in you coming through!

    Like

  3. Hi Stacey, I enjoy reading and watching your blogs especially in relation to the TDCO. Have you considered holding a workshop locally here in Seattle using the TDCO method or do you do private consultation regarding pant fitting?

    Thanks, Leslie Stimson


    Like

    1. Hi Leslie, thank you for the kind words! Offering classes or private lessons locally and/or online is definitely on my radar. I am exploring some options now and hope to have more info later this summer or early fall. Keep an eye on my blog for more!

      Like

      1. Will do!


        Like

  4. They look really great on you!

    A perfect fit.

    PS my knees are jealous of your squatting ability.

    🙂

    Liked by 1 person

  5. Carol Haines Avatar
    Carol Haines

    Hi Leslie, you are so inspiring, you incite motivation and excitement with your detailed descriptions of your sewing journey and your sheer joy in the process.

    I am excited to hear that you might consider online classes. I will keep my eye on your blog and hope to hear some good news soon.

    Like

  6. A perfect Fit! What type of fabric are you using as your fitting fabric?

    Like

    1. Thank you! This is a 10oz denim that you see in the toile photos. It’s a little lighter weight than my final fabric (which is 12oz denim), but it’s close enough to give me an idea of how the final garment will fit. I try not to use cotton muslin/calico for toiles where I intend to use denim, because the fabrics behave so differently, and that will affect fit. I also like to use a light colored denim for toiles because then it’s easier to see any markings that I make on the toile itself.

      Like

  7. Thanks so much for this post! Would you have any tips for toiling stretch corduroy? I suspect regular muslin wouldn’t work, but not sure what would give the same effect.

    Like

    1. If you are planning to make the final garment in a stretch fabric, you’ll want to make the toile out of the same or very similar fabric. The amount of stretch has a huge impact on the fit, so plain woven muslin fabric won’t be an appropriate choice in this case. I’d look for a toile fabric that has the same stretch percentage and weight as your final fabric, if you can find it. Another option, although not usually the economical one, is to buy 2x the yardage that you need for the pattern and toile using the fashion fabric.

      I don’t know if you are planning to use Top Down Center Out or not, but if you are, I would recommend making a full, two-legged toile whenever you are working with a stretch fabric.

      Like

      1. Thank you for replying! I have something in my stash that’s close-ish, but I still may just end up doing a toile in the fashion fabric, do a baste fitting, and seeing what tweaks I can make. The fabric wasn’t prohibitively expensive (thanks to my local independent fabric store!)

        Looking through the hashtag, it seems that a lot of people have good luck doing a waist to hip grade without fussing with the crotch curves, because the drafting is more curve-friendly than others. I’m hoping this pattern will be a TNT for me, and so I’ll just jump in and see what happens!

        Like

  8. Thank you for the thorough review! The pants look great. I’d be curious to see your review of the Lander pants by TB. They seem similar to me and would love to hear your take.

    Like

    1. The Lander pants have been in my sewing queue forever, I hope to make them eventually! The drafting on Lander is very different from Brier, especially in the crotch curves, so it will be an interesting comparison with Brier and other similar styles.

      Like

      1. Being brutally honest the Landers tend to look slightly off to me when looking at makes on IG- front crotch curve always seems too long or too straight? Maybe the differences you’re citing. I only hear rave reviews from DJ patterns so I am called to give Briers a try! Styling and drafting feels more what I’m going for. Look forward to your Landers if you get to them!

        Like

      2. Yep, I agree. Landers have a different look and fit in the crotch if you study the photos. Enjoy making the Brier pants!

        Like

  9. These pants are so good! I’ve been looking for a new pant pattern to try out after years of just sewing Dawn Jeans. I love the look of Persephones but have never loved wearing them, too uncomfortable. The Adams Pant were such a great sew, so I’ve been thinking of trying another DJ pant. I’m just waffling between these and the Coe. But I think after seeing yours I’ll finally try to get the comfortable sailor pants of my dreams.

    Love your thorough write ups! Thanks so much

    Like

    1. I love my Briers and wear them constantly. The fit is much more comfortable than Persephone, for sure. I have a suspicion that the designer specifically designed these sailor pants with comfort in mind, perhaps even as a direct response to the Persephone pattern. Enjoy sewing them!

      Like

Leave a reply to lavivaneau Cancel reply