
Paper Theory describes the Agnes PJs as being a “relaxed loungewear suit”, and that’s pretty much all I needed to know; I bought these instantly. Like many (all?) Paper Theory patterns, they are comfortable, classic, and a little bit unusual. Patterns like that always make for the best sewing projects and Agnes does not disappoint.
Agnes is a versatile pattern, too. I’ve seen several examples of the shirt pattern being used to make a jacket (Tara’s denim chore coat is something I am definitely going to copy), and the shorts could easily be a summer staple if you add some patch pockets. So with one pattern, you can cover a lot of ground.
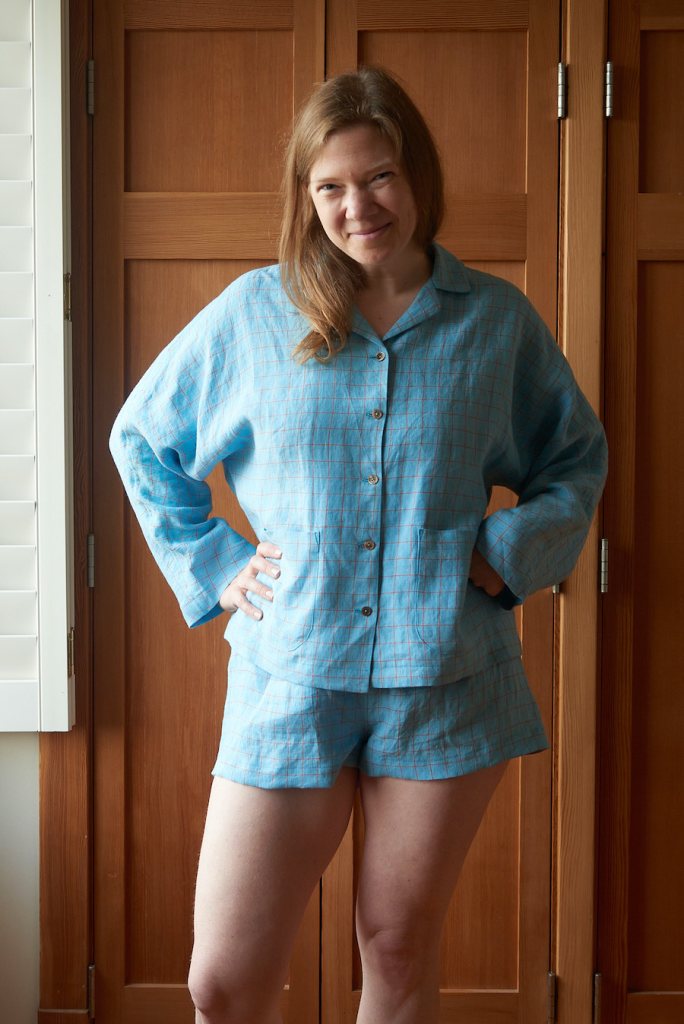

I sewed this sky blue set in a 200 gsm linen from Merchant and Mills, but I’m also dreaming of a flannel version for winter and a silk version just for fun.
Fit Adjustments
For the shirt, I measured into the size 16 but sized down to a size 14 given the generous ease. Because of the dolman sleeve, the hip measurement is the most critical. In the size 14, I have 5 inches of positive ease at the hip.
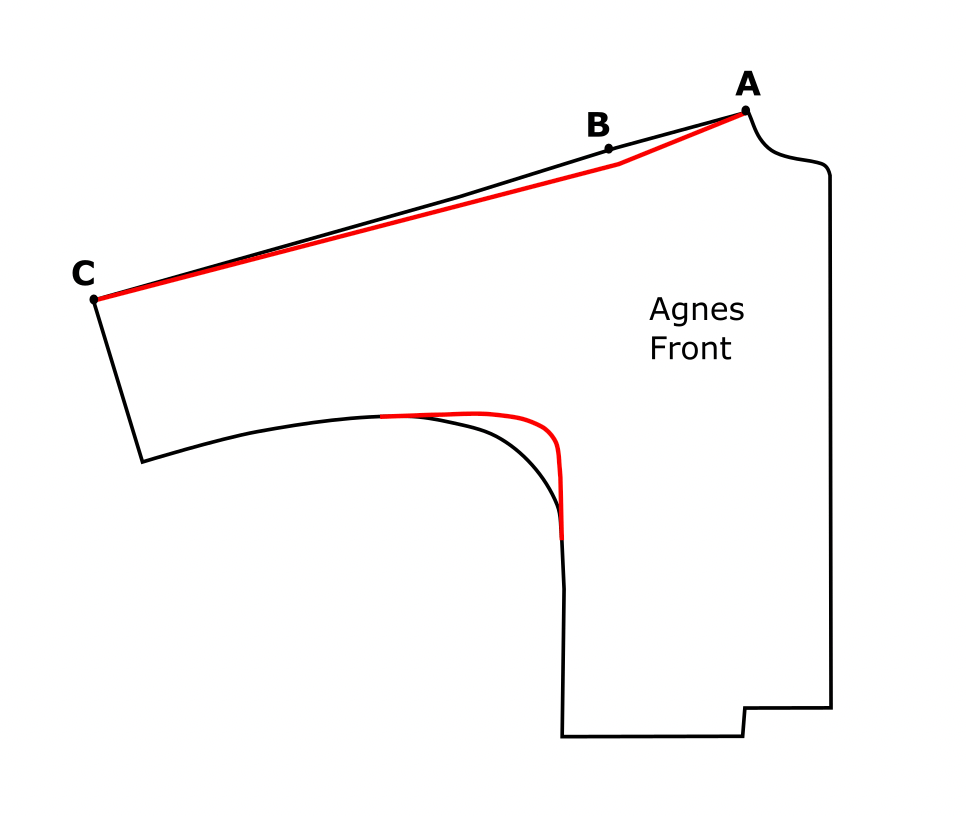
After a toile, I decided to take in the underarm curve by 2 inches, effectively making curve of the dolman sleeve slightly more acute (see diagram below). This provided just a little bit more shaping and definition, but not so much that the relaxed fit was compromised. If you make this adjustment too, it’s important not to raise the armpit curve too much, since that could restrict your arm movement. Keep the curve below your bust for best results.

I also did a forward shoulder adjustment, because I noticed that my toile had a shoulder seam that wanted to fall behind my shoulder, pulling the front of the shirt up toward my neck. This is a standard adjustment for me, and I usually have to move shoulder seams forward by about 1/2″. To do this, I measured the distance between the base of my neck (marked as point A, below) and the ball of my shoulder (point B). On my body, this is 4.5 inches. I transferred this measurement to the pattern, then shifted point B down by a half inch. Next, I drew a line from the neck to the new shoulder point, then to the cuff (point C), as shown in red below.
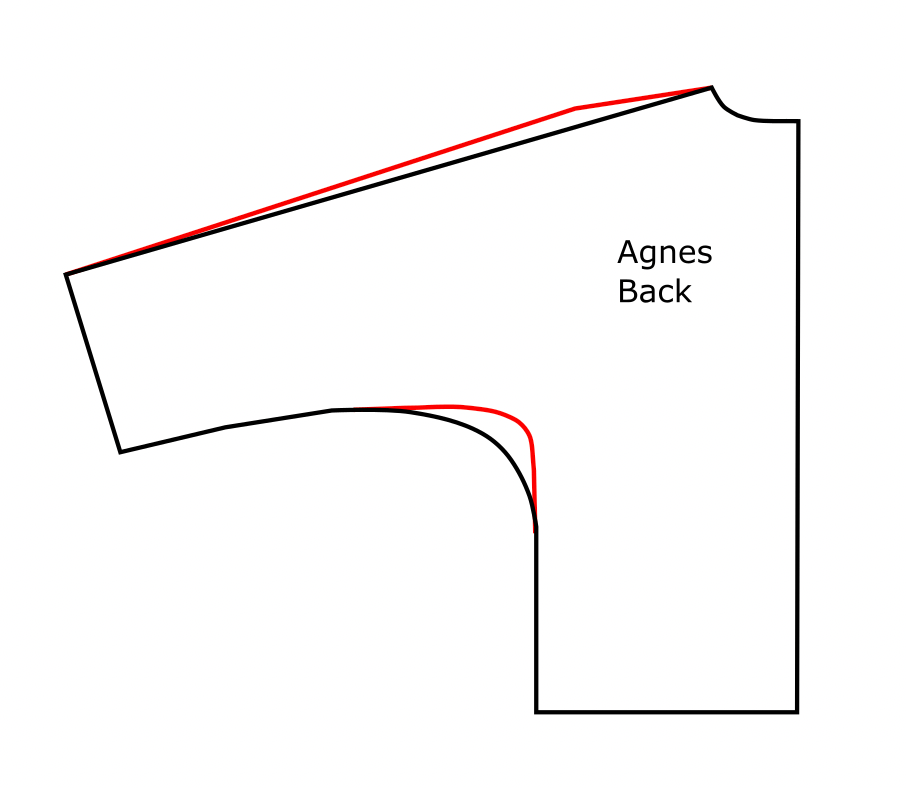
For the back piece, I performed the opposite adjustment, moving point B up by 1/2″ and adding the same amount of fabric that I removed from the front.
For the shorts, my hip measurement puts me at a size 16, and my waist measurement puts me at a 14, so I cut the size 16 and then graded to the 14 at the waist.

Construction
Paper Theory patterns are a thing of beauty. Lines that you think are straight are actually slightly curved to fit the body. They also include LOTS of notches, which helps construction go quickly and smoothly. The pattern illustrations and instructions are very good, although I deviated in a couple of places:
- Seam finishes: The instructions call for either French seams or serging, but I opted for flat felled seams throughout because I wanted a smooth finish on the inside for maximum comfort. The seam allowances for Agnes are 1/2″, which is just enough for a narrow flat felled seam.
- Pockets: Agnes has patch pockets on the front of the shirt, no pockets on the shorts or pants. I lengthened the pocket piece by about 3/4″ to comfortably fit my phone and added it to the back of the shorts.

Note that on the pattern piece for the Agnes shirt front, there are outlines drawn to illustrate pocket placement. The actual pocket piece is about 1/2″ longer than the outline drawn on the front pattern. If you follow the instructions, you may not even notice the difference in length because you are instructed to align the pocket by using the drill holes at the top of the pocket outline. But your pockets will extend slightly lower than drawn on the top.
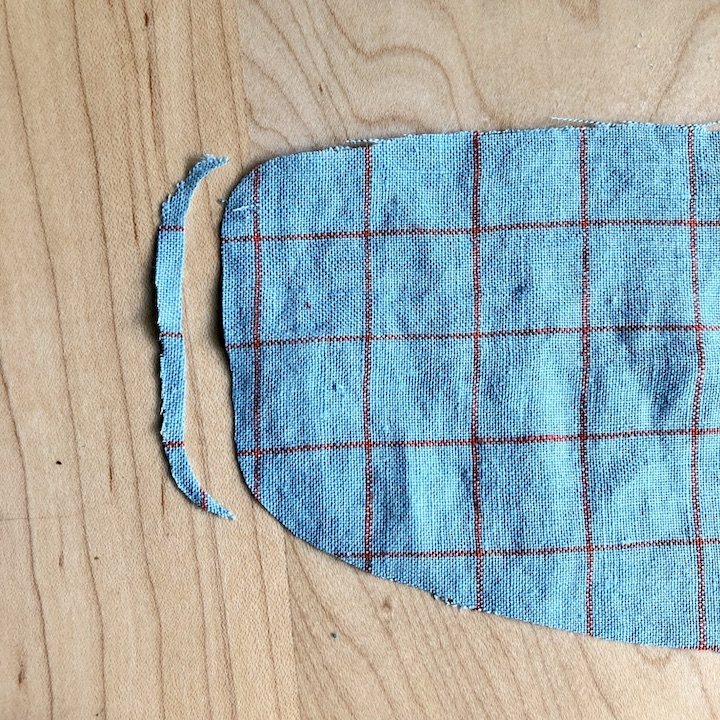
- Collar: The instructions have you cut two identical collar pieces and sew them together. I trimmed the under collar by 1/8″ on the two short sides, which is standard practice for constructing more formal shirt collars. When I sewed the two collar pieces together, I gently stretched the under collar to meet the top collar. Cutting the under collar slightly shorter helps roll the collar seam to the underside for a professional finish.
- Front Facing and Lapel: When attaching the facing to the front shirt, I trimmed the seam allowance around the lapel curve down to about 3 mm. The instructions don’t tell you to do this, but it is a similar curve to the collar and the instructions DO tell you to trim that.
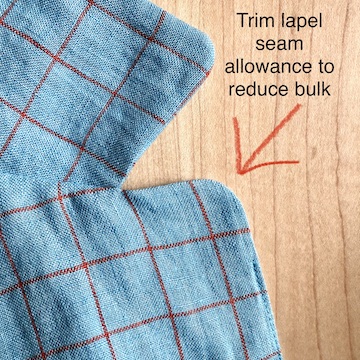

Agnes has a really nice method for creating the front facing and lapel, and I prefer this construction method (and instructions) to others like the Carolyn PJs. There is also a really nice method for creating the lapel “break point”, where the front edge of the shirt sweeps across the button placket to create the lapel.
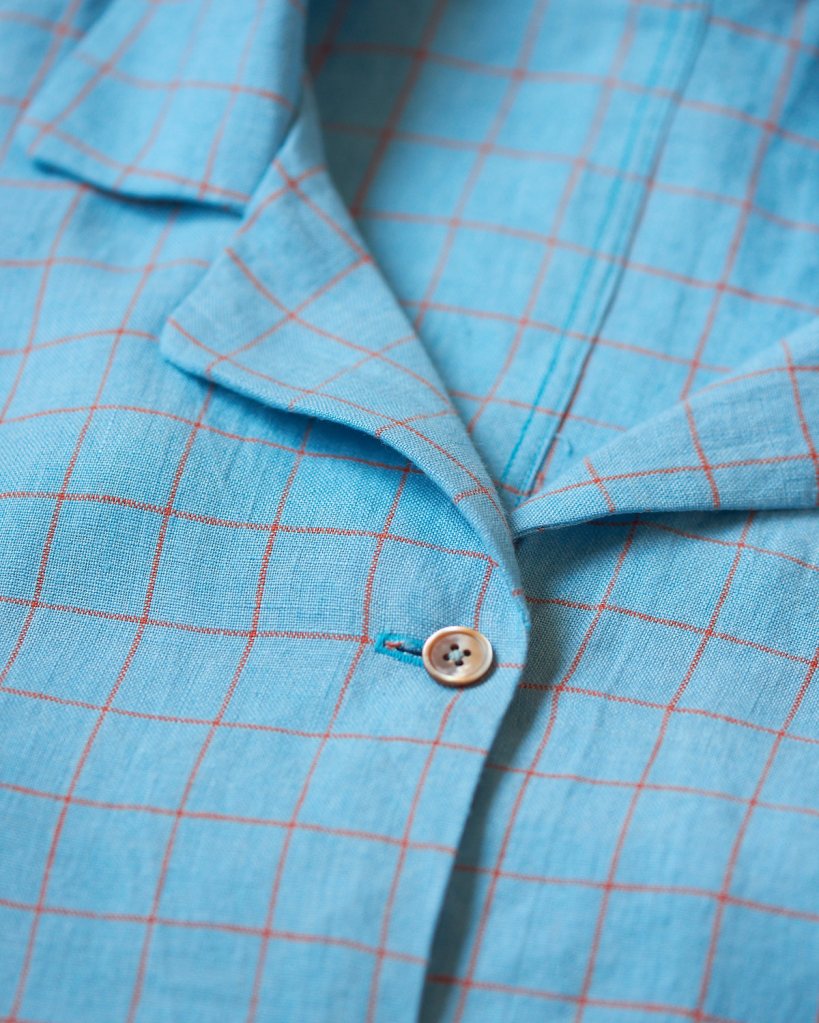
- Buttons: The instructions don’t specify how to attach your buttons, but I sewed mine through both layers of the shirt (so, through shirt + facing). Although you will have some visible stitches on the inside of your shirt facing this way, I figured this helps to keep the unfinished seam allowance where the shirt meets the facing securely tucked away so it won’t fray over time.
I really enjoyed making this Agnes set and would give this pattern a slight edge over the Carolyn PJs if I had to rank both. The whole set comes together relatively quickly, and I really liked the method for constructing the lapel. These PJs are easy to fit and overall very satisfying to make.

Leave a comment