
I was a tester for the Solig dress*, the latest pattern from Paradise Patterns. Like many designs from this pattern company, the dress is meant to be worn without a bra underneath. You can either go braless, or there is an option to convert a facing into a low-support bralette.
I signed up to test this pattern because I liked the simple design, and I was curious about whether the bralette would work for me. I am a size 34H or 34I in US bra sizing, and going braless has never been a comfortable option for me. I’ve seen many glowing reviews for Paradise Patterns, but many of these are from sewists with smaller busts. So I volunteered for the test to see if I could make this cute, breezy summer style work for me.

Design and Fit
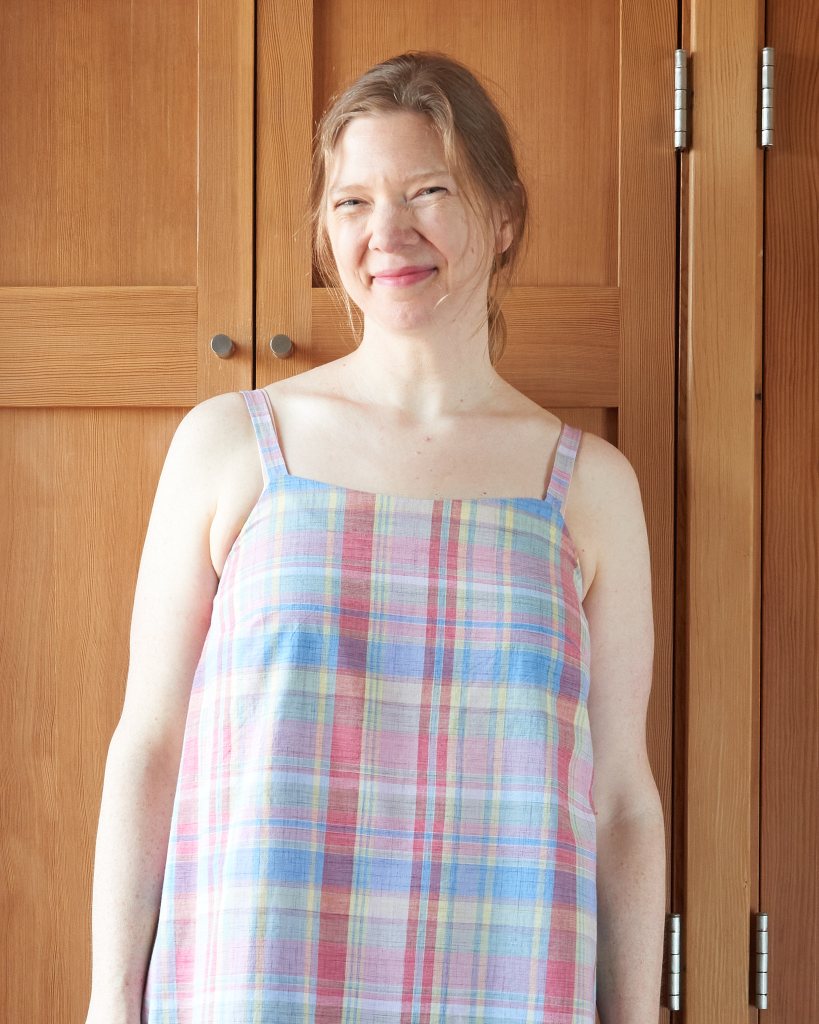
The Solig dress is an A-line, flowy sundress with a minimalist silhouette — exactly what one would expect in a summer sundress. View A features an elastic back and a more secure fit around the bust and neckline, View B has a slightly scooped back that is gathered loosely with ties. Both views also have spaghetti straps, bust darts, and an internal facing that can be converted into an optional bralette by adding elastic to the hem.
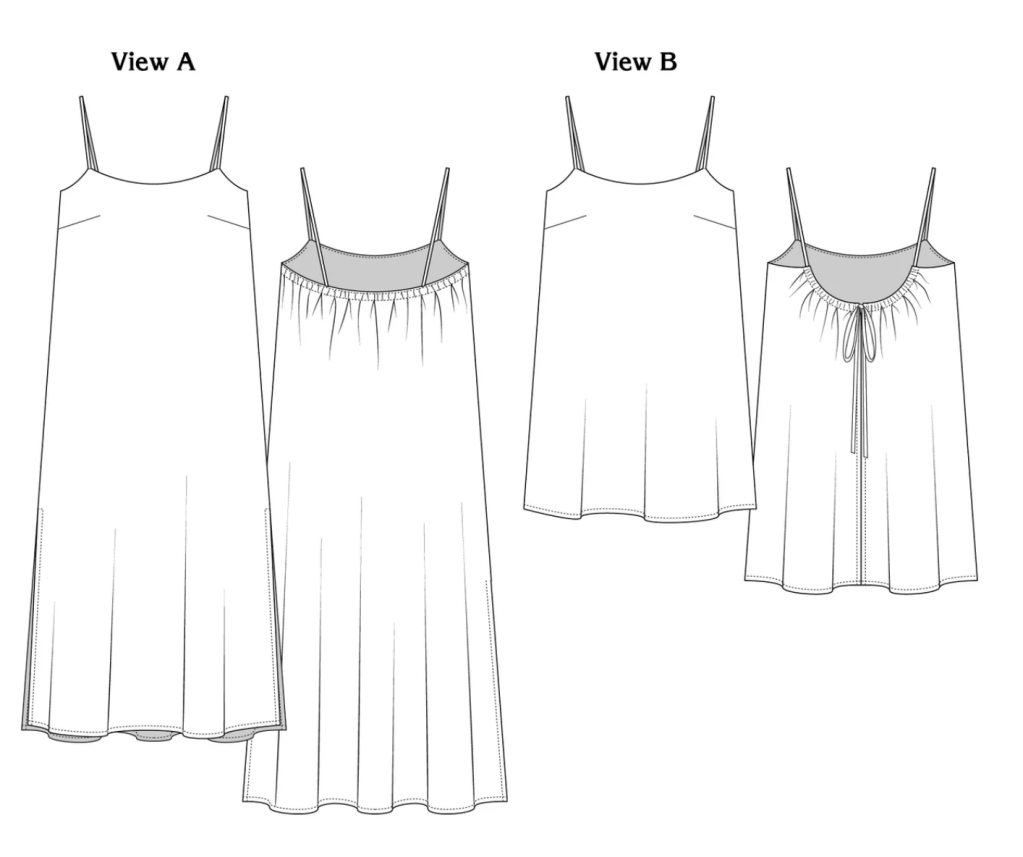
The dress comes in two lengths: a midi length with side slits or a mini length. The mini length is quite short! I’d recommend checking the finished garment measurements for the side seam lengths to see where the hem will fall on you.
There are no pockets in this dress, as they would break the otherwise sleek silhouette. But if you are a die-hard pocket lover, they would be relatively straightforward to add to the side seams.
Toiles and tribulations
If you are curious about this pattern but, like me, are not sure if a low-support bralette will work for you, I’d recommend making a toile of just the bralette to see if it will be supportive enough. The bralette does not require much yardage and it’s quick to sew.
Some bralette considerations:
- The pattern recommends a lightweight lining fabric for the bralette but a mid-weight fabric might be a better choice for a larger bust because it would resist strain and may offer more support for heavier breasts.
- If you are using a mid-weight fabric for the bralette, however, you are more likely to see some “poufiness” around the underarm of the final dress, as the gathered shelf bra adds some volume underneath the dress. I see this as a fair trade off for a (potentially) more supportive bralette, though.
- Sewists with larger busts will likely need to add length to the bralette/facing pieces, as I believe this dress was drafted for a B cup.
- Consider using a wider, sturdier elastic for the bralette’s underbust band. The pattern calls for a 1/2″ elastic width for the shelf bra, but this was a bit too soft and pliable for me. A sturdier elastic band may help provide more support and keep the bralette in place.
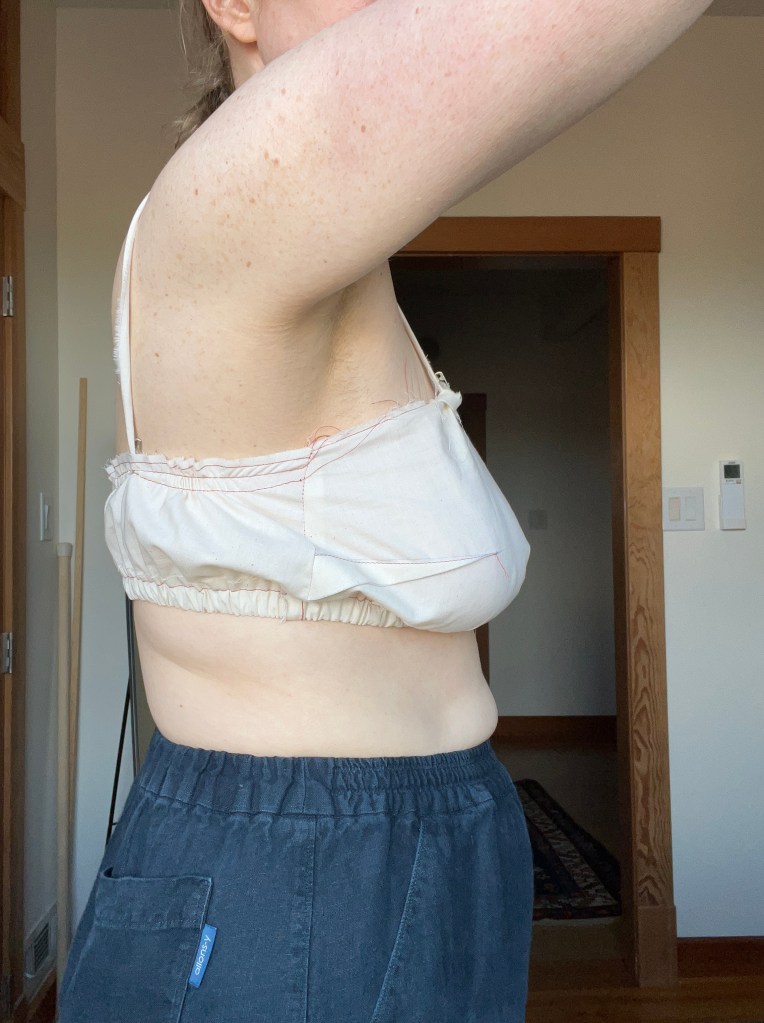
I made a toile of just the bralette out of cotton muslin to check the fit and see how supportive the bralette was. While most testers raved about the bralette, sadly, I was the only one in a group of roughly 60 people who was unsuccessful with it. The weight of my bust pulled on the straps and it wasn’t comfortable or supportive enough for daily wear.

Given the results of my toile, I decided to skip the bralette and make Solig with a facing. My next challenge was to modify Solig’s neckline and straps to work with a bra underneath. I made the pattern twice, each time trying a different set of adjustments for two different bras.
Version 1: Widening the straps
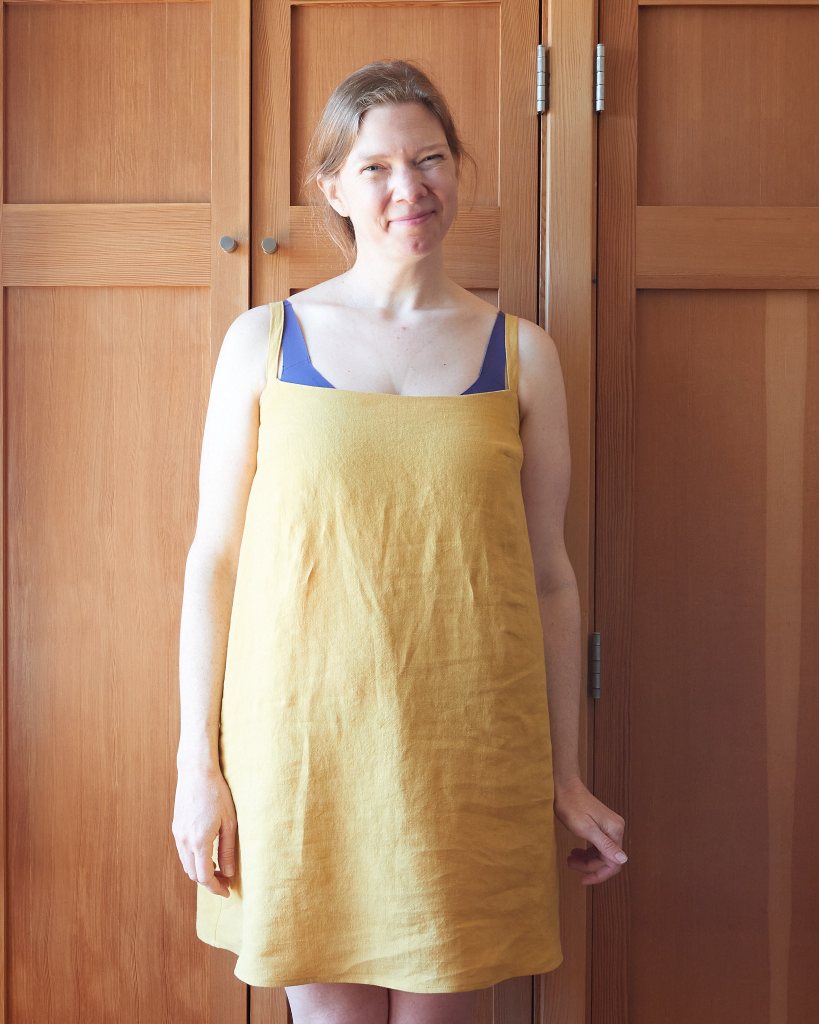
I tried several different bras with my Solig bralette toile and found that none of them were immediately compatible. They all showed in one way or another, so I picked the bra that required the least number of changes to Solig and pressed on.

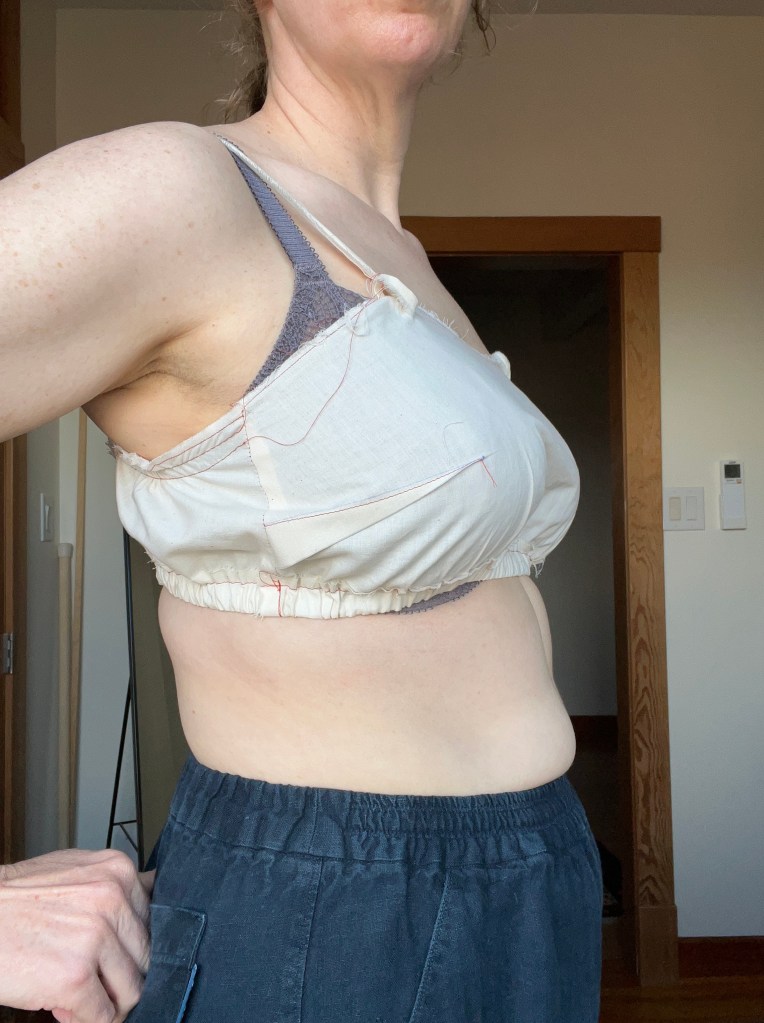
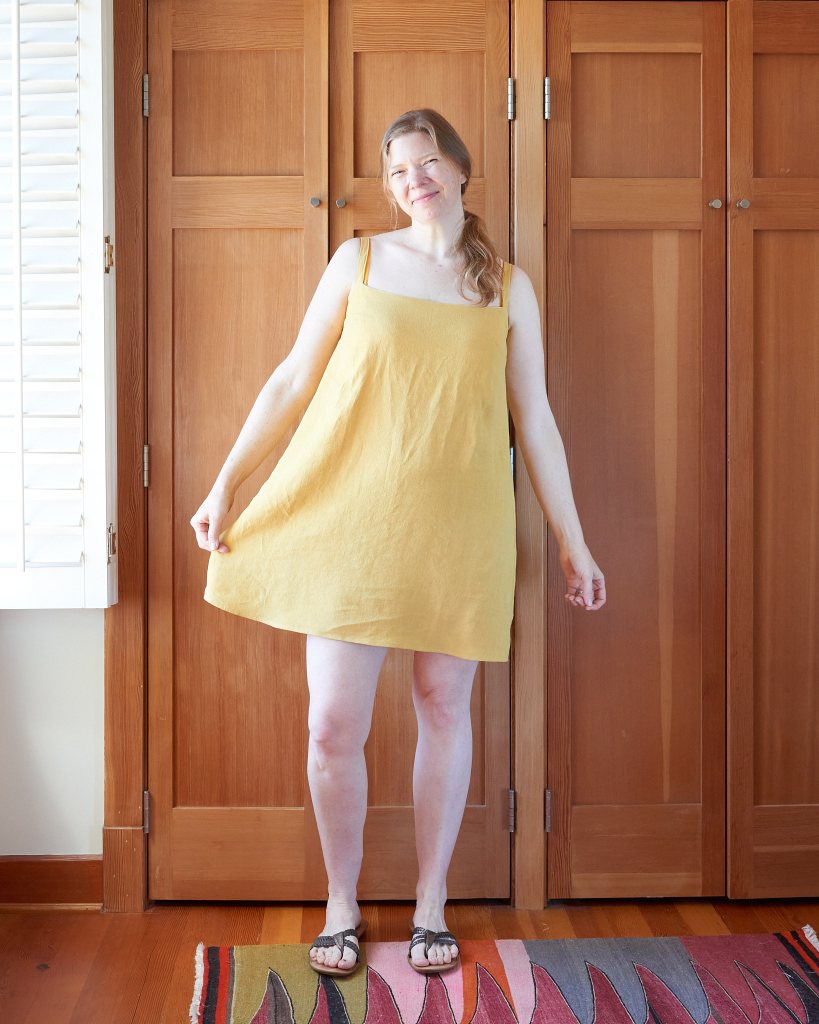
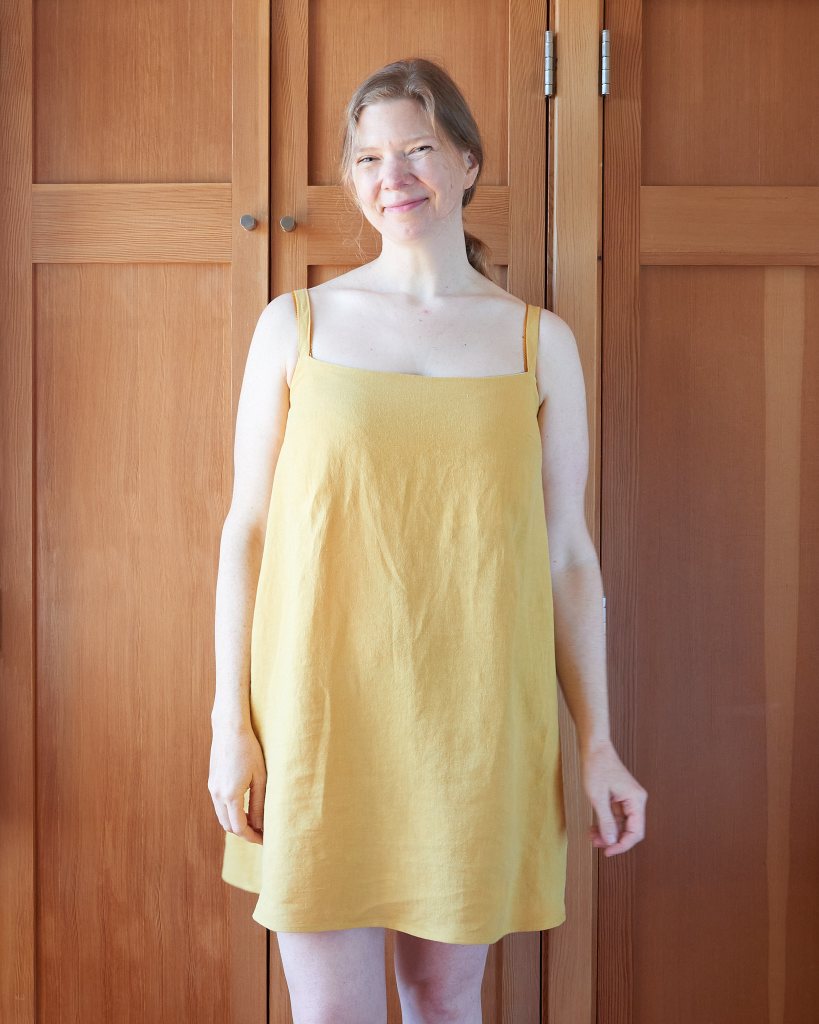
I chose a bra that was largely covered up by the Solig neckline (as in above, left), and I just needed to shift the Solig straps toward the sides to align with the bra straps.
My upper bust measures 37 inches, and my bust measures 40 inches, so I started with the size 12 according to the size charts. My changes were:
- On the front of the dress, I widened the strap attachment points by 1.25 inches to align with my bra straps.
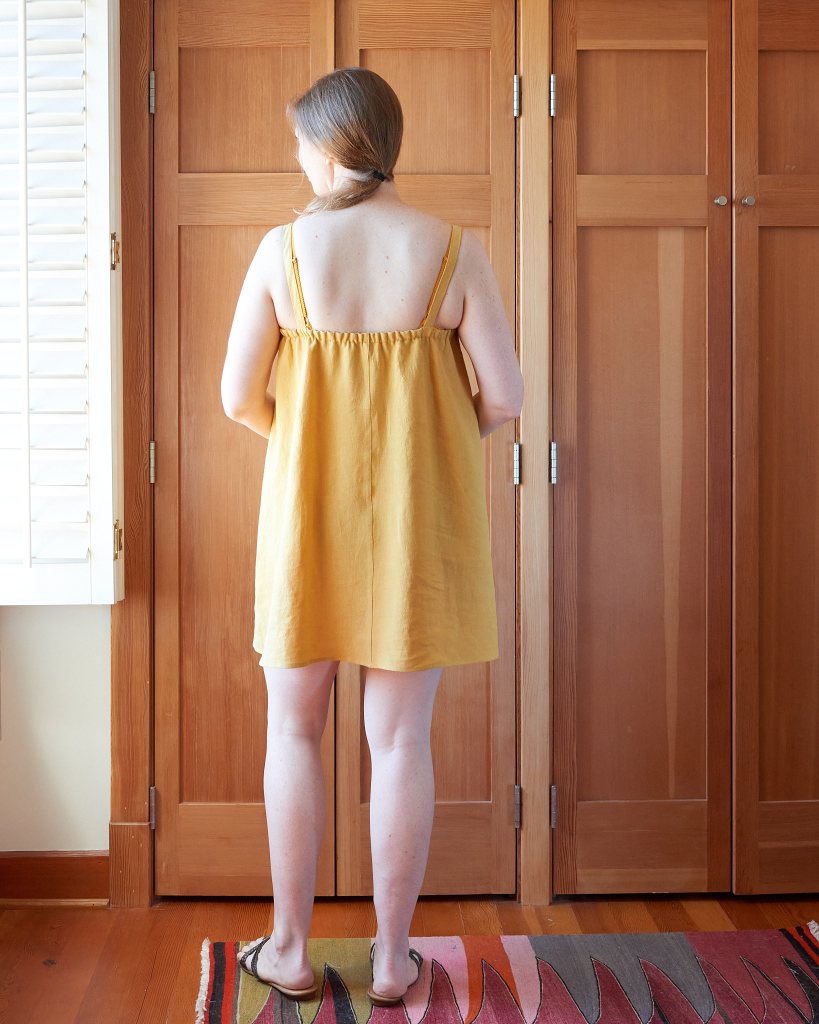
- On the back of the dress, I narrowed the strap attachment points by 1 inch to align with my bra straps, essentially just shifting notches inward.
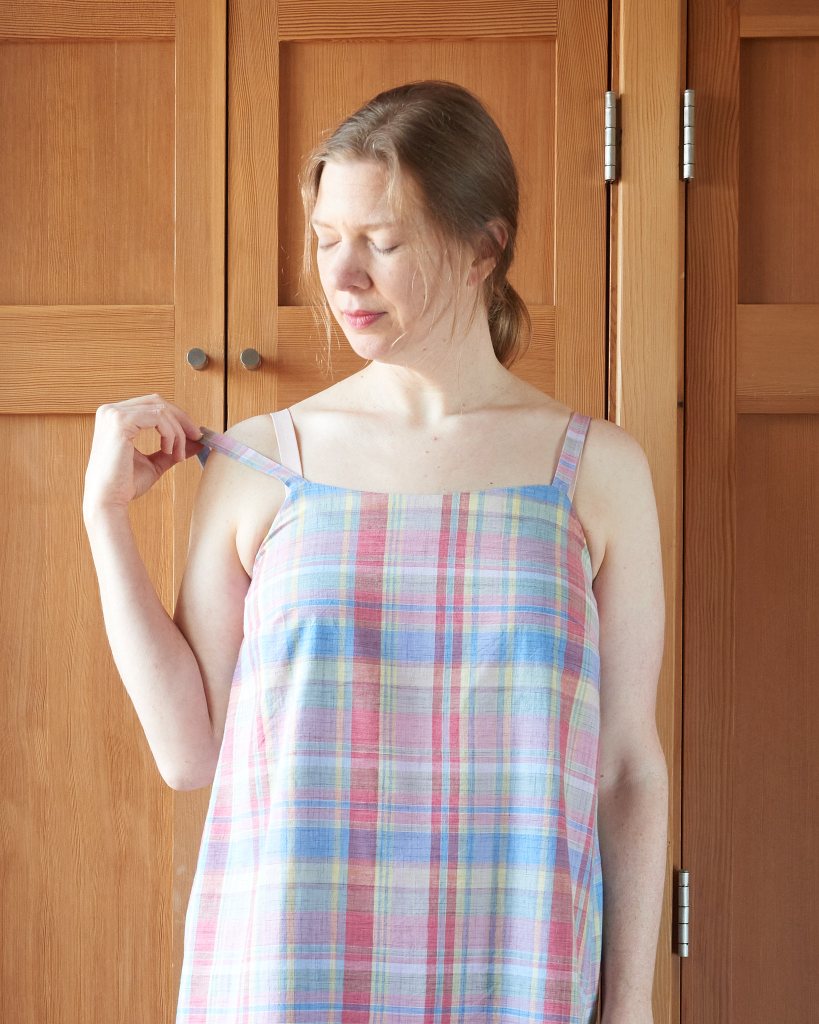
- I widened the spaghetti strap width from 0.375 to 0.75 inches to cover my bra strap.
- I added 1 inch in length to the facing pieces front and back so that the facing hem would sit below my bust.
- Not bra strap-related, but I made the mini version and added 1.75 inches to lengthen to the dress hem (I am 5’10” and this dress is drafted for 5’7″).
These modifications technically worked, and my bra is mostly covered now. However, the new, wider strap placement and width changed the overall look of the dress, and I don’t love how wide the neckline is on this version. While this dress is absolutely wearable, I wasn’t quite satisfied.

Version #2: Raising the neckline
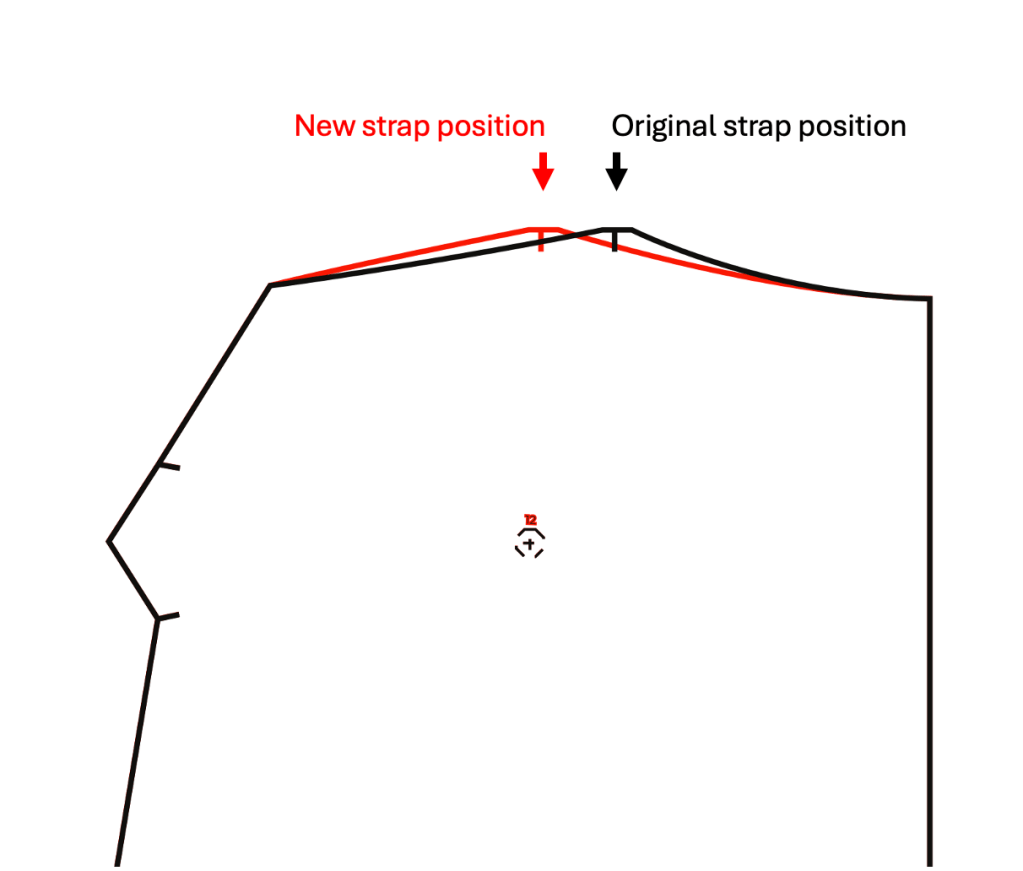
For this second version, I want to keep the original strap position on the dress to preserve the aesthetics of the design but try a different set of modifications to make the Solig work with a different bra.
I dug out all of my bras and identified a few that had narrower strap placement, more in-line with the original Solig straps, but these needed a higher neckline to cover the bra cups.

For this second version, my changes were:
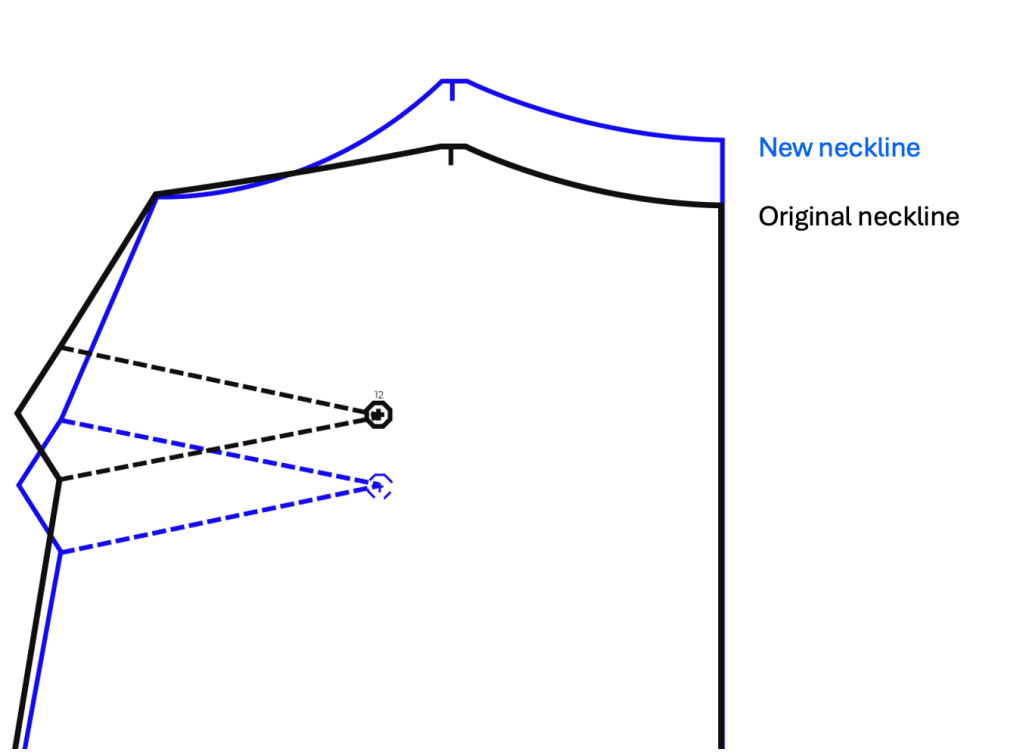
- I kept the strap attachment point in the original location as drafted, but I moved the neckline up 1.25 inches to cover my bra cups. I re-shaped the front armhole slightly to meet the new neckline.
- In the back, I kept the attachment points for the strap the same as my previous version (1 inch narrower than drafted).
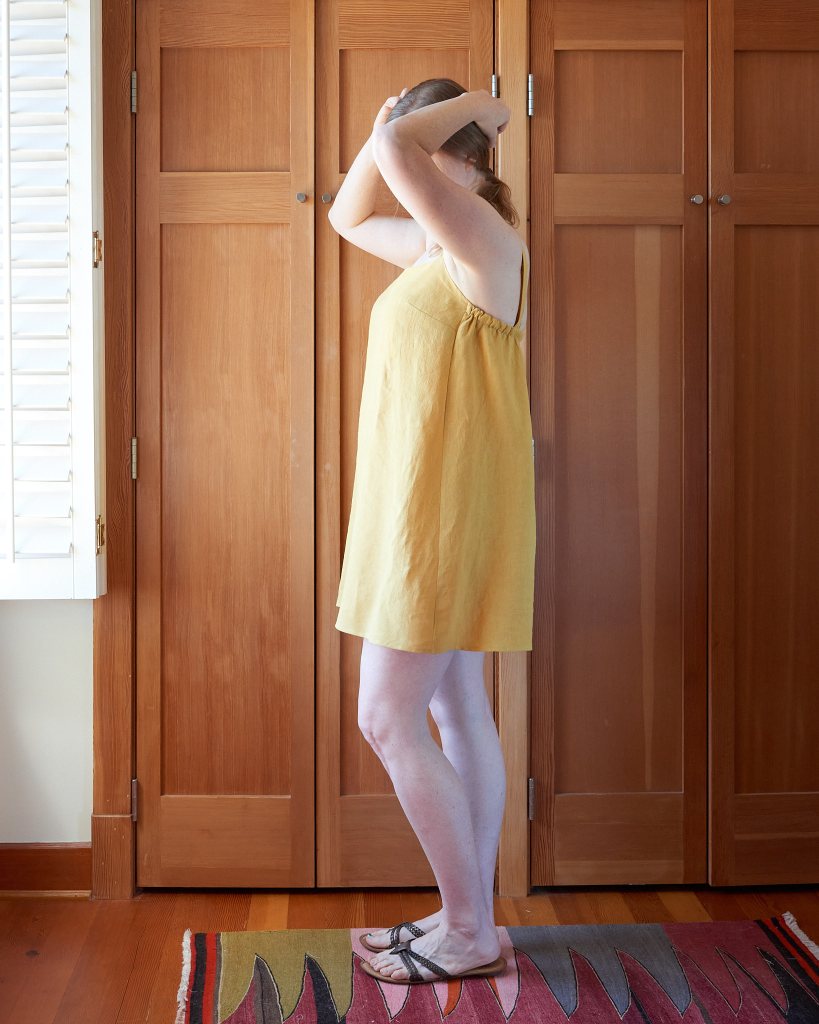
- Based on the fit of the yellow dress, I moved the bust dart down by 1 inch.
- In the yellow version, the facing has a tendency to flip out in the back, because it’s quite short, so I lengthened the facing in front and back an additional 0.5 inches and I anchored the facing to the dress by stitching in the ditch along the length of the facing at the side seam.
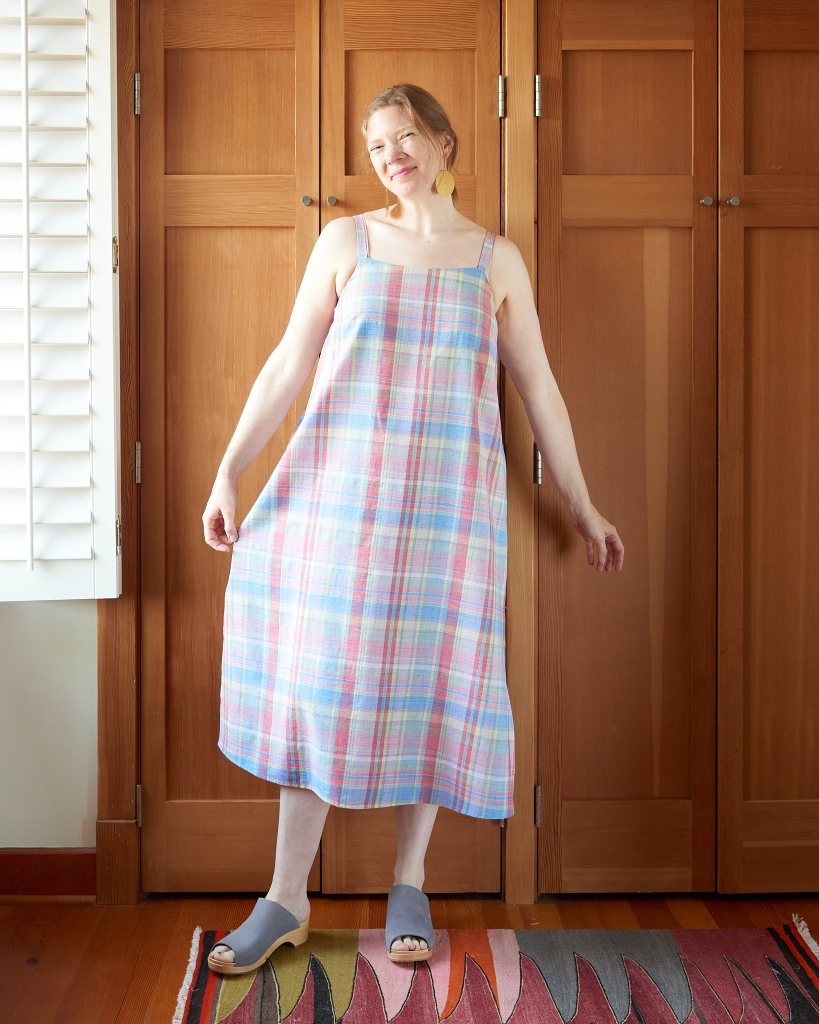

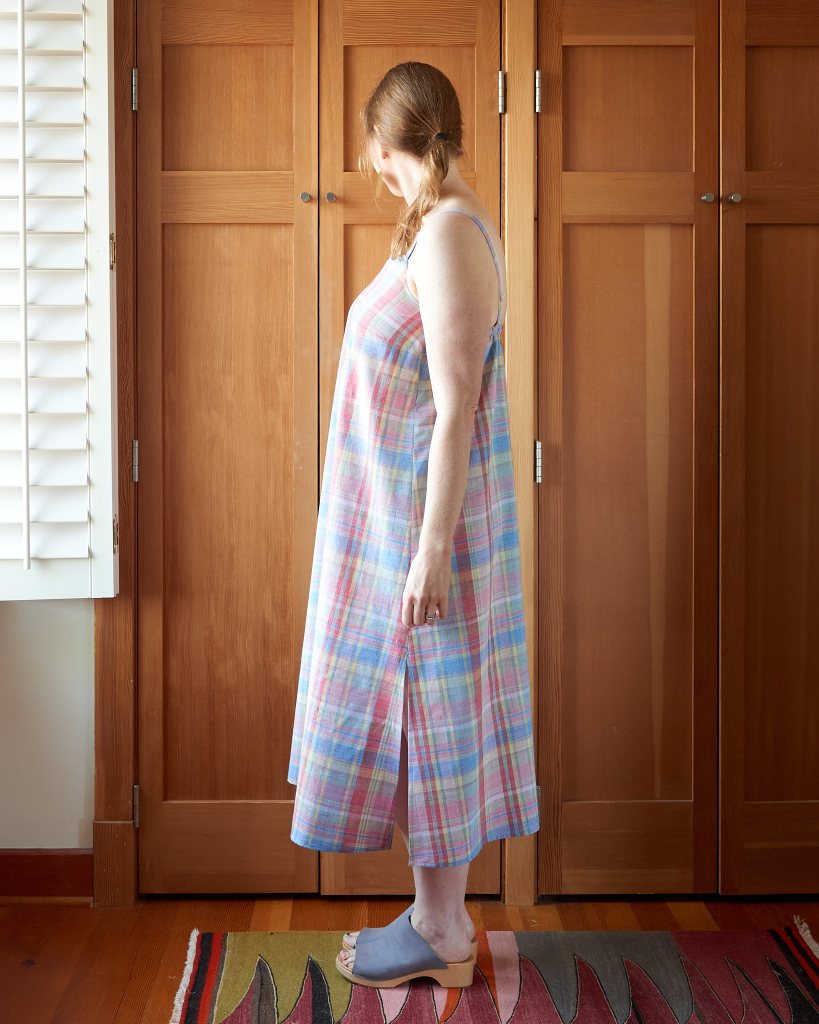
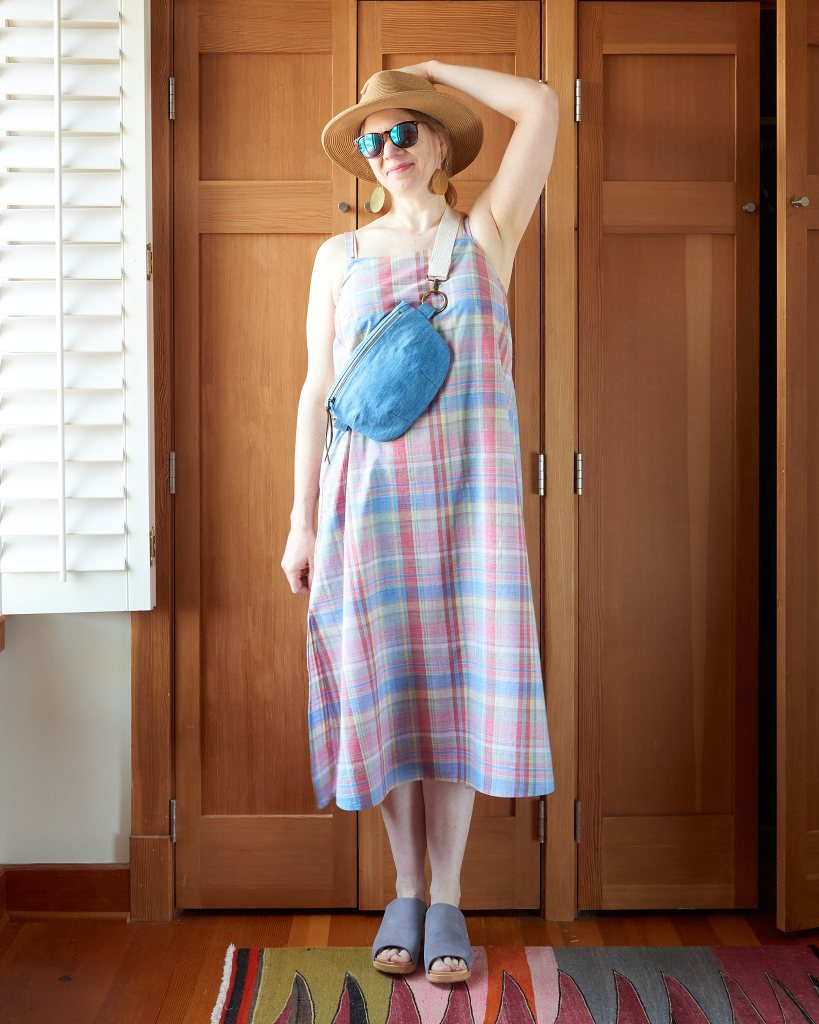
I like this version much better than my first, and I think it is more true to the original design. My bra is covered, and the straps do peek out occasionally in the back, but that’s expected with a strappy sundress like this.
The fit is snug around the neckline and bust, but very loose and breezy everywhere else. I made this plaid version out of a lightweight cotton, and it’s perfect for summer.
Final Thoughts
Normally when I see a dress like Solig, I file it under “not gonna happen” and move on. But I’m glad I persevered with this one; it’s a sweet summer style that I know I will wear often when the temperature spikes. The design is also a great canvas for a bold print or for hacks (adding tiers, gathers, color blocks, or chopping into a top), so it is a versatile summer staple.
This would also be a good pattern for a confident beginner, as it has great instructions for some foundational techniques like French seams, side slits, turning a spaghetti strap, and installing a facing. If you are already an experienced sewist, then this pattern will be a quick and easy sew, perfect for whipping up a new summer dress to enjoy for the rest of the summer.


P.S. – Are you on Threadloop? It’s a new sewing community made by and for sewists. It’s a fantastic project organization tool and also a way to share info about sewing patterns, projects, and many other sewing topics (if you are a knitter, it is similar to Ravelry). I share all of my detailed project notes and photos over there now, including many that never make over here as official blog posts. It’s free to join, so come say hello!
*Disclaimer: Since I was a pattern tester, I received this pattern for free with no obligation to post.

Leave a reply to couchcrafts Cancel reply