
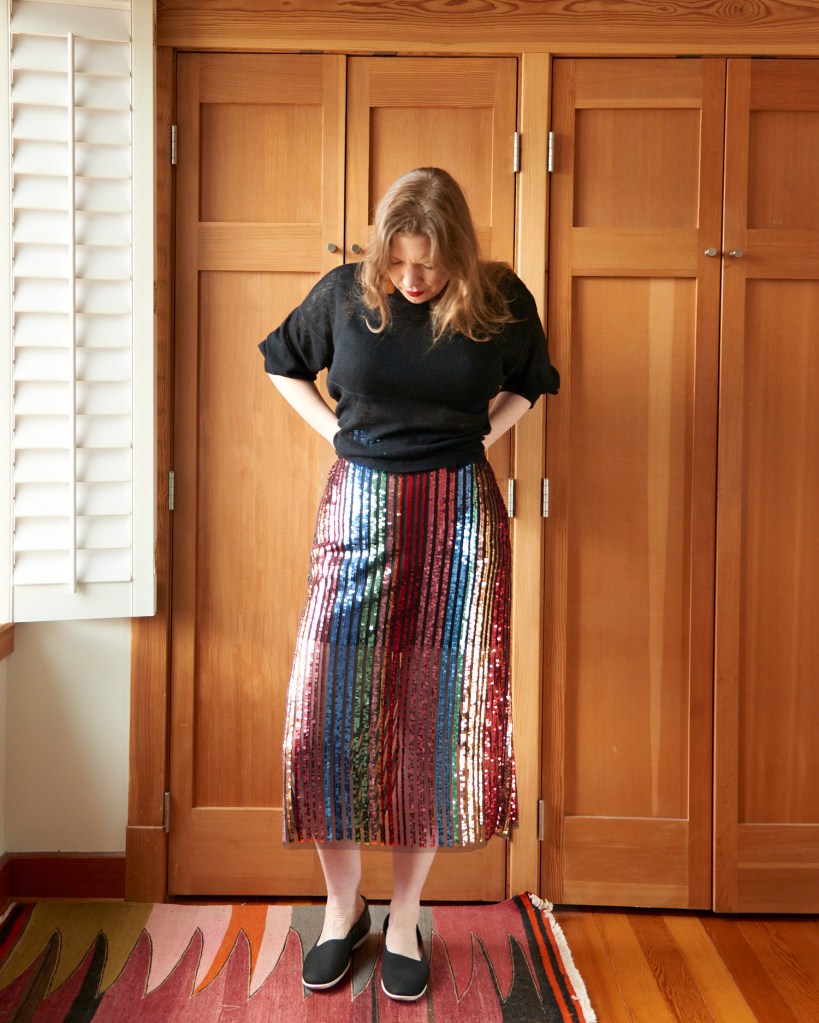
It’s no secret that my sewing has slowed down since last fall. I have most of the garments that I need in my wardrobe these days, so I’ve been spending my creative time in other ways. However, a few weeks ago when I got a Valentine’s Day party invitation with the instructions to “wear something special,” I knew what I had to do.


Choosing the right pattern for the fabric
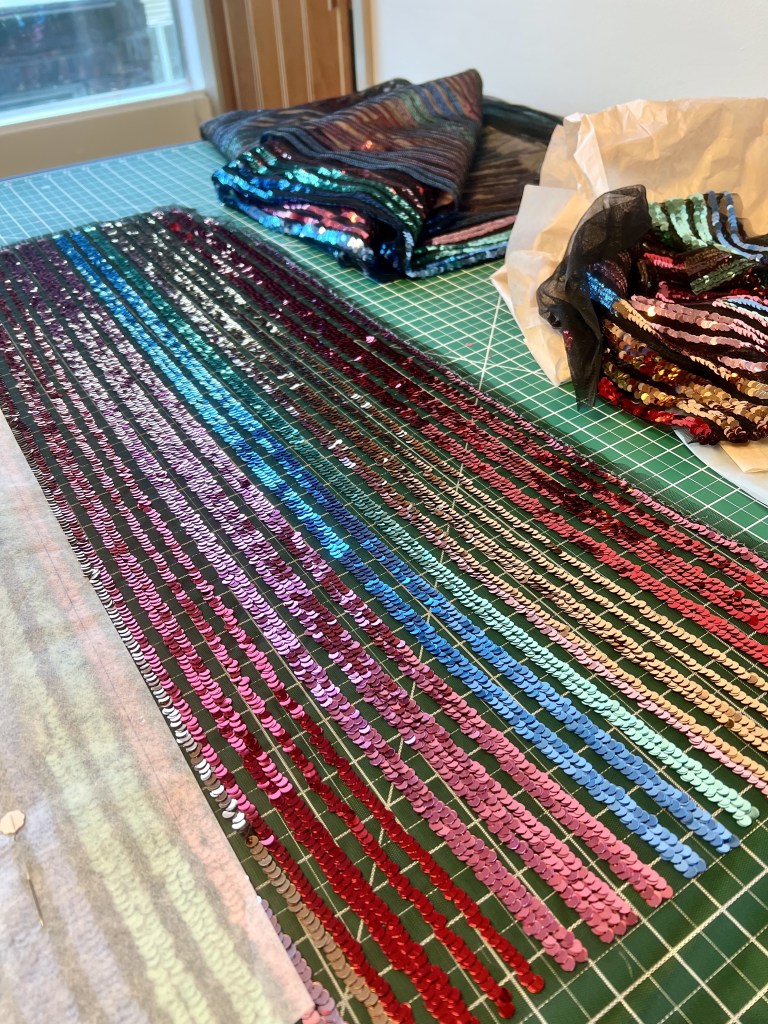
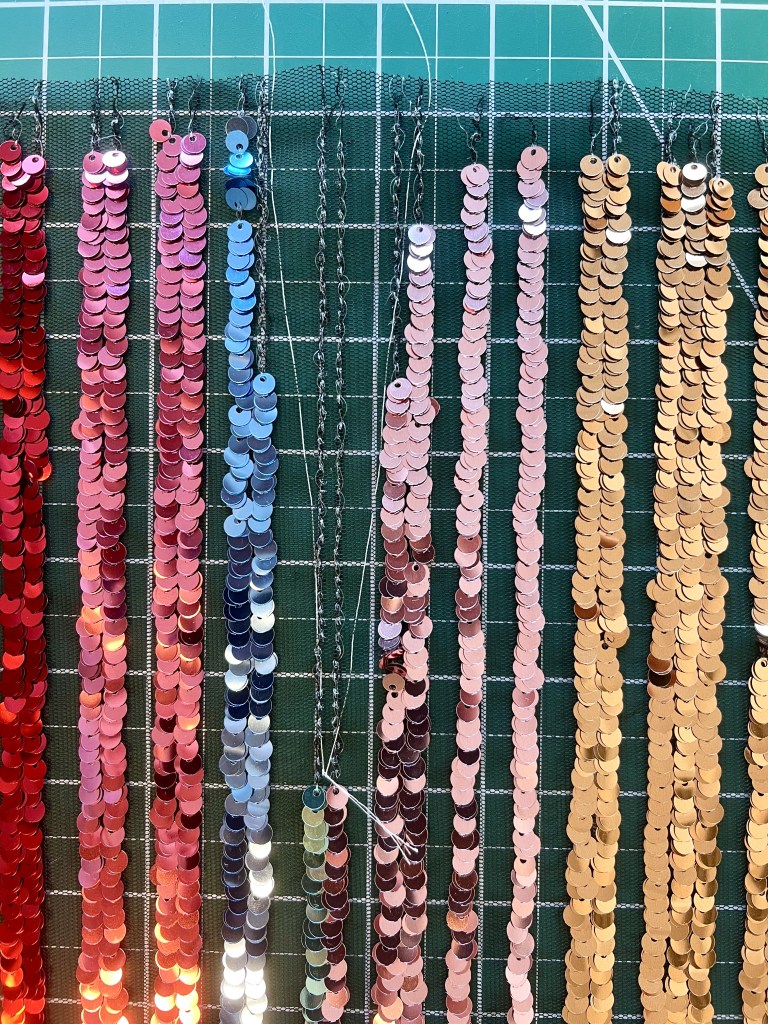
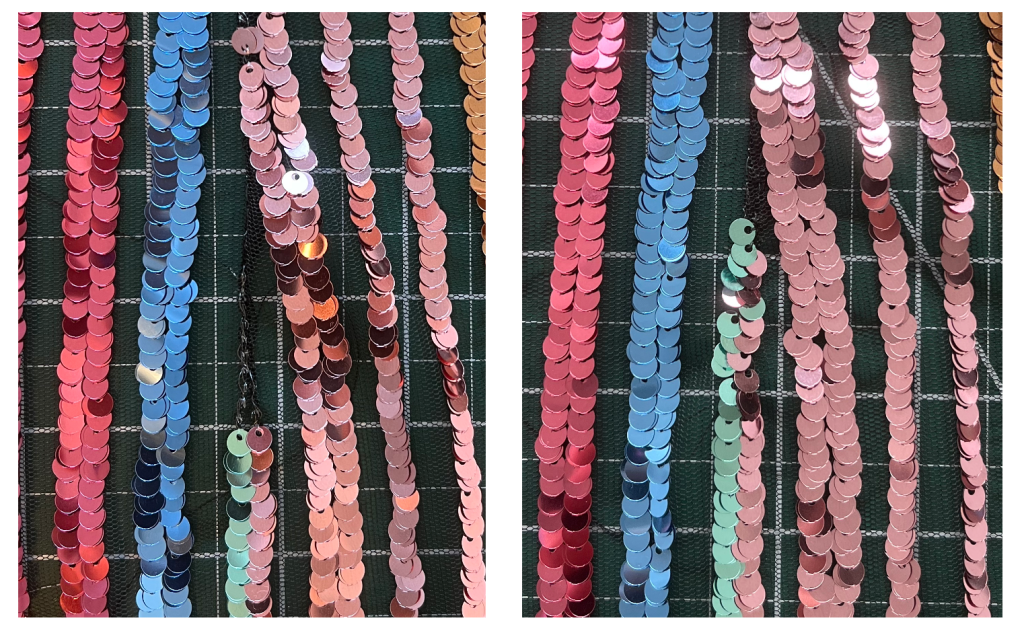
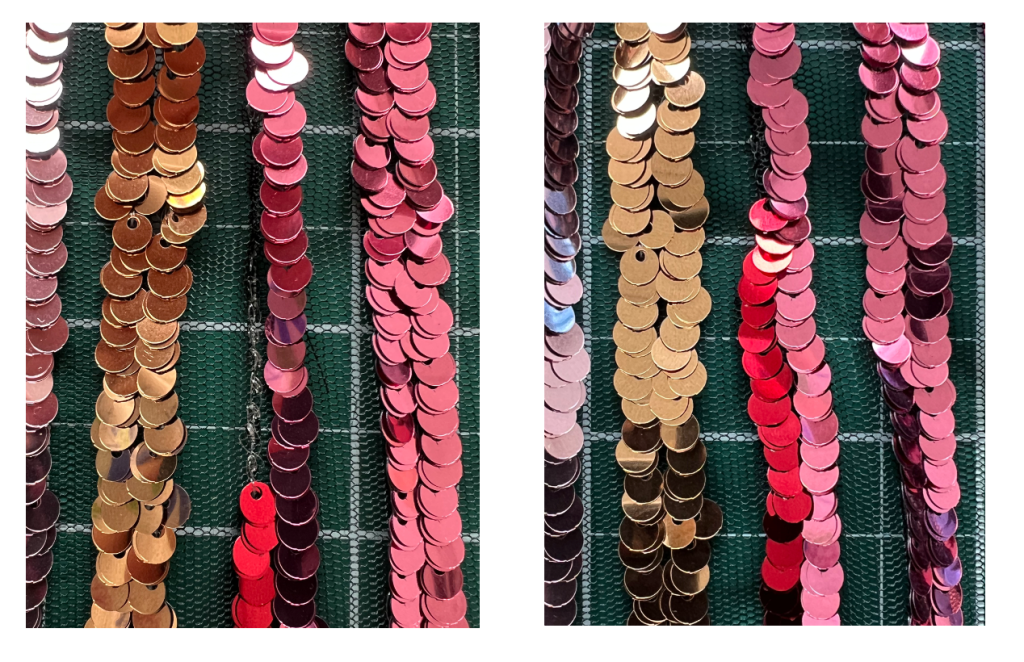
I knew right away that this deadstock sequined fabric would be the centerpiece of my party outfit. I don’t have much experience with sequined fabrics, but I knew even before beginning this project that sequins take extra care and attention to sew. With that in mind, I wanted to choose a garment with simple design lines. Fewer seams and uncomplicated construction seemed like the obvious choice for fussy fabric.

After some Pinterest research, I settled on the idea of a midi-length column skirt. I particularly liked the idea of pairing a glittery skirt with a casual top and shoes (I live in Seattle after all, we don’t do formal wear here). I’d already made a Teague skirt before, so it seemed like the obvious choice.
Pattern modifications
I’ve already written about how I adapted this pattern, which is intended for stretch fabrics, to work with non-stretch wovens. I used the same pattern pieces for this non-stretch sequin fabric as I did for my linen version last year.
The only additional modification that I did was to rotate the front dart from the side seam up to the waist. My motivation was equal parts aesthetics and practicality; I like the look of how a vertical waist dart would look with my vertically striped sequins, and it meant fewer sequins to unpick within the dart volume.
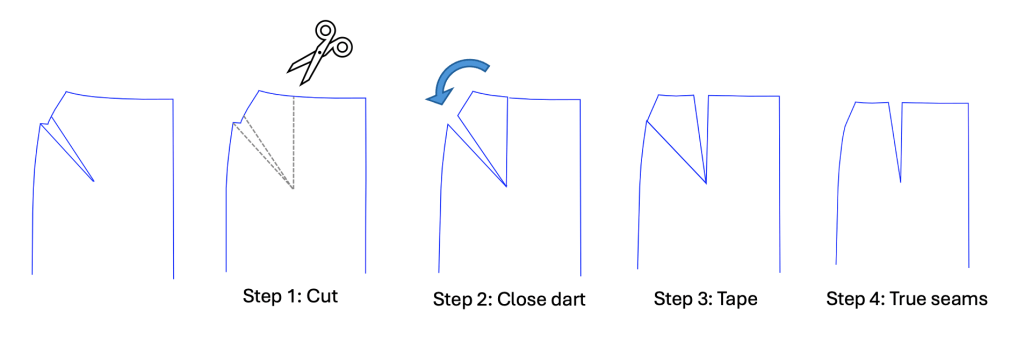
Above is an overview of how I rotated the dart. There are many in-depth guides on how to rotate bust darts, and I just followed the same principles here.
Construction
Constructing this skirt took about 30 hours, about 6x longer than it did for my linen Teague skirt, mostly because of all of the extra prep work needed to cut and prepare the fabric for sewing. Before I began, I read a few sequin sewing guides online, and most offer fairly intuitive advice. This page is the one I referenced the most, but there are others if you search.
My main takeaways from my internet research are:
- Sequined fabric can have a nap, and mine certainly did. Be aware of the direction of the nap when cutting, and depending on your pattern you may need extra fabric to accommodate.
- Cut pattern pieces in a single layer, do not fold your fabric to cut. Cut from the wrong side to avoid shattered sequin bits flying in your face. I used heavy duty craft scissors (not fabric scissors) to cut my pieces.
- Yes, you will get sequins in every corner of your house, car, and life.
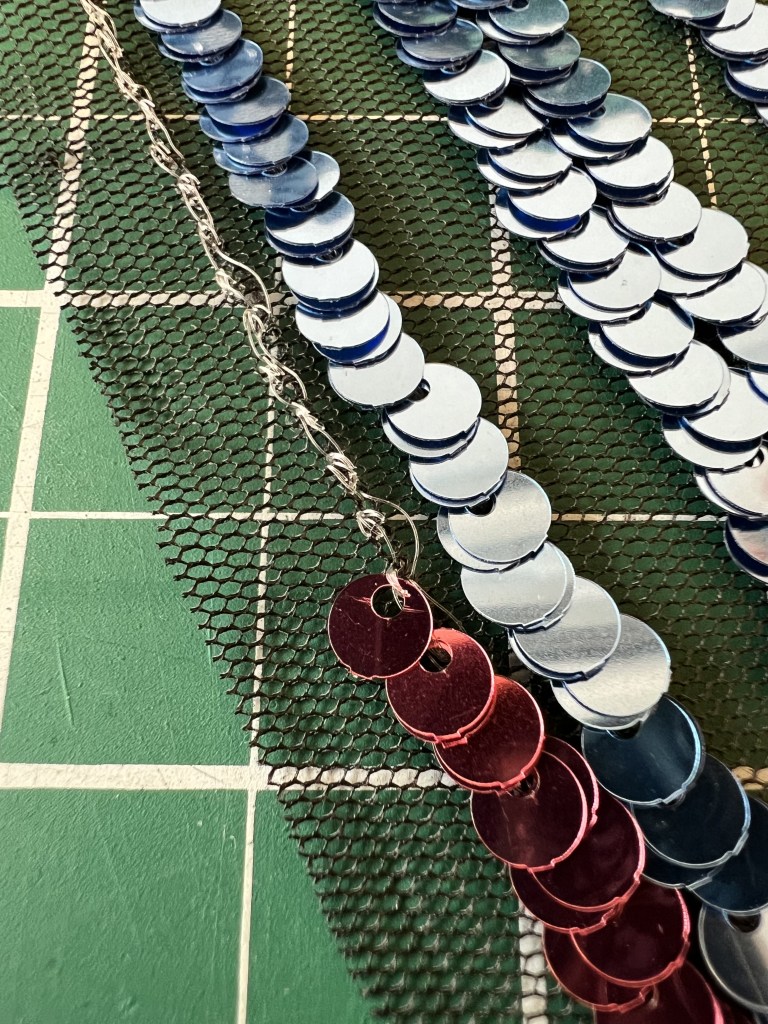
- Unless they are very small, you must remove sequins from all seam allowances and darts. Sewing through sequins will create stiff, awkward seams where the sequins get caught. I experimented with MANY different ways of removing sequins — different types of fine scissors, a seam ripper from the right side, then a seam ripper from the wrong side. Depending on your fabric, you may have more or less success with one method over another. So experimentation is key.
- I considered using a magnifying glass and strong task light, although ultimately I just sacrificed some eye strain for this project. If you have a good magnifying glass/task light set up for fine needlework, use it.
- Avoid direct contact with an iron. Sequins are plastic and can melt. When I needed to iron the silk lining or waistband on this skirt, I covered any adjacent sequins in a few layers of a pressing cloth.
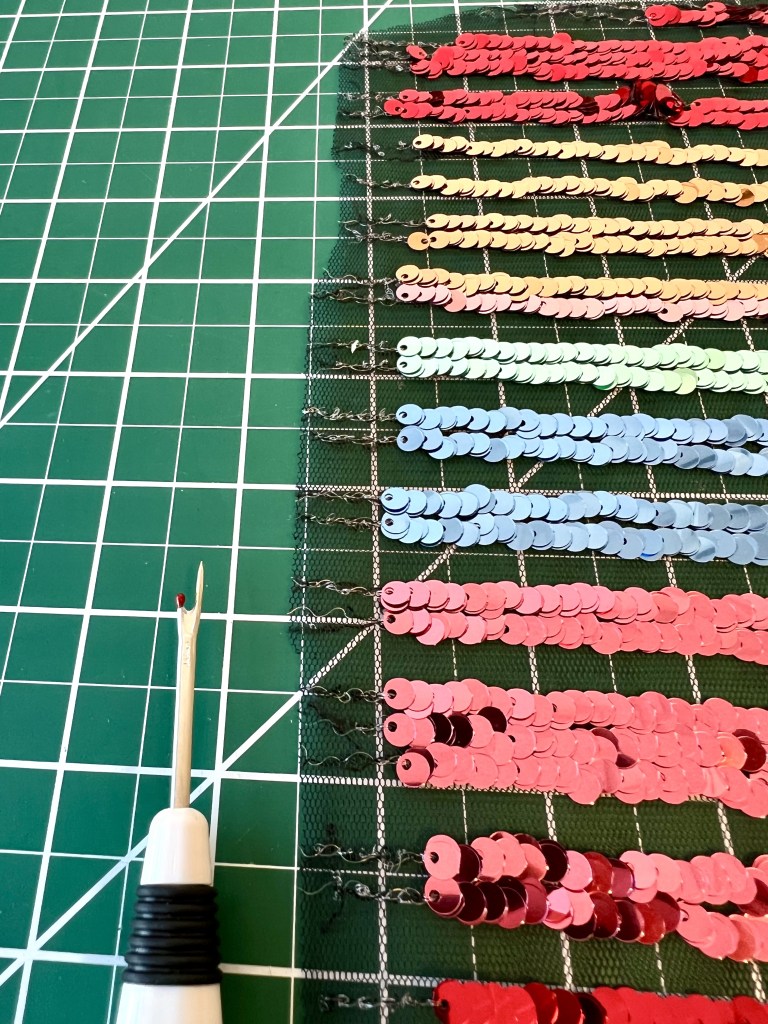
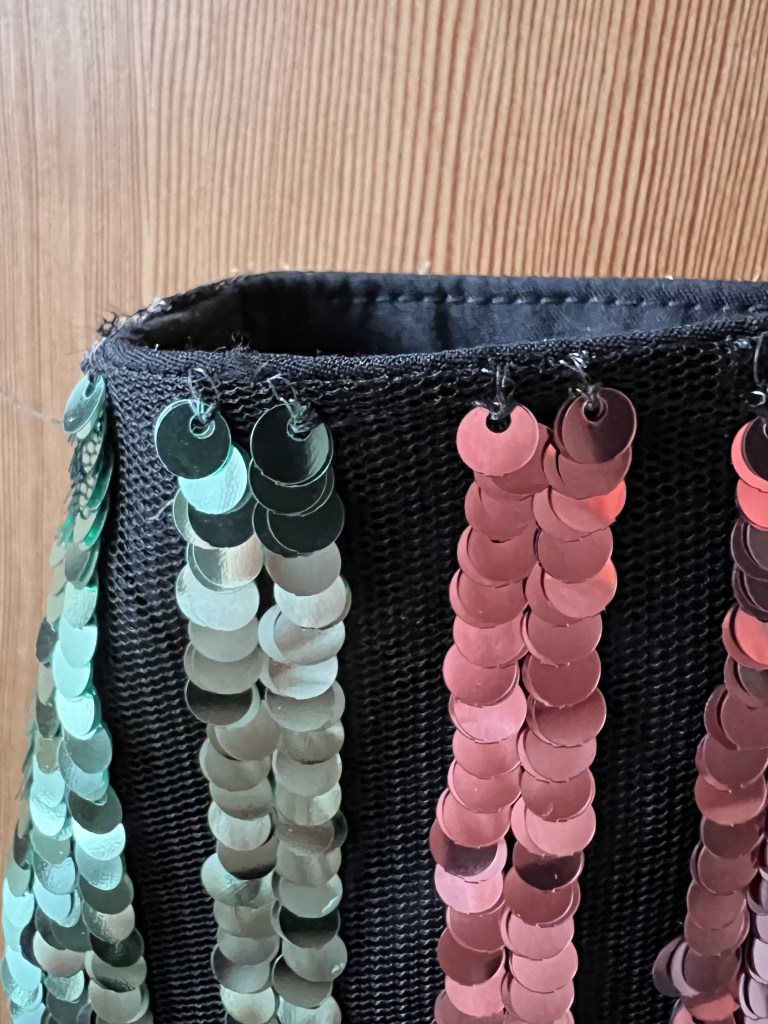
- Mark darts, notches, any other important pattern markings with basting thread. In my case, the sequins are sewn onto a fine mesh, so clipped notches and chalk markings were difficult to see clearly.
- A lining is usually a good idea with sequined fabrics, as they can be scratchy. I used a black silk lining for my skirt and waistband facing.
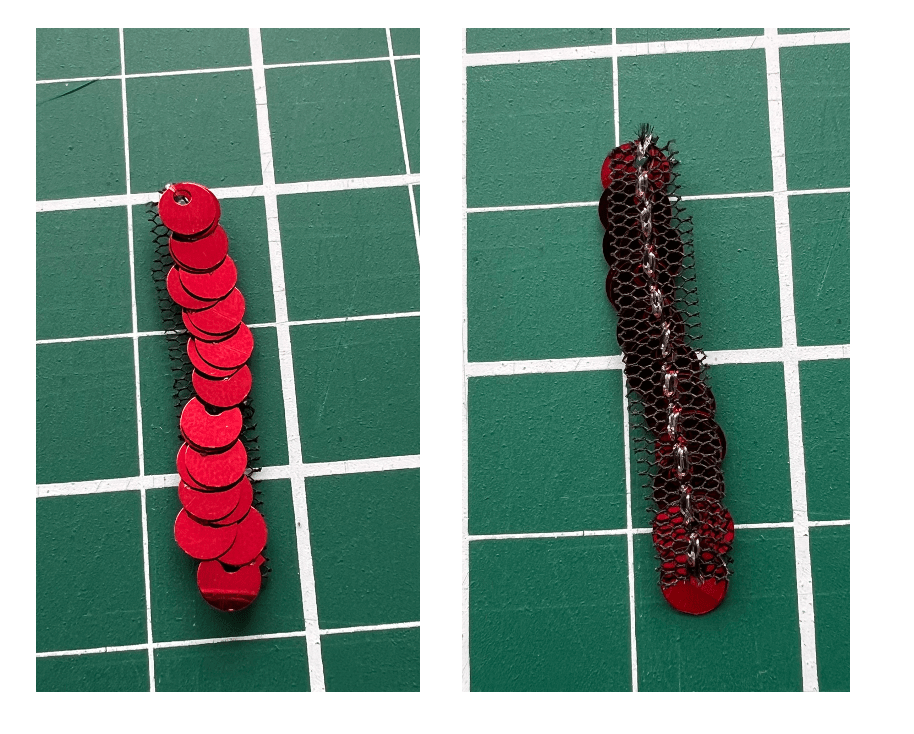
Despite all the warnings above, I quickly discovered that sequins are a huge pain to work with. After cutting out each pattern piece with heavy duty scissors, I removed the sequins from the seam allowances and darts before sewing. For this fabric, the sequins are individually locked in place on the mesh backing with two strands of fine thread resembling fishing line and one strand of black wooly nylon. The threads are very strong and hard to see, and so they were quite a challenge to remove. To make matters worse, each sequin was knotted into place, so removing one sequin did not release the sequins above or below it. I used a seam ripper to rip one at a time from the right side of the fabric. In the end, each cut piece took me about 4-5 hours to prepare for sewing.
After sewing the darts, I decided to add back some of the sequins to cover the bald spots that were left behind. My first attempt is below, I added back a small row of sequins by hand, sewing each sequin individually. This was challenging because you need to get the thread tension just right to have the sequins lay flat and in a straight line. It is also very time consuming.
Right: sequins added back by hand
For the second dart, I tried a different method for adding back sequins. Below, I cut out a row of sequins and their mesh substrate to make a graft. The sequins are so securely locked in place that they do not come off after cutting out a little section like this. I then sewed this little strip onto the bare patch on the dart. This worked much better, retained the right tension for the sequins to lay flat, and was faster than sewing individual sequins by hand.
Right: After adding sequin graft.
Once I finished the skirt construction, I also decided to reinforce all of the sequins along the top edge of the skirt, as over time I figured they might be subject to more abrasion and wear, and they may get pulled off more easily than the rest of the sequins. I went around the top edge with black thread and knotted each sequin in place.
Conclusions
All in all, I’m not sure I will choose to work with sequins again anytime soon, but I do love the finished skirt and got tons of compliments at the Valentine’s Day party. I hope this blog post will be helpful to anyone working with stubborn sequins!


Leave a reply to Mary Tipping Cancel reply