A few months ago, Hetty from The Modern Sewing Company shared her hacked Cara top, a minimalist woven tank top. I loved the look–like a hybrid between a waistcoat and tank top–so I decided to recreate it. The project was also an opportunity to experiment with fitting a bodice using some key concepts that I learned from Ruth Collins’ body neutral approach for pants fitting.
To be clear, this post is not meant to be a universal bodice fitting method, and it’s not “Top Down Center Out for bodices”. I would only trust Ruth Collins to create such a method based on her pioneering work on fitting trousers. Instead, this post is meant as an example of how I’ve been thinking through fitting challenges when working with a bodice, which of course is directly influenced by Ruth’s work.
Hacking the Cara top
The original design for the Cara top is a relaxed fit, A-line tank top with a collar and swingy silhouette. There are about 5.5 inches (15 cm) of bust east in my size. Hetty’s hack creates a boxier, cropped silhouette and invokes a classic waistcoat style.


Hetty shared a few notes on how she made this transformation on Instagram:
- Omit the collar
- Crop the length
- Straighten the side seam and hem
- Add a center back seam with some waist shaping
- Finish arm holes and neckline with bias binding (original pattern uses a double fold hem for the armholes)
- Add lots of buttons to the front
Fitting the Cara top
My bust is around 40 inches (101 cm) which puts me at a size 16. Here is a Cara top muslin as drafted with no changes:
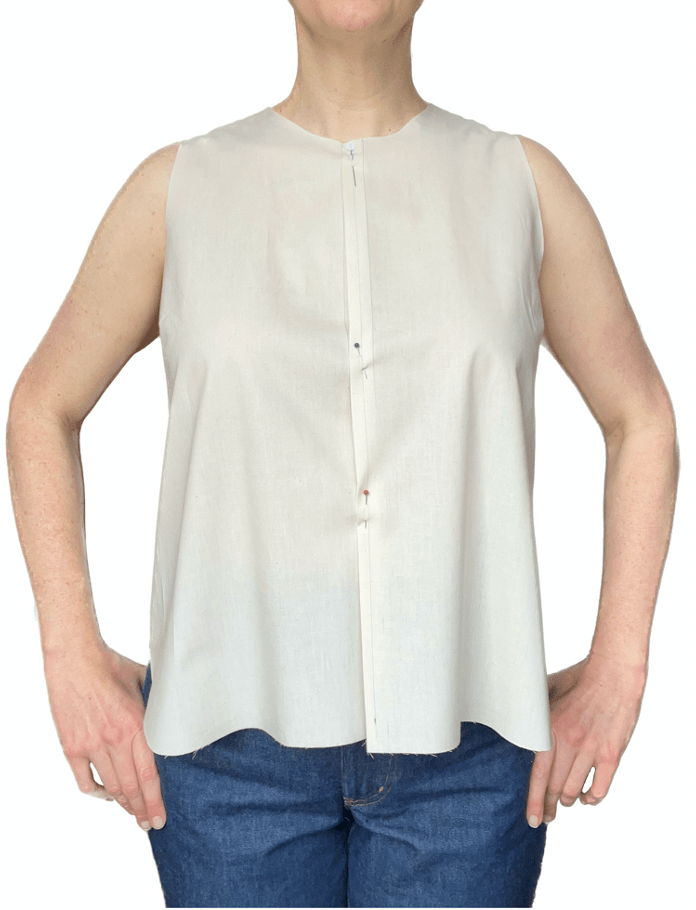


Aside from the bust dart tip sitting above my apex, the fit is not bad. This top would be beautiful in a silk or rayon. Time to do some hacking, though.
For the second toile, I cropped the pattern, straightened the side seam and hem, and added a center back seam, as per Hetty’s description. I decided not to move the dart just yet.

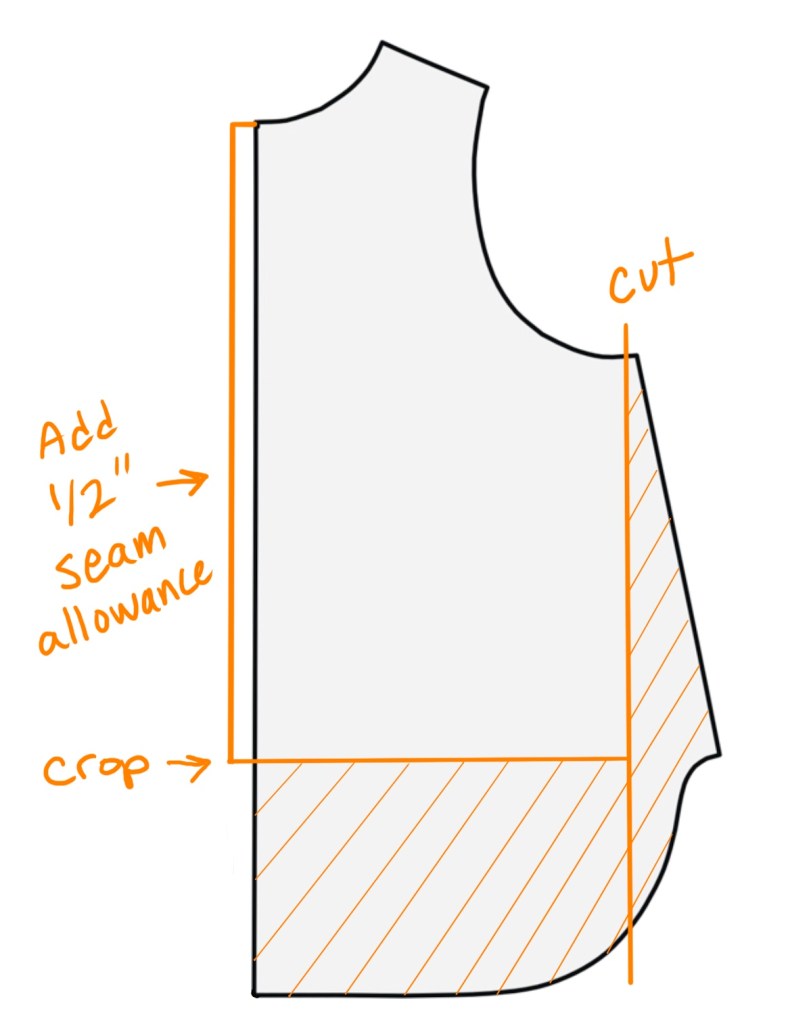
Below is the cleaned up flat pattern after my first round of adjustments. With these changes, I’ve removed 2.5 inches of ease in the bust, so about half of the intended ease from the original design.
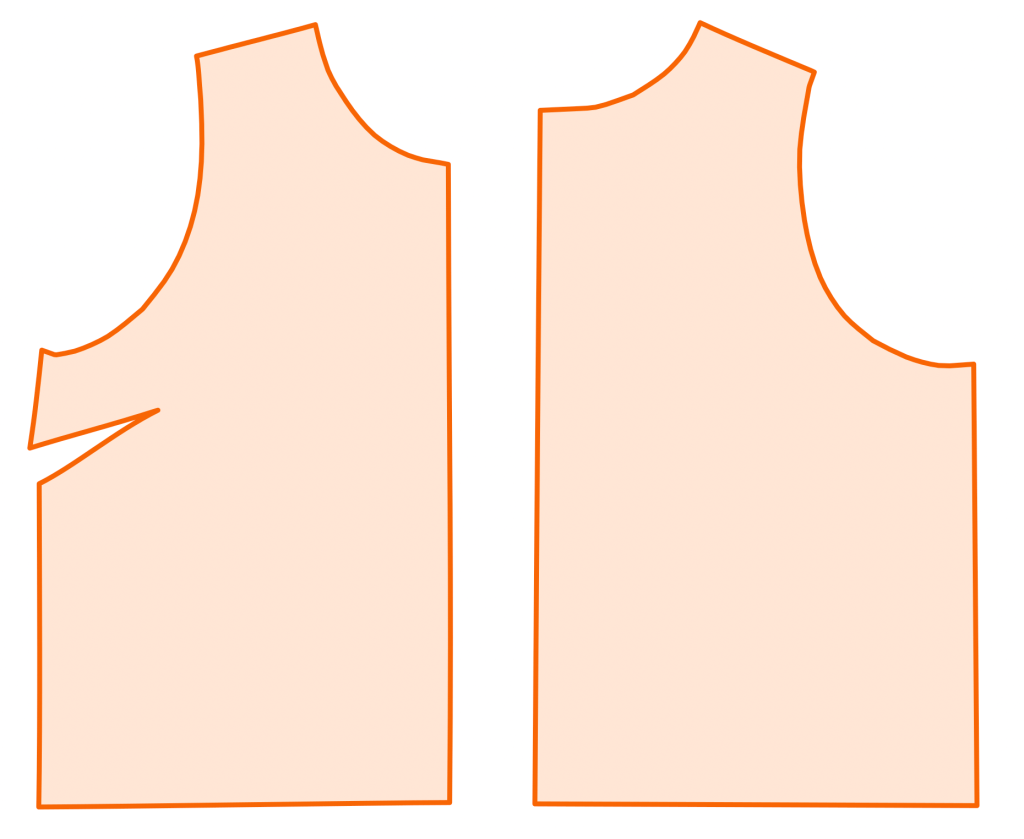
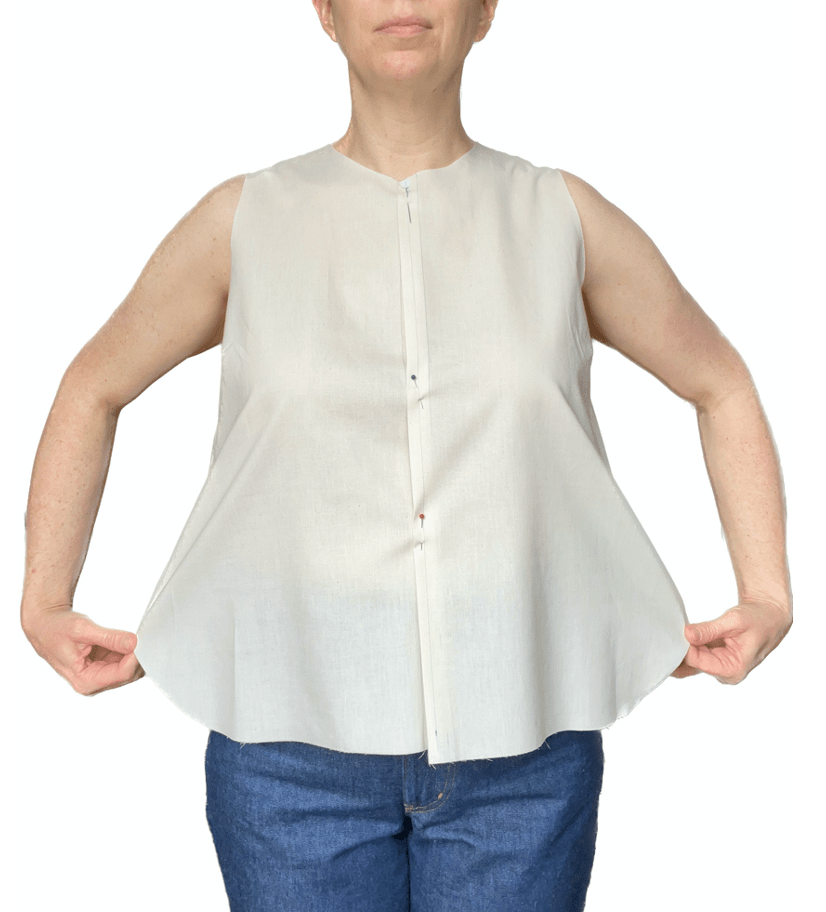
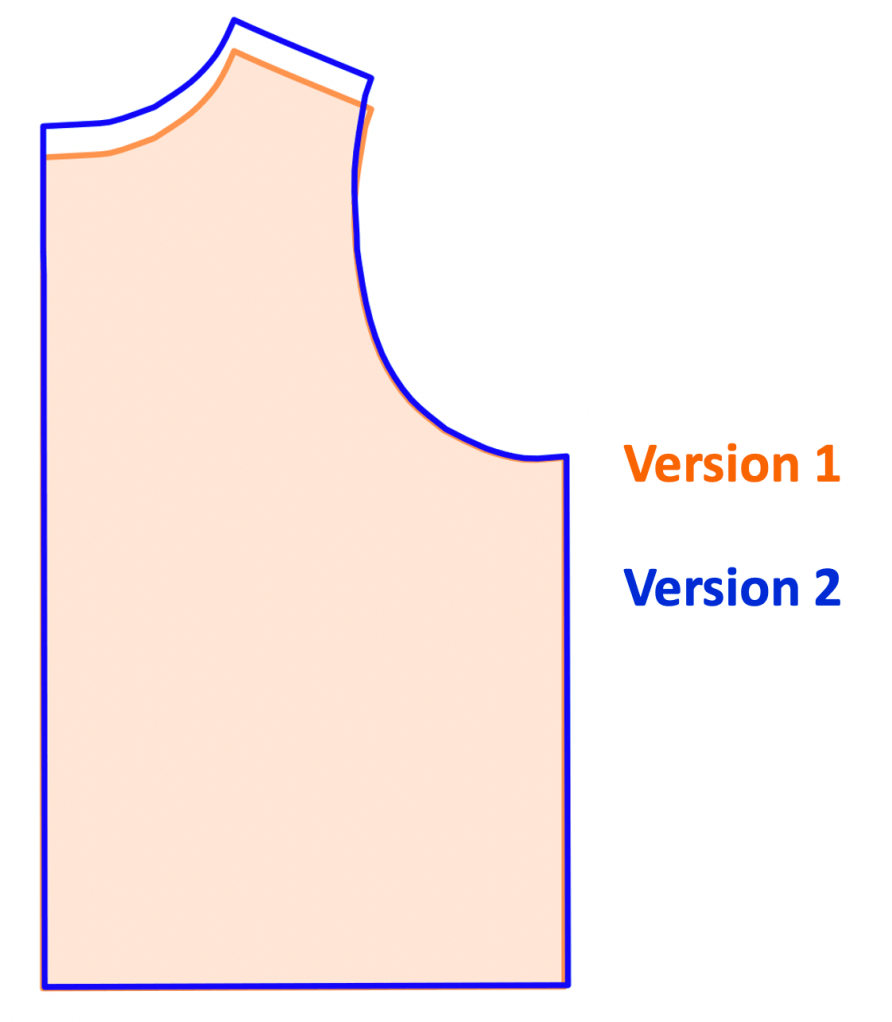
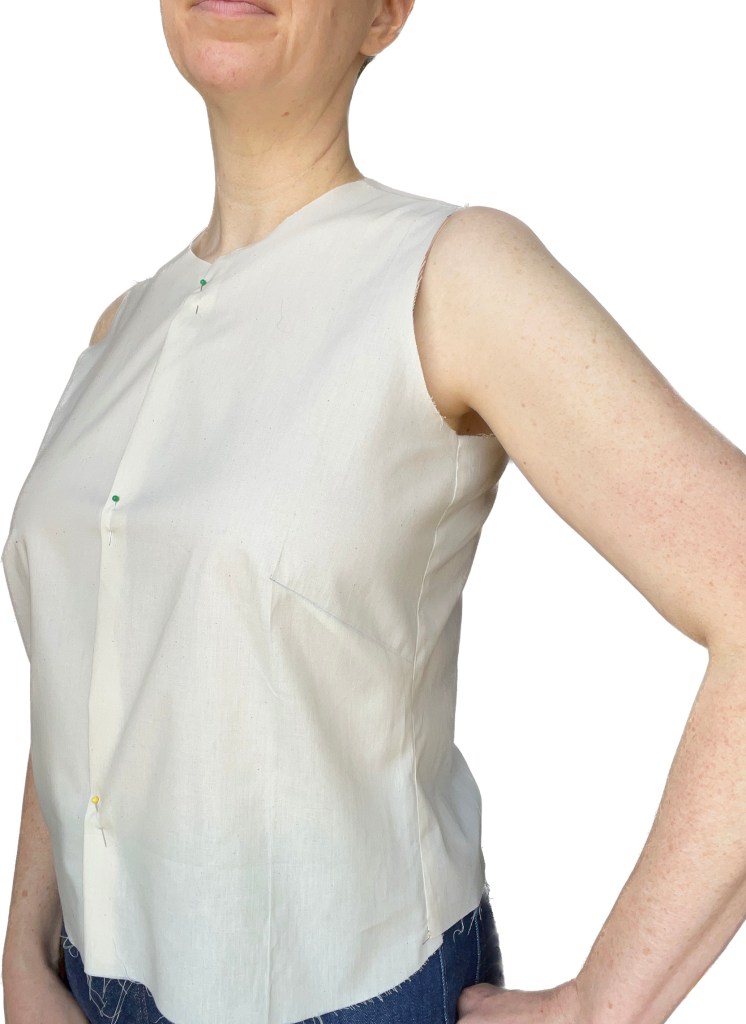
If you’ve spent a lot of time looking at bodice patterns, you may be able to tell already that the front piece looks a little odd after my chopping. Here’s what those alterations gave me, the second toile:


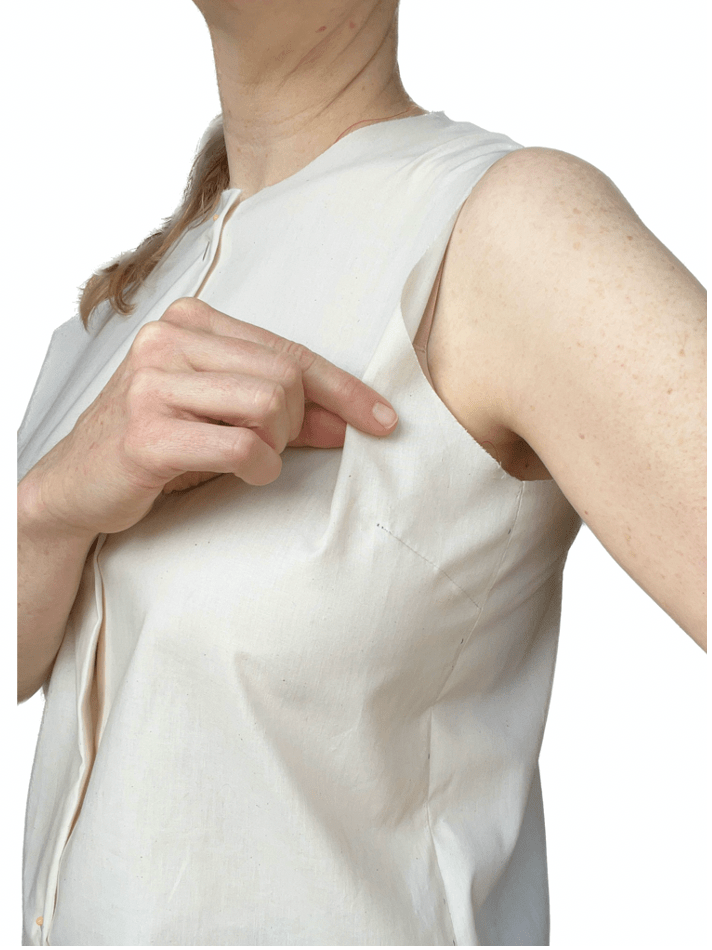
The fit around the armscye is noticeably worse, just look at that excess fabric at the front armscye. I can pinch out 1.5 inches of extra fabric easily without making the armscye too tight. This didn’t happen on the original.
To understand where the extra fabric is coming from, it’s important to look back at the original toile. As drafted, there is a generous 5.5 inches (15 cm) of ease around the bust, which works with the ease in the armscye to create a relaxed fit. In other words, the ease is evenly distributed all around the garment, not just in the horizontal circumferences but through the curve of the armscye as well.
Because I significantly reduced the circumference of the bodice, the garment now sits closer to my body and has half the amount of bust ease. So to correspond, I also need remove ease in the armscye so that it also sits closer to the body.
(Top Down Center Out fans: this concept applies to trousers, too. Significantly reducing the hip or thigh circumference on a relaxed fit trouser pattern may require less ease through the crotch seam, often best achieved by sizing down in crotch and inseam and/or removing vertical length from the rise.)
I pinned out the excess fabric along the front armscye to shorten the arc of this seam, then I marked how much fabric to take out.

In the next toile, I lowered the original dart and then rotated this extra armscye fabric into that bust dart, shown below. For a complete tutorial on rotating fabric into darts, there are many online tutorials like this one).

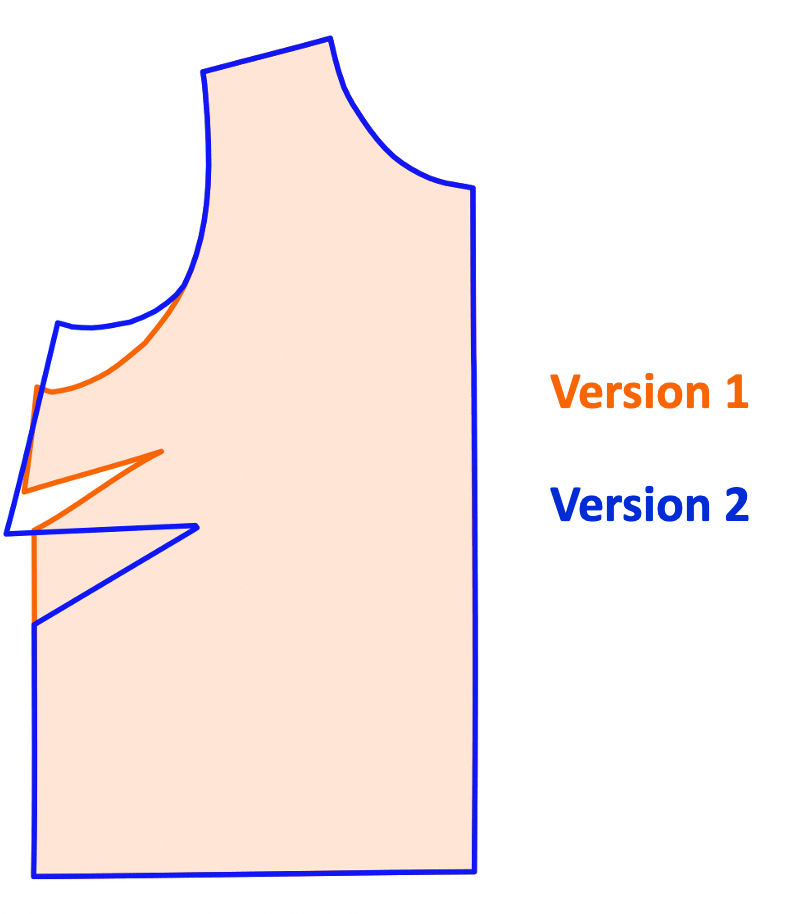
Below is the comparison between version 1 and version 2, the first and last pattern pieces in the above diagram. I’ve aligned the pieces in two different ways to show that the original drafting at the shoulder is preserved, but vertical length has been removed from the armscye only:

After pinning fabric out in the front, I noticed that the back armscye digs into my armpit a little, which is a common fit issue on bodices for me. You can see the curve of the back armscye is landing right in my armpit, because the vertical length of the back armscye is too short. Adding more vertical length in the upper back will add some much needed ease here.
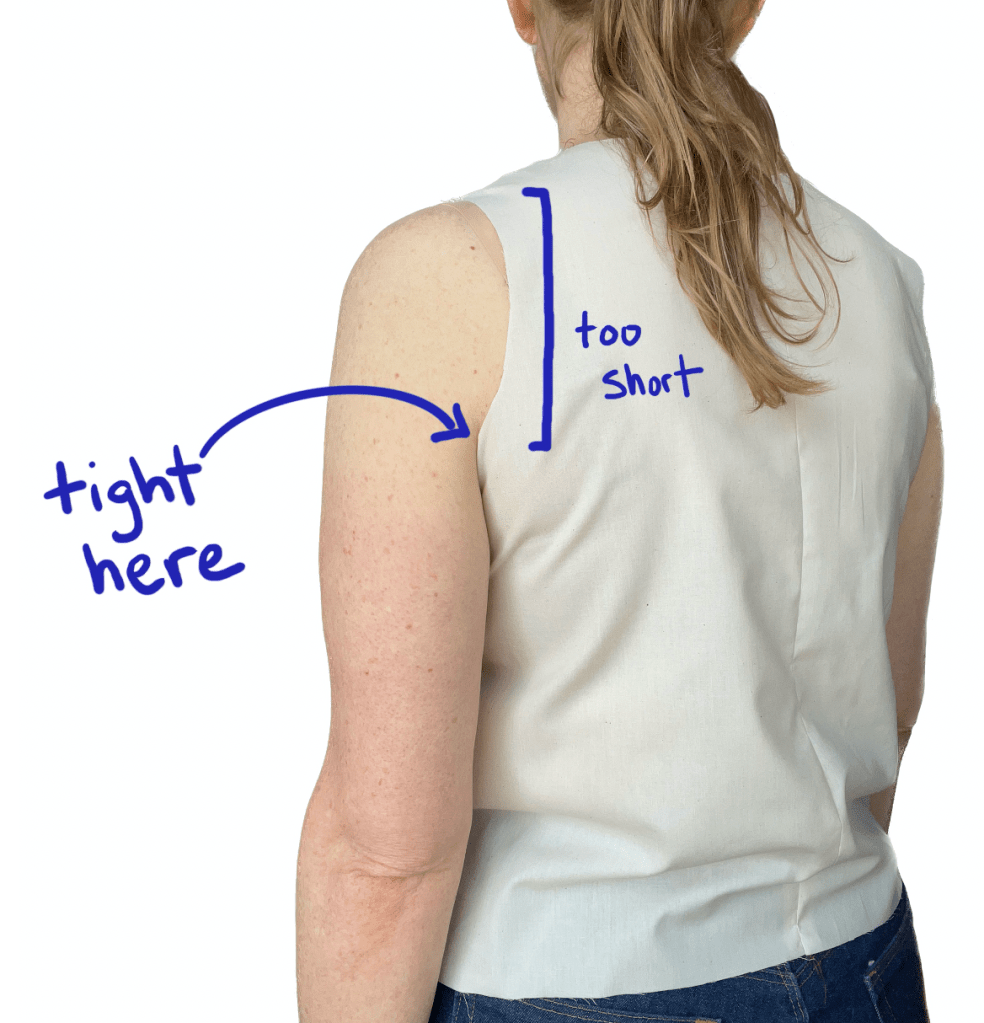
To add length, I cut the pattern horizontally around mid-shoulder blade and added 1/2 inch of fabric to give myself a little more room there.

And here is the comparison between first and last steps, above:
This modification obviously lengthens the back armscye, but it also creates more length in the upper back of the garment, raising the back neckline.
In total, overall effect of these modifications is to 1) decrease the total circumference of the armscye by 1 inch (subtract 1.5 inches in front and add 0.5 in the back), and 2) rotate the shoulder seam and back neckline toward the front of my body.


I made one more toile to check the fit before cutting into my final fabric. I was happy with the modifications to the armscye here.

For my final adjustments, I raised the bust dart a half inch since I went a little too far with lowering it on the previous toile. I also decided to crop the top more, and I added a little shaping to the center back seam at the waist. I curved the front hem just slightly.
Here is the comparison of where I started the hack and where I ended it, with all pieces aligned at the bottom of the armscye.
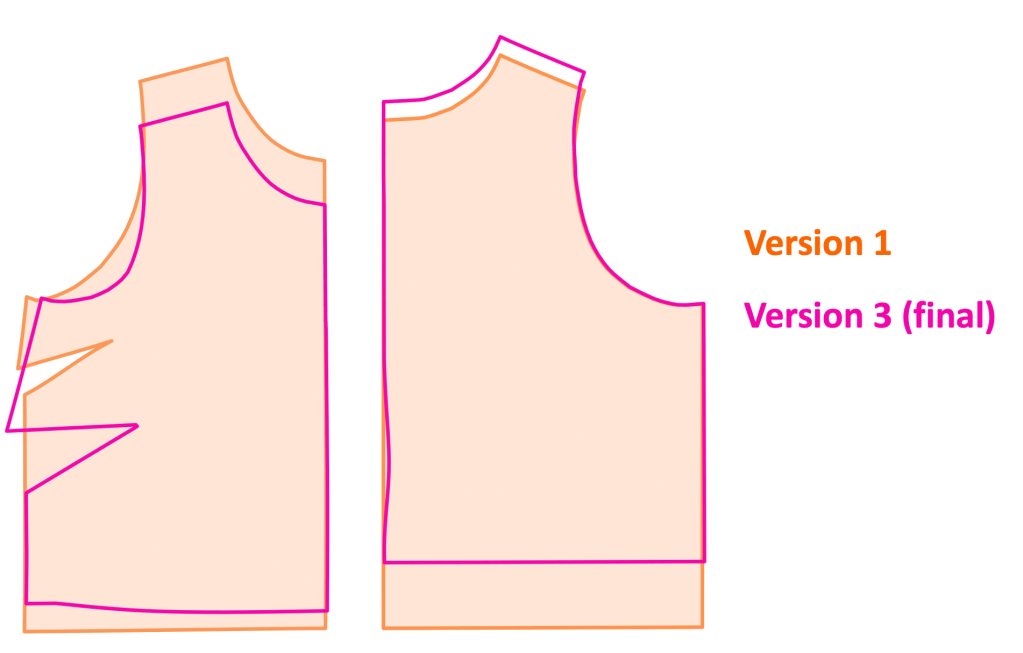
And here is the same comparison but with pieces aligned at the shoulders:

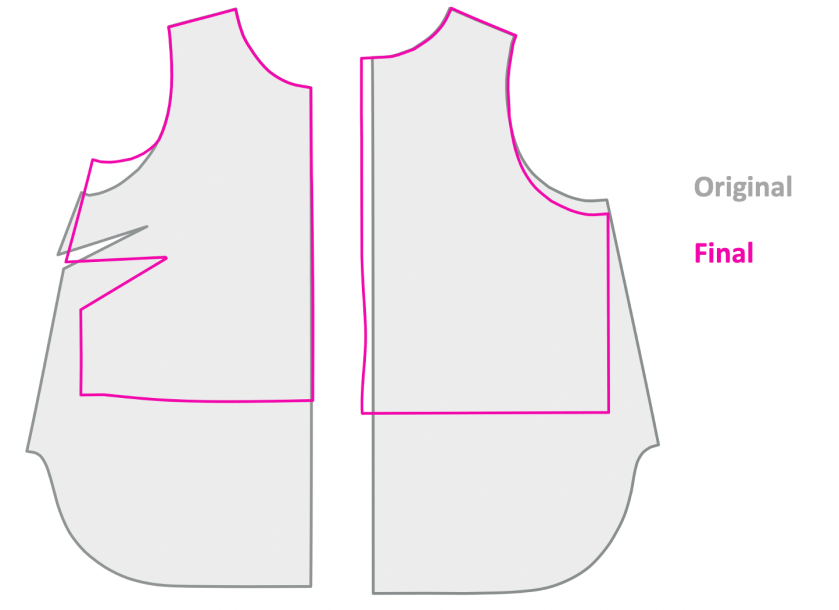
And just for good measure here is final pattern aligned with the original Cara top:
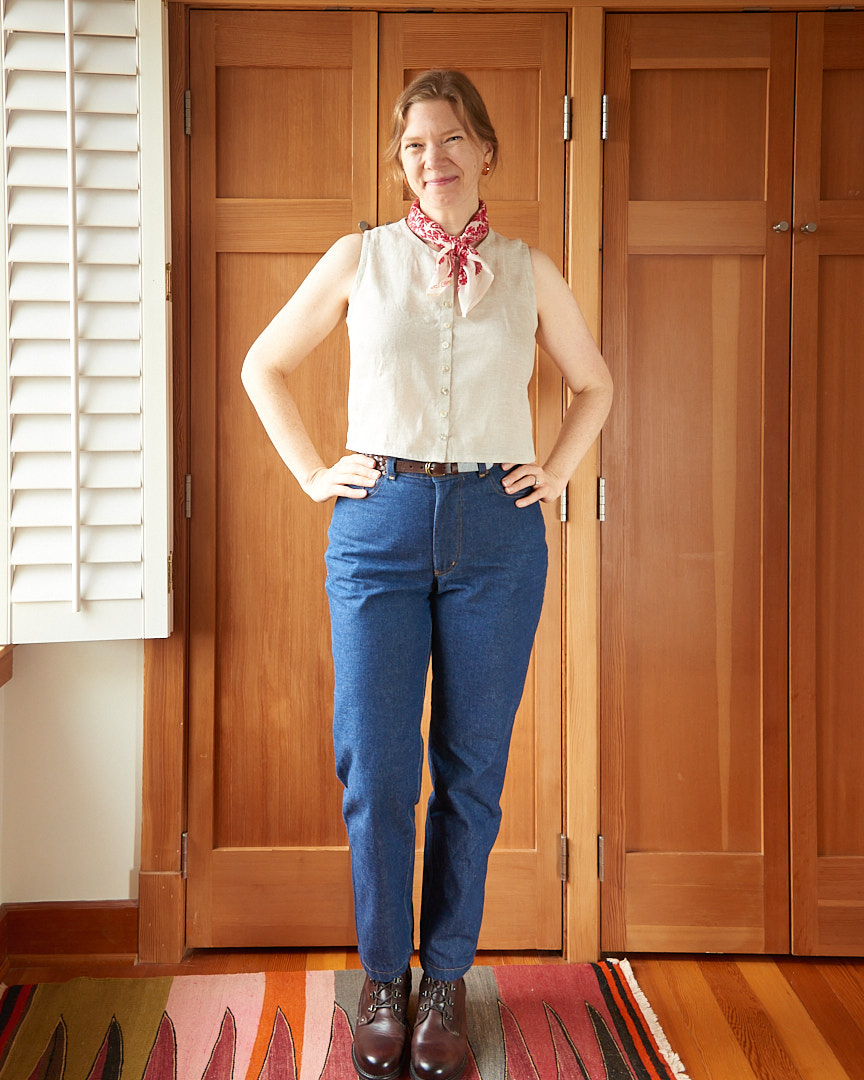
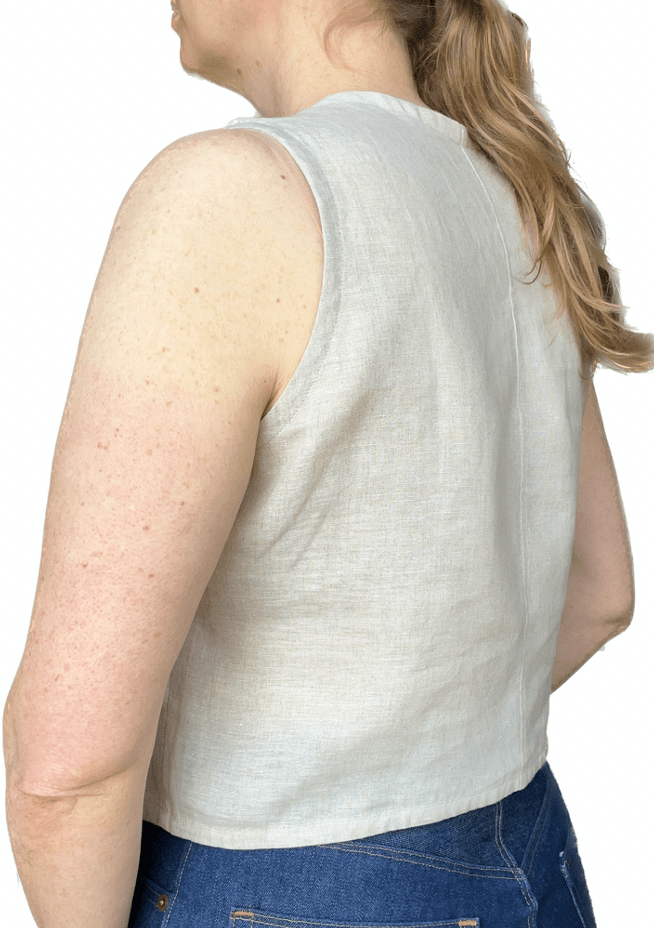
The final garment fits exactly as I’d hoped and resembles Hetty’s hacked version. I’ve eliminated the excess ease in the front armscye, given myself plenty of room in the back armscye, and still managed to maintain a somewhat relaxed fit throughout.
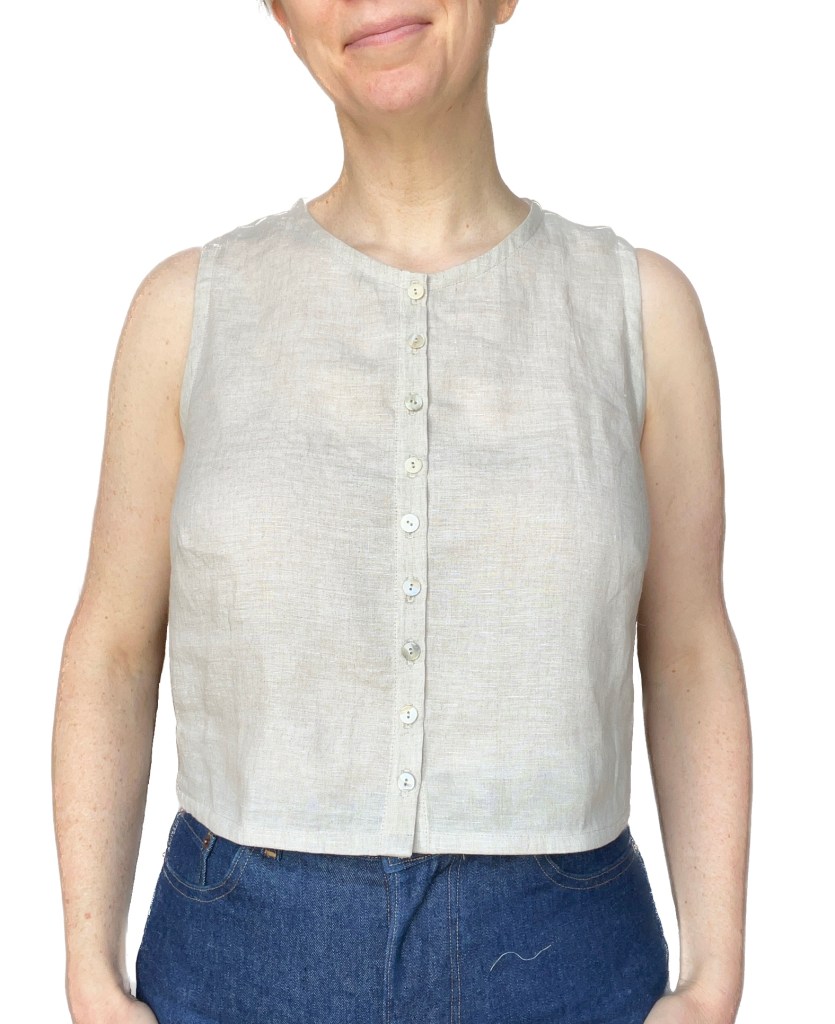
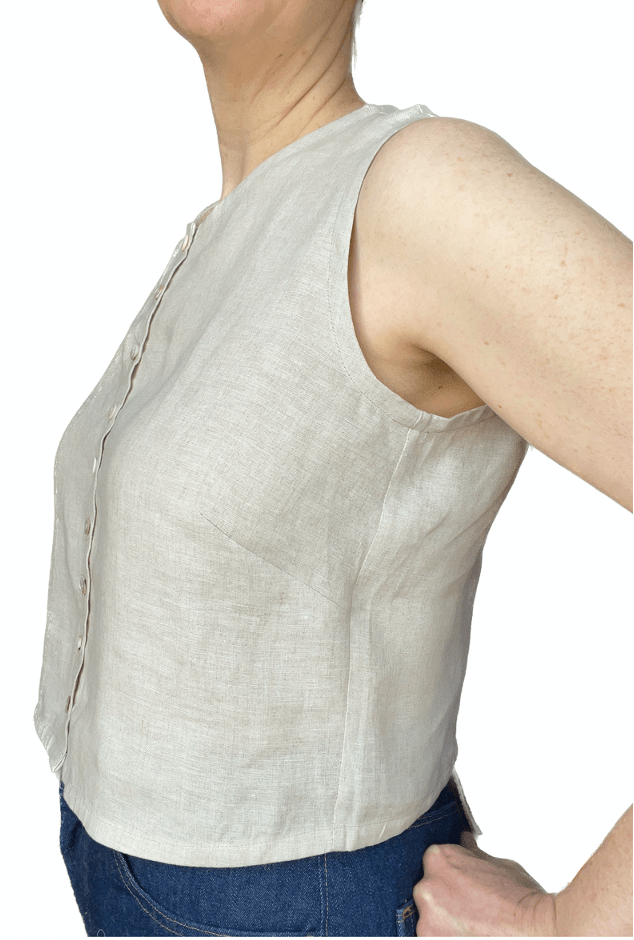
With projects like this one, the danger in taking the pattern fairly far from the original design is that it is tempting to overfit. My goal here is not to chase down every wrinkle, nor is it to nip in every inch of ease. I still wanted a relaxed fit in the end, and that’s what I got.
Construction Notes
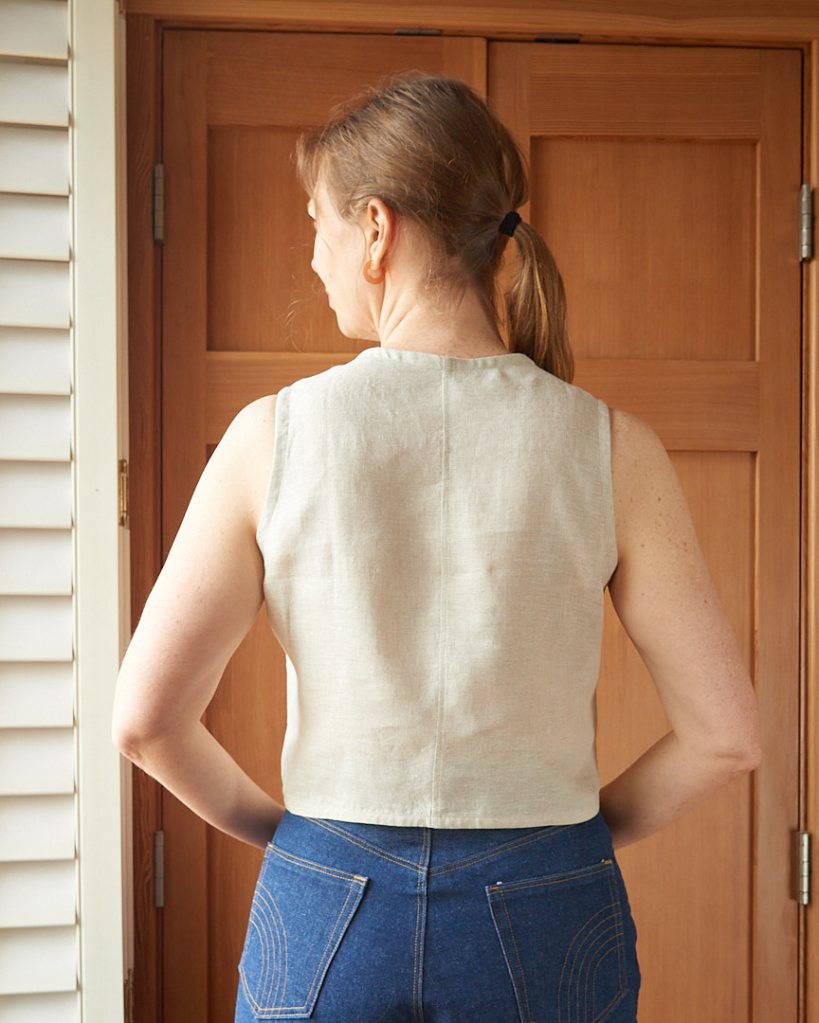
For the final garment, I used French seams for the shoulder and sides, and a flat felled seam for the center back. I added bias binding to the neck, armholes, and hem using my favorite method for applying bias binding (the French way, bien sûr!). I used my iron to steam the bias binding into a curved shape before applying it to the garment, which makes for a stress-free application.


I made this top in August, and my only regret is not making this top sooner so I could enjoy it throughout the summer, but it is serving as a nice base layer for autumn weather.

Final thoughts
I came away from this project with a few takeaways:
First, I was able to shift the shoulder seam forward without touching the shoulder seam itself. Usually I’d reach for the old trusty forward shoulder adjustment, but not this time. Instead, I adjusted the vertical lengths in the upper bodice, subtracting more in front and adding a little in back, which rotated both the shoulder and back neckline toward the front of the bodice.
So, turns out the forward shoulder adjustment, which I thought was an absolute requirement when fitting tops for myself, was not necessary at all. This lightbulb moment was similar to when I discovered that I didn’t really need a knock knee adjustment to make my pants fit better, I just needed to lengthen the rise.
Because I approached my bodice fitting with neutral, objective terms like length and circumference, I didn’t have to think about what body parts were “problems”, and I didn’t even need the corresponding body part adjustments.
All this has left me wondering: Can we jettison the body scrutiny from the fitting process altogether? What if the terms “forward shoulder” or “full tummy” or “full thigh” (or whatever terms are assigned to us) had never existed in the home sewing world? What if we learned to fit without ever needing to compare ourselves to any other body shape? How would that feel?
I’m optimistic that eventually the home sewing world will move away from all the body comparison language. Some folks may have found a way to work within the conventional fitting systems and that’s great, but I’m glad that now at least we have body neutral fitting as an alternative approach for anyone who wants it.
Acknowledgements
All of the credit for body neutral fitting goes to Ruth Collins, the inventor of the Top Down Center Out fitting method and my friend and fitting mentor. Discussions with her helped me think about this bodice project in new ways, and as always I am grateful for her wisdom and guidance.


Leave a reply to Ellen Perry Cancel reply