
I buy more dress patterns than any other type of garment (yes, even pants), but I rarely make or wear dresses. I’m always tempted by the siren song of the ultra-feminine, cottage core aesthetic—ruffles, gathers, tiers, big sleeves!—but I have yet to feel like myself in one of these designs. So the Daughter Judy Teague dress is for those of us who want to wear something a little different.

Design
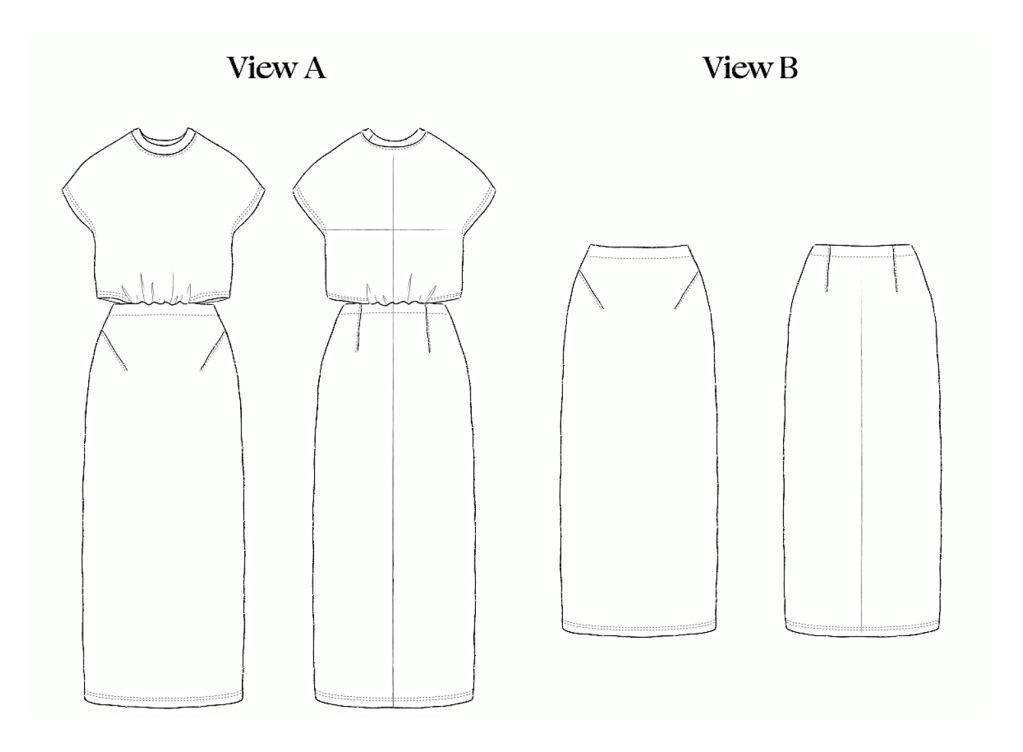
Teague dress (view A) is an oversized sleeveless top attached to a column skirt with subtle cutouts at the side waist. It’s designed for knits or stretch wovens, and it’s meant as a casual and modern take on a t-shirt dress. View B is the column skirt alone.
The Teague dress was launched along with Daughter Judy’s substack newsletter, where Chelsea shared some great insight into the Teague design. I won’t repeat everything Chelsea shares in that newsletter, but it’s worth a read if you enjoy a design deep dive.
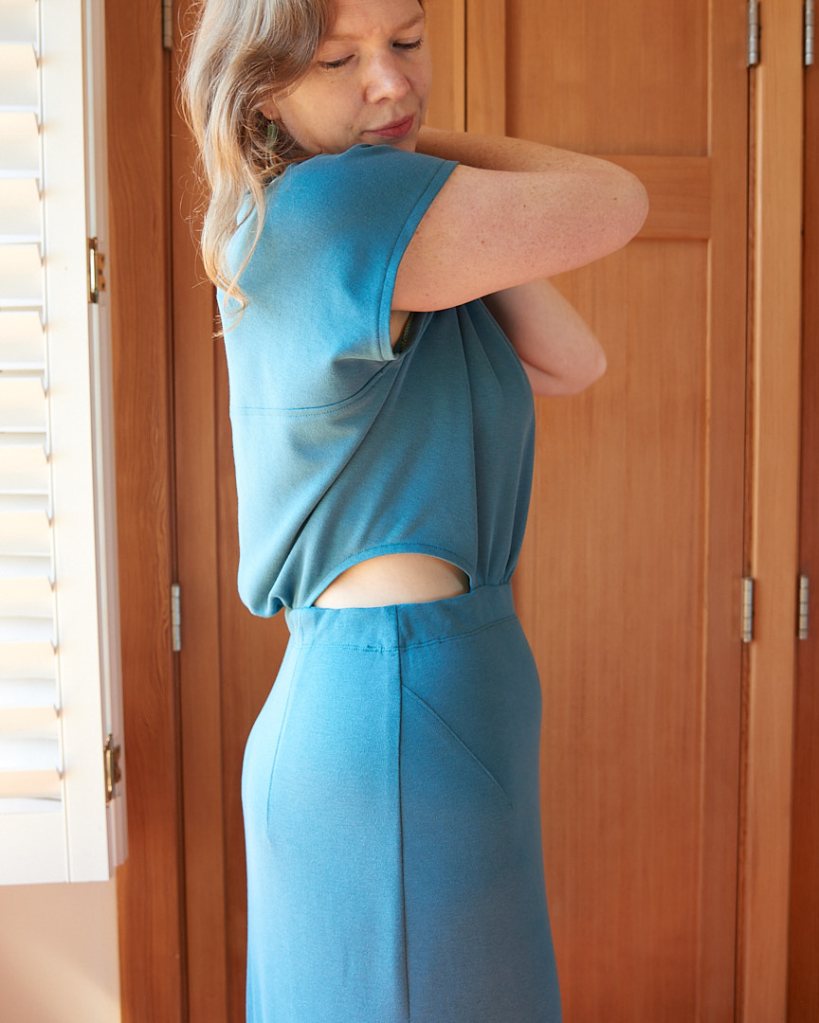
I will state up front that I’ve never been drawn to cutouts, but this silhouette grabbed me immediately. I like that the cutouts are subtle, not in-your-face sexy, but offer a hint of skin. They add a unique surprise to the dress that is unusual and fun.
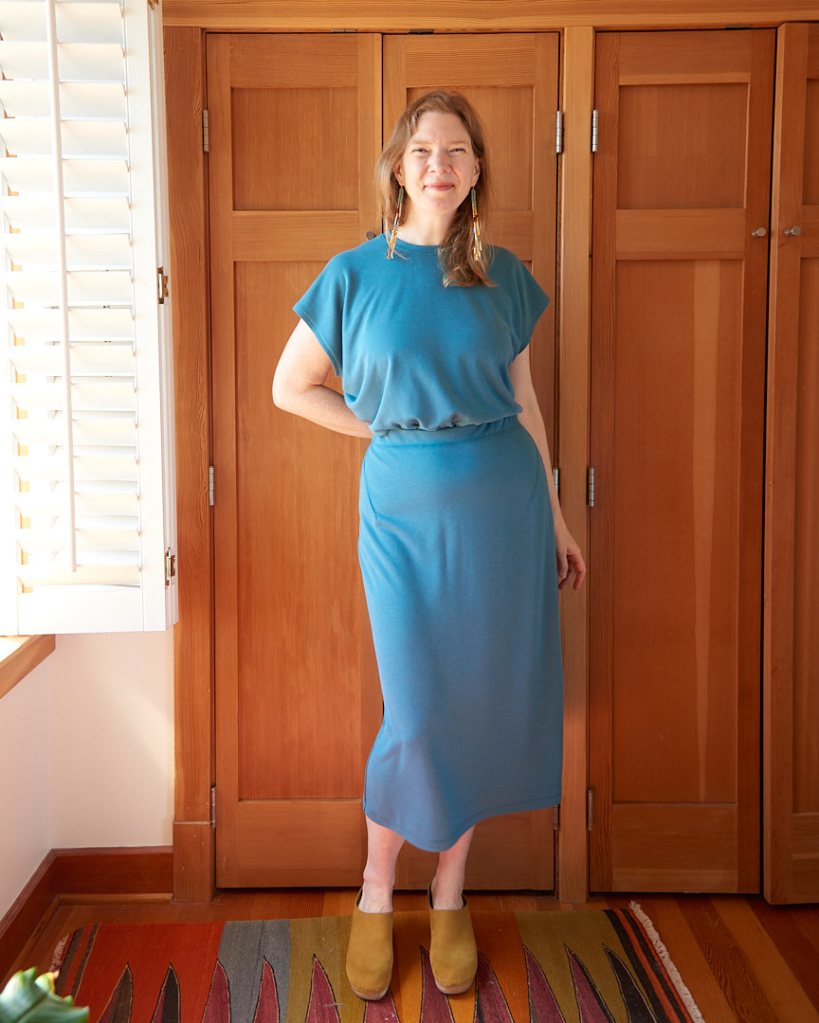
The top has a relaxed fit with lots of ease, which keeps the style looking casual and comfortable. The slimmer column skirt balances the volume on top, and adds a sophisticated polish. The midi length lets you show a little ankle and a fabulous shoe. It’s not my usual silhouette, but I decided to try it.
Fabric
The Teague dress can be a real chameleon depending on fabric choice. You could dress it up as evening wear (stretch sequins, slinky silk jersey, etc) or down as ultra casual (sweatshirting, stretch denim, etc). But the fabric choice could also make or break this garment, depending on your expectations, so it’s worth some extra consideration.
Ponte seems to be an early favorite from the IG makes I’ve seen so far. Ponte would be a good choice if you want the top of the dress to be more structured to show off the volume, and if you are ok with less drape in the skirt. The heavier weight of ponte will also be more stable to sew and wear.

I decided against ponte because I wanted a softer silhouette and a fluid drape for both the top and skirt. So I chose a heavyweight viscose/spandex jersey from Stone Mountain instead. This jersey is the same weight as ponte (9.73 oz per square yard / 330 GSM) but has a much higher drape. It also meets the minimum stretch requirements recommended for the Teague dress, so it was perfect.
Sizing and Fit
My current measurements for waist and hip are identical to a size 12 on the Daughter Judy size chart, which maps to a size L in the Teague dress. If I cut my size, I’d have 14.75 inches (37.5 cm) of positive ease at the chest and 2 inches (5 cm) of negative ease at the hip.
I decided to go down a size for the top and up a size for the skirt. Here’s my reasoning:
TOP :: I sized down to a size M, mostly due to fabric restrictions. The viscose jersey I used is 54″ inches wide, so I was able to squeeze everything into the 2.375 yards that I had, but with no room to spare. Sizing down meant that I had about 13 inches (32 cm) of ease at the bust, which was still plenty.
SKIRT :: I sized up to a size XL. I wanted positive ease at the hip because I didn’t want tight fabric across my lower abdomen. Ideally, the skirt fabric would fall straight down from my belly button, rather than cling to me in front. I tend to feel more exposed when skirts fit tightly around the abdomen and hips and I knew I wouldn’t reach for this garment if it made me feel self conscious.
To know how much to size up, I used an old trick for measuring for a pencil skirt. I took yard stick and and placed it at my center front where my abdomen projection was greatest. Then I measured my hip circumference and included the extra circumference added by the yardstick (see image below).
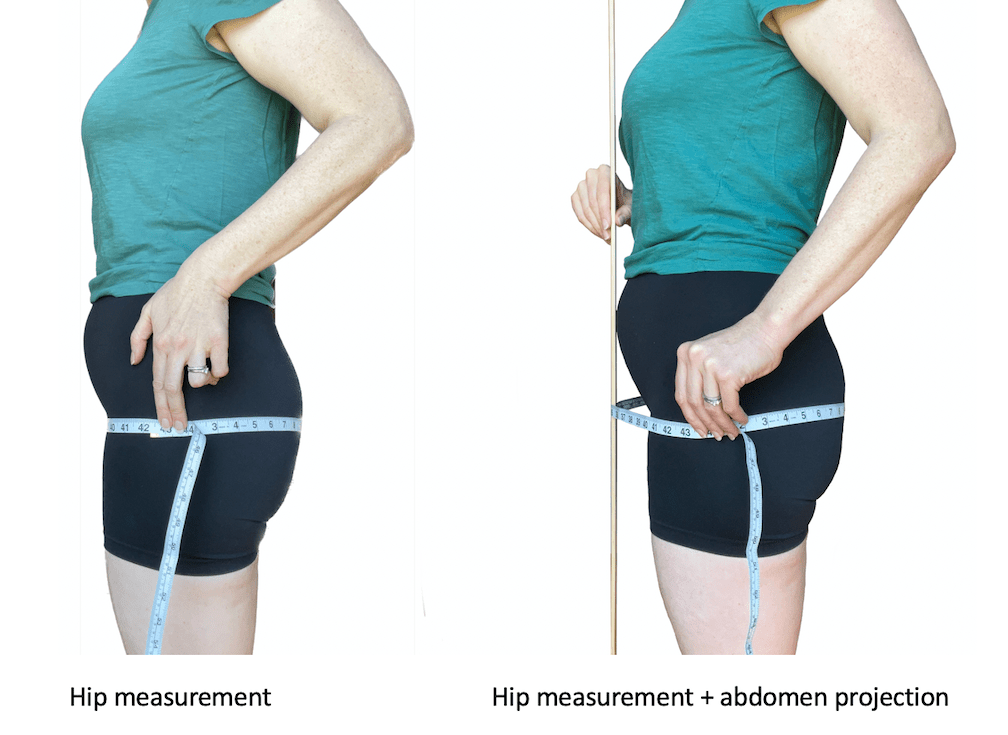
Without the yard stick, my hip circumference is 42 inches. With my abdomen projection included, my hip circumference is 43 inches. So I knew that I wanted the finished garment hip measurement to be 43 inches or greater so that the fabric would fall straight down from my abdomen and not cling to it. One size up from my size is an XL, with a finished garment hip measurement of exactly 43 inches, so that’s what I chose.
The size XL skirt is the sweet spot for me, and I’m VERY happy that I sized up. The size L would have technically fit me just fine, but the size XL skims and falls away from the body exactly as I wanted it too. I feel comfortable and not too exposed, and the silhouette is still true to the original design.

The top is very relaxed even though I sized down. The arm holes are generous, so at the right angle, you can see part of my bra through the opening. If this bothers you, narrowing the armhole opening slightly or adding a sleeve band may address this, but it could change the silhouette and drape of the top, so I’m not changing it.
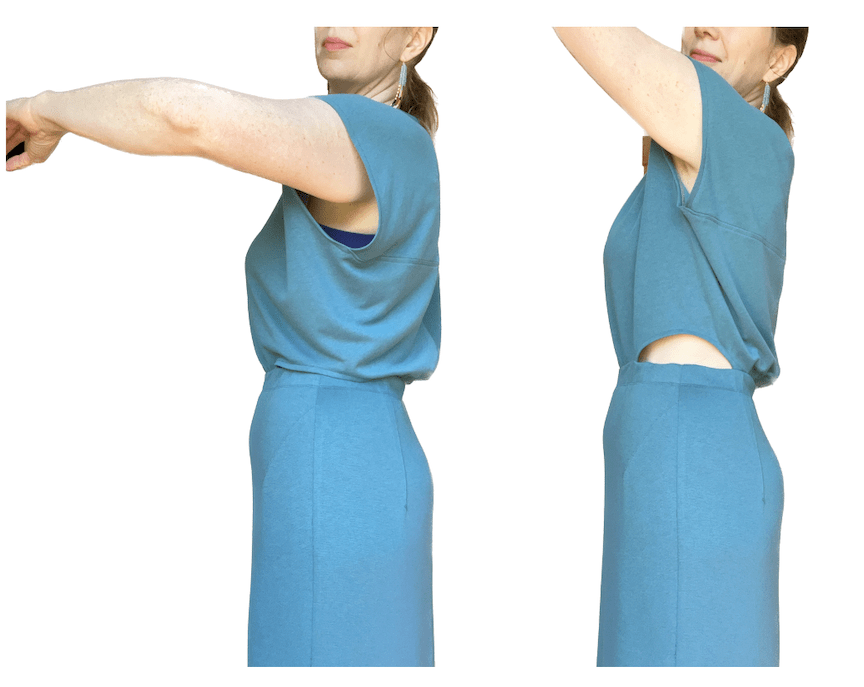
I also love the side cut outs. They are relatively small and not visible unless I raise my arms up fairly high. It’s like a secret sexiness level you can unlock at your own discretion.
Construction
One of the coolest features of the Teague dress is that the top is one piece of fabric that wraps around the entire body. Instead of the traditional bodice pattern pieces with shoulder and side seams, this design re-imagines how fabric can be directed around the body to create negative space. The approach reminds me Julian Robert’s Subtraction Cutting method, which explores creative ways to wrap the 3D body in 2D fabric.

Sewing the Teague dress went smoothly for me, but with a few caveats. The instructions give you many options for construction; there are 3-5 different stitch choices for seams, hems, and neckband, and two different options for constructing the waistband.
So you can choose your own adventure here, although some options may give better results than others depending on your fabric and your sewing machine capabilities.
It’s also worth noting that the Teague dress was not tested. I didn’t encounter any major issues with mine, but there were a few places in the instructions where I relied on my instincts rather than what was written.
- For finishing the cutouts and armholes, we are instructed to fold the fabric edge “along the fold line” but I could not find any such markings on the pattern piece. I just folded along the seam allowance and then topstitched with a chainstitch.
- For neckband insertion, I could interpret the instructions a few different ways, so I just eyeballed the alignment and it worked out fine for me, but your results may vary depending on your fabric and your skill level.
- Because my fabric is heavyweight, I graded my seams in a few places to reduce bulk: along the neckline seam after neckband insertion, and along the top edge of the skirt after attaching the waist tunnel. I also opted for the “dirty” waistband construction option since it yields a less bulky waistline.
Lastly, I added a couple of elements to my Teague:
- I added a slit in the back because I have a long stride. I pressed the center back seam open and topstitched the seam allowances down with a chainstitch.
- I also added topstitching (chainstitching) along the back bodice seams to highlight this cool design feature.


Conclusion
This was a fun sew, and I get a lot of compliments on the dress when I wear it. I never knew I needed a cutout dress in my wardrobe, and I’m hoping this pattern will be a gateway to more dresses in my future.
The instructions do a good job of elaborating all your options as a maker, but they won’t always tell you exactly what to choose. If you are a true beginner or if you like firm direction when you sew, this pattern could feel overwhelming. For me, the fun part of sewing is being empowered to make my own decisions about every aspect of my project, and I like that Daughter Judy fully embraces that part of the creative process.
Like all Daughter Judy patterns, the design offers a wardrobe staple with a unique point of view. The indie pattern landscape can often look fairly generic (how many boxy top patterns do we have now? plain t-shirts? basic wide leg pants?), but the reason I keep coming back to this designer is because Chelsea’s offering a fresh perspective.
And if you’re wondering, this post was not sponsored or solicited by Daughter Judy in any way, I just really like Chelsea’s designs and her patterns always jump to the top of my sewing queue.


Leave a reply to The Crooked Hem Cancel reply