Fun fact: my home city has the longest spring season in the US, yet one glaring hole in my wardrobe for years has been a lightweight spring jacket. I can never settle on a pattern. Enter the Cosmique jacket from Les Lubies De Cadia, a new-to-me French pattern company. Cosmique manages to take utilitarian workwear and elevate it with some interesting design choices, so I decided to give it a try.
Design and fit
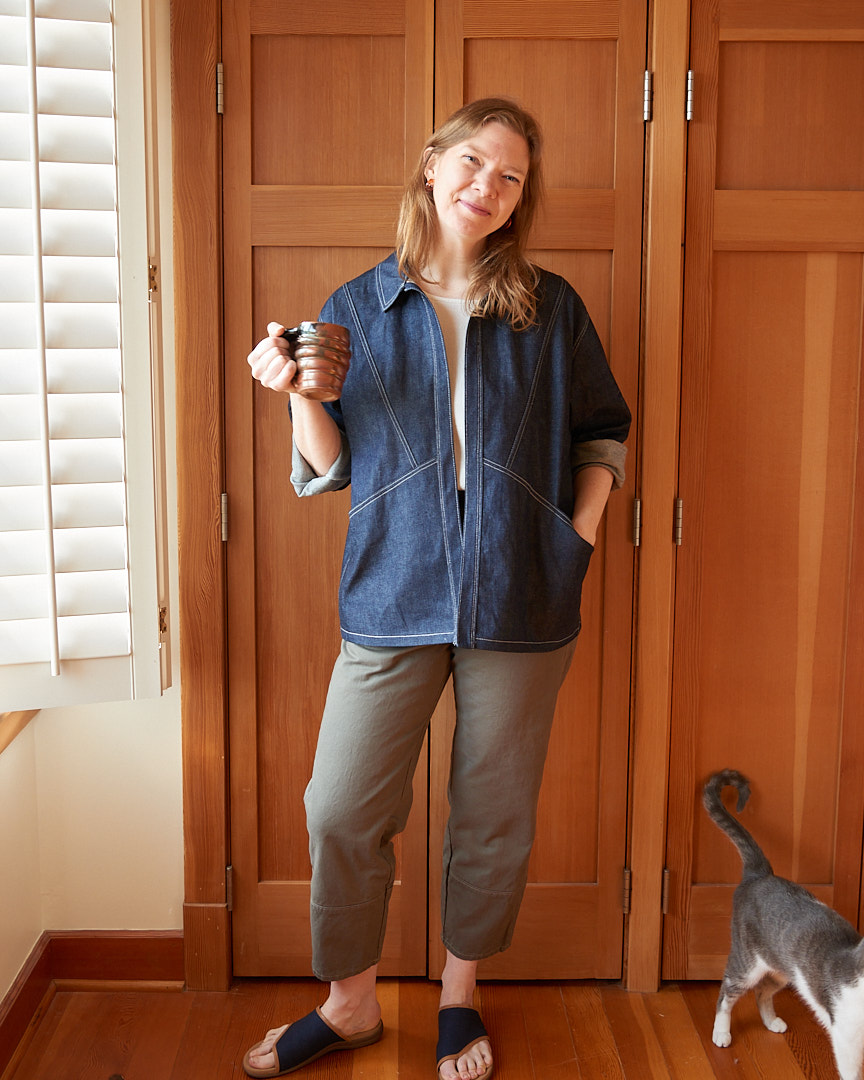
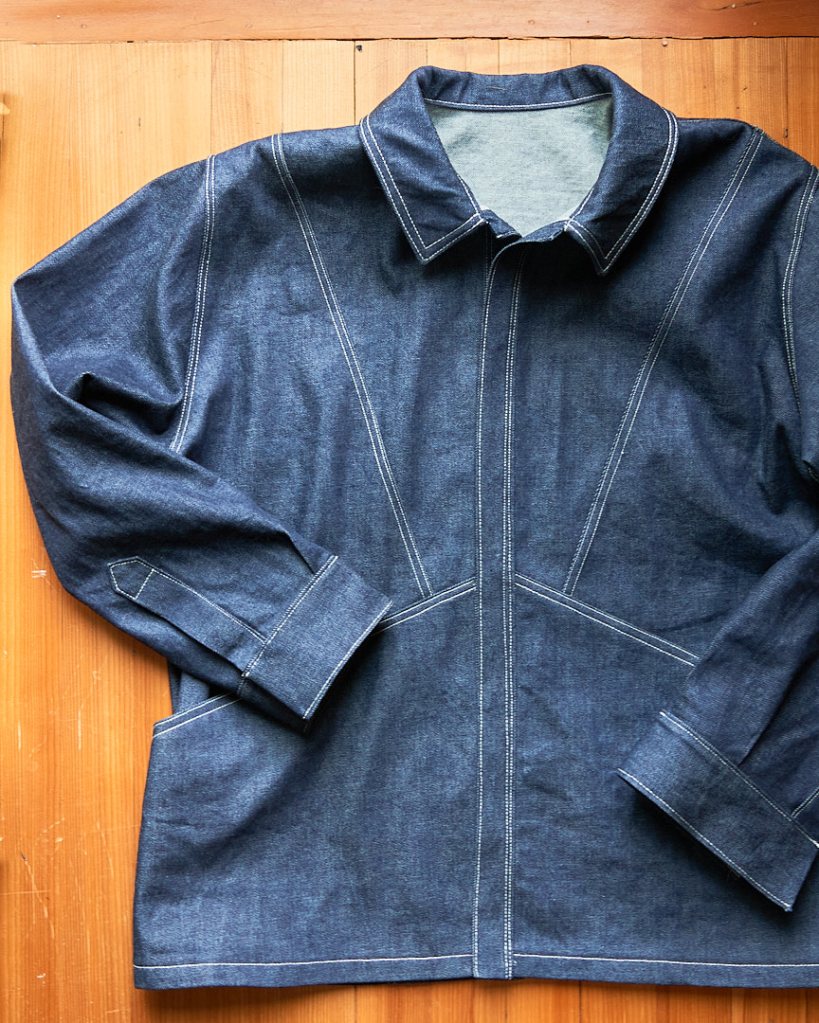
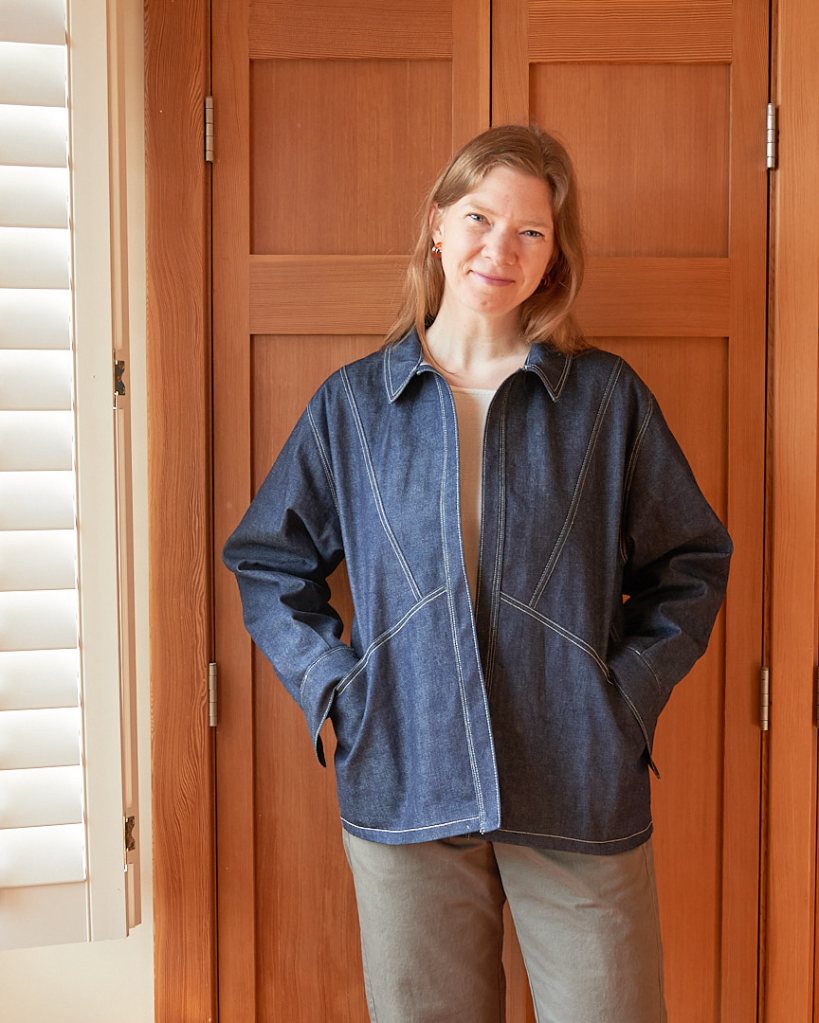
The Cosmique design strikes me as a blend between the Nova coat and the Paola workwear jacket. You get the dramatic, diagonal seam lines on the front (and back) of the jacket but with the everyday practicality of workwear.

Cosmique has a drop shoulder, two front pockets concealed in the front seam, and plenty of ease. There is no shaping through the body of the jacket, so the circumference at the chest is equal to that at the hip. This pattern could easily be a non-gendered design that fits a wide range of body shapes. The fit is intentionally generous and boxy, but the diagonal seam lines break up the square silhouette and add visual interest.
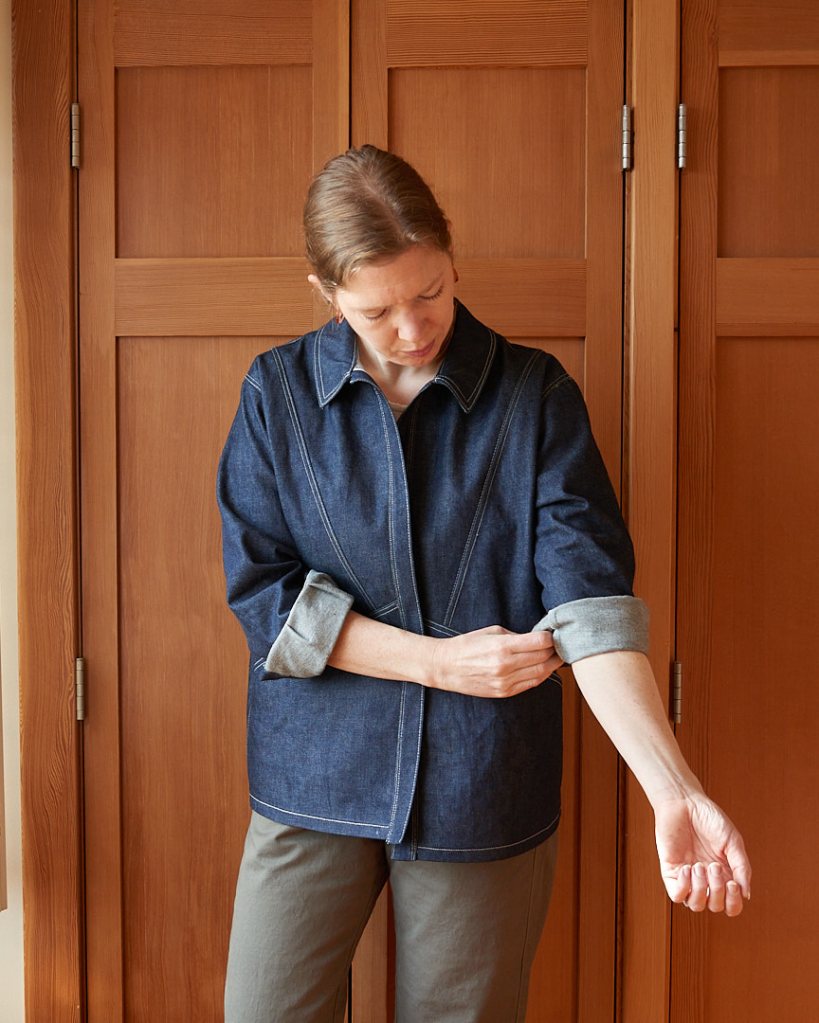
Depending on fabric choice, Cosmique could also be an overshirt, rather than a jacket. I think the design works particularly well with sleeves rolled up, to balance the volume in the body.


Sizing
Cosmique comes in two size ranges: 34-48 (up to a 42.5 inch / 108 cm chest) and 48-54 (up to a 52.75 inch / 134 cm chest). Initially, this pattern was released only in the lower size range, but the designer quickly opened a pre-order to fund a size expansion. Ultimately, it’s still not the most size inclusive pattern on the market, however I’m appreciative of Cadia’s quick response to feedback and her commitment to offering patterns in her full size range. I encourage Cadia to expand her sizing even further.
Cosmique is designed to have 11-12 inches (28-30 cm) of ease at the chest for all sizes. I’d recommend choosing your size by determining how much ease you want in the jacket, then comparing the finished garment measurements to your own body measurements. The finished garment measurements for this jacket go up to a 64.5 inch (164 cm) chest/hip circumference.
I sized down one size for my Cosmique. My body measurements (39 inch / 99 cm chest, 42 inch / 107 cm hip) put me between a size 44 and 46, but I cut a size 42 which still feels very roomy. I have 9 inches of ease at the bust and 6.75 inches of ease at the hip, which feels comfortable.
Construction
This pattern comes with instructions in French and English. The English pdf instructions were clear with helpful diagrams. If you speak French, there is an extensive blog post available here as well as a sew-along video (also in French but the visuals may be helpful). Cosmique is categorized with a difficulty rating of 4/5, but I think it would be suitable for an intermediate sewist who has made a button up shirt (including collars, cuffs, and button bands). A good understanding of how to work with bulky fabrics is also helpful, and something that’s not discussed much in the English instructions.
The pattern recommends a range of heavyweight fabrics such as denim, gabardine, jacquard, or even velvet for this coat, but no mention of recommended weights. I chose a 10 oz Japanese selvedge denim that I’ve had in my stash for years but that always felt too lightweight for jeans.

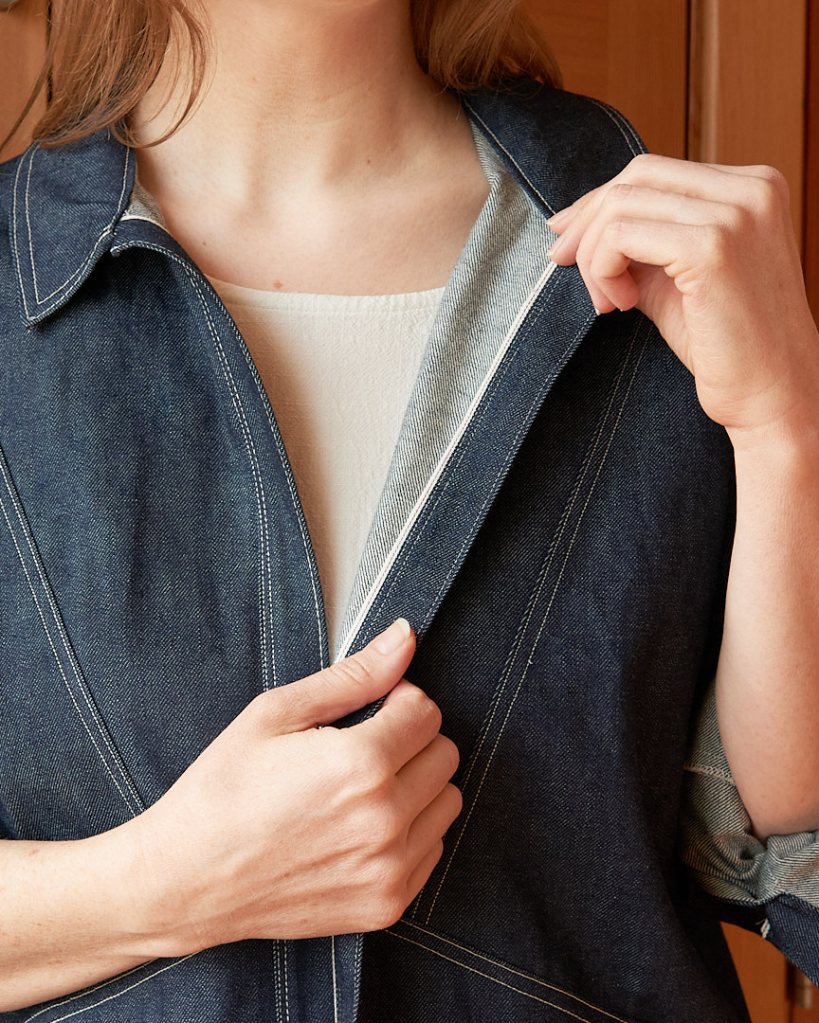
I took advantage of the selvedge edge for constructing the button plackets and the cuffs. I like how I can see a little bit of selvedge peaking out along the inside of the placket when I wear it open (which is always because I haven’t added buttons yet). I slightly regret not leaving a little selvedge exposed on the tower plackets, too, but once I sewed them up there was no way I was going to unpick them.

My one critique of the instructions is the collar assembly. The instructions tell you to sew the two collar pieces together starting at one end and ending at the other, like this:

For collars, I prefer to use directional sewing for a nicer finish. Because portions of the red seam line above are slightly on bias, sewing from one end to the other can cause the fabric to skew as you sew, resulting in a twisted collar. I sew the collar pieces together in 2 passes, starting in the center of the collar and sewing toward the short ends, like this:

When sewn from the center, the under collar can be slightly stretched evenly as you sew (this tutorial illustrates how, the original source is David Page Coffin). Stretching the under collar relative to the outer collar gives the collar its own natural 3D shaping, seen here as the collar is laying on my ironing board. This shaping ensures it will always lay correctly on the finished garment.

After stretching, the under collar is slightly smaller, which encourages the whole collar piece to curve around the neck rather than sit flat. It also prevents the under collar fabric from bunching up or wrinkling once the collar is sewn to the jacket.

Final thoughts
I like this jacket so much that I started wearing everywhere it as soon as I’d sewn the last seam. The design re-imagines a basic workwear overcoat into something a little more elegant.
A few things I’d do differently next time, if I make it again:
First, this pattern has 3/8 inch (1 cm) seam allowances throughout, which makes serging seams a breeze. I prefer a flat-felled seam on a jacket like this, though, so if I make it again I will increase the seam allowance to 5/8 (1.6 cm) instead and flat fell everything.
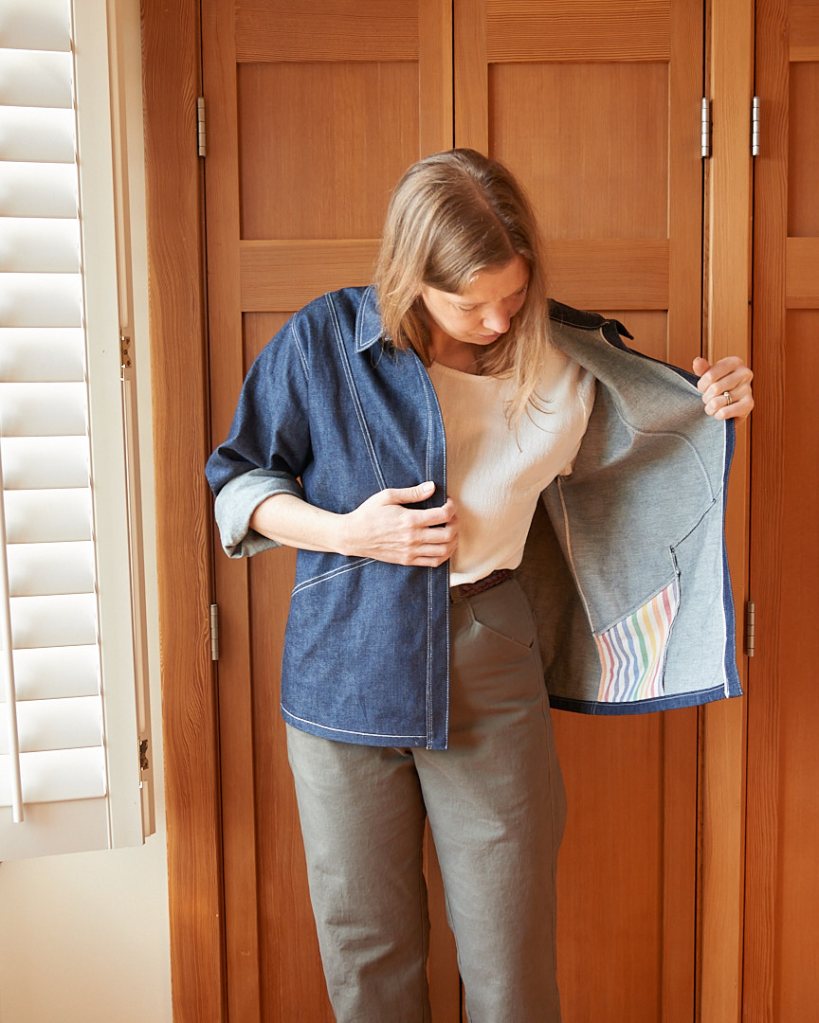
Second, I’m also wondering if there is a way to make the pocket bag larger. It’s deep enough to carry my phone, but it’s not as spacious as I’d hoped. I’m considering extending the pocket bag all the way to the button placket next time, although this may mean some changes to the pocket construction.
Finally, I would grade the sleeve cuffs down to a smaller size if making this pattern again. The cuff circumference feels quite large even with a sweater underneath, and I can pinch out at least two inches of fabric before they start to feel right.
These adjustments are fairly minor, though. If you are looking for a transitional jacket for spring or autumn, this pattern is worth a try.


Leave a comment