
The Shop pants are the first pattern released by Open Studio last year, and they’ve been on my radar ever since. I decided to give this pattern a try after seeing so many positive reviews and learning a bit more about the pattern company.
Open Studio is an offshoot of Sew Co., which is a Nashville-based sewing factory. They serve a variety of smaller, sustainably-focused brands like the ever-popular Elizabeth Suzann. You can read about their commitment to sustainability, environmental stewardship, and fair wages here.
Design and fit
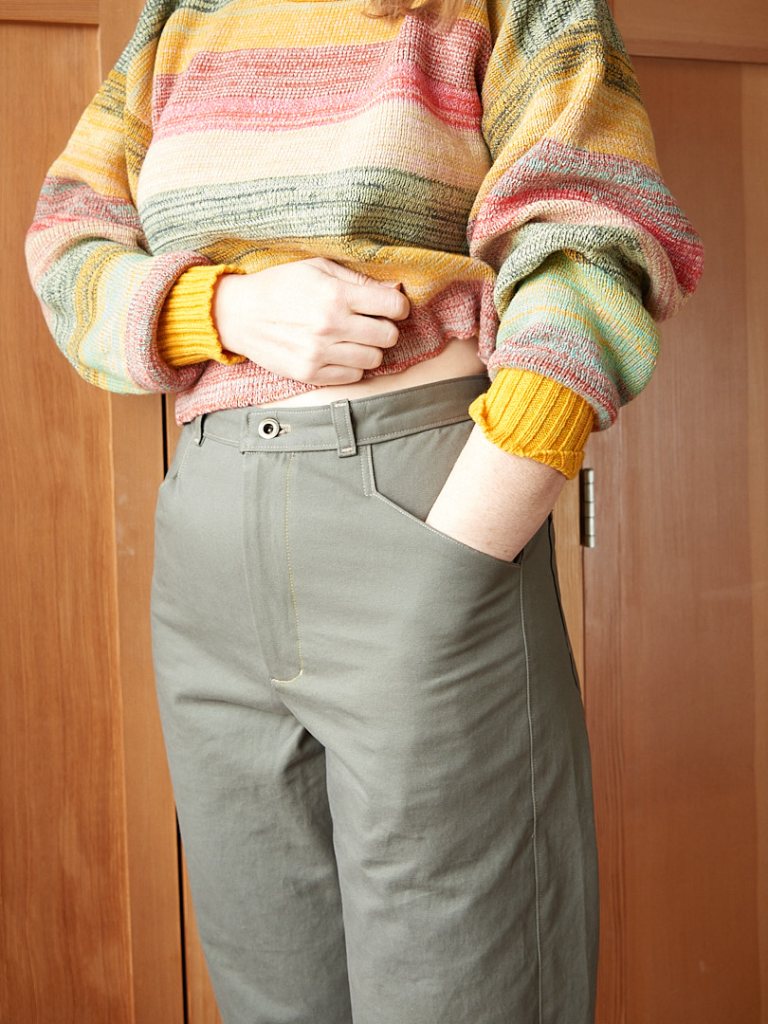
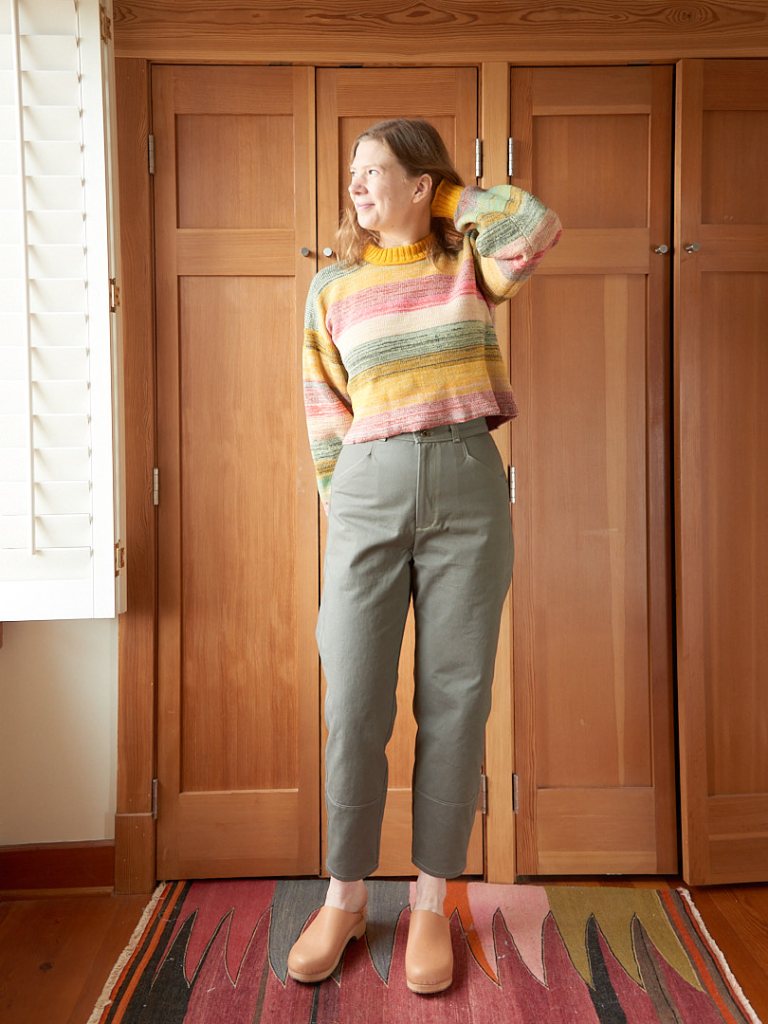
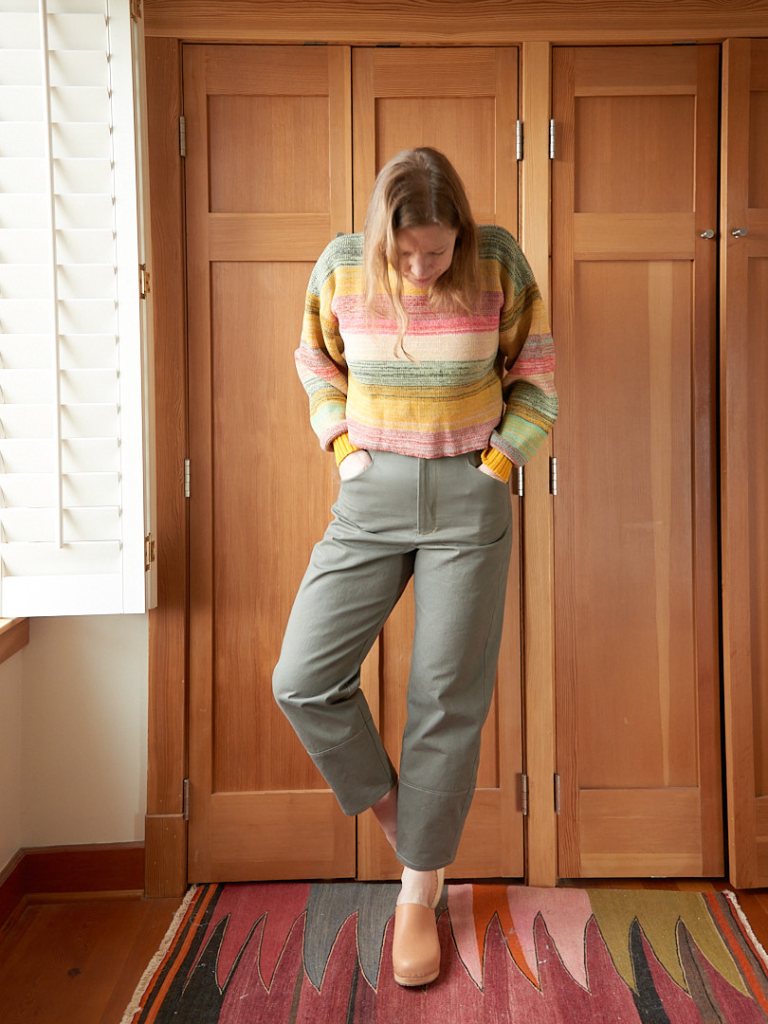
The Shop pants are a “utility pant” that can be dressed up or down. They are a high-waisted and close-fitting from the waist through the hip, but have ample ease in the thigh and leg for a full range of movement. The barrel-shaped leg tapers at the ankle.
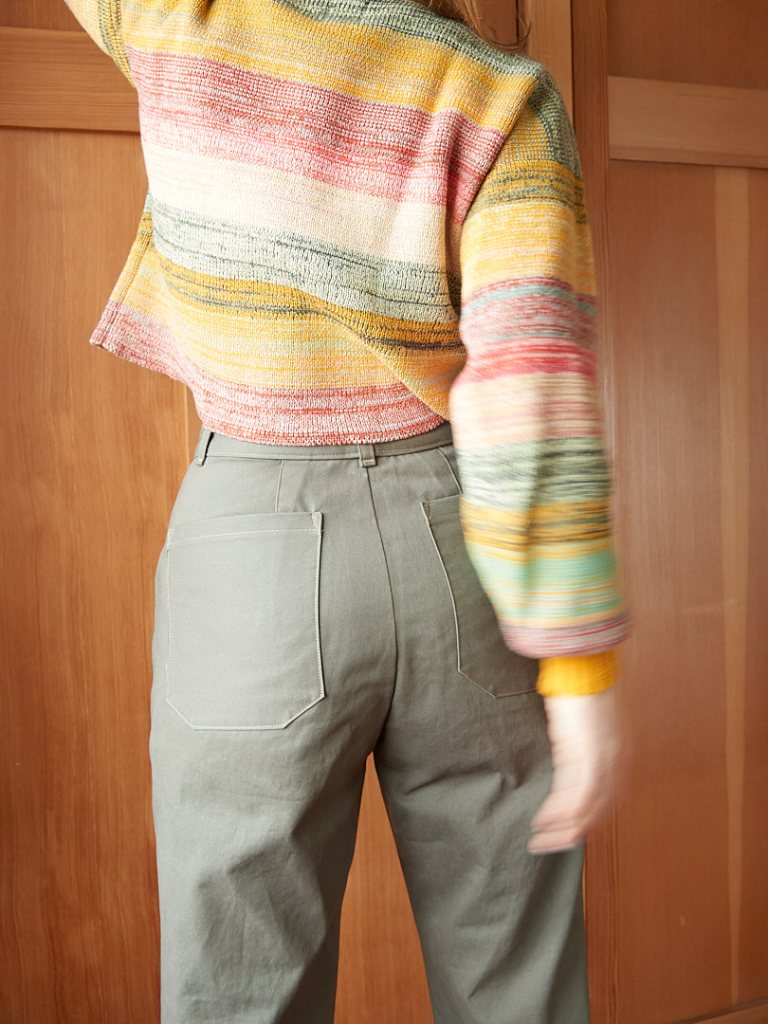
The Shop pants have a semi-contoured waistband and two darts in the back waist to create shaping. They have a unique, angular front pocket shape with DEEP pocket bags. I can fit my whole hand in there well past my wrist. At the bottom, there is a lower leg panel that creates a wide hem.

The barrel leg or balloon-leg silhouette is popular right now, and I have a mood board here with inspiration from the fashion world. There are a number of home sewing patterns that offer a similar silhouette, but I chose the Shop pants because I liked the design details (zipper fly, leg shape, fit) and because I wanted to support Open Studio.

Sizing and Ease
At the writing of this post (Feb 2023), the Shop pants have a size range spanning a 34″ hip to a 51.5″ hip. A size expansion and full pattern re-issue is coming soon.
If you purchased the pattern before February 2023, be aware that the finished garment measurements on the size chart are inaccurate. There is an updated size chart on the Open Studio website here.
Based on that updated size chart, the Shop pants will have between 1.5-4 inches (3.8-10 cm) of ease at the hip depending on your measurements. It’s normal to see ease changing gradually as sizes increase or decrease, but here the ease jumps up and down unexpectedly depending on your body measurements.
One complicating factor is that the body measurements used to determine one’s size are given as a range, rather than a single point. The most extreme examples are at the upper end of the size chart. For example, if you have a hip circumference between 49 and 51.1 inches, you are directed to sew a size 7. But within that single size, you could have between 1.5 to 4 inches of ease, depending on your hip measurement. That will look and feel very different.
If you are using Top Down Center Out to fit your pants, waist and hip ease are straightforward to customize while fitting, and I did not encounter any hiccups with sizing or fitting my Shop pants. However, if you are using other methods to fit your pants, go cautiously with choosing your size for this pattern. I’d strongly recommend checking your measurements against the pattern pieces before you begin the project.
I’m eager to see the upcoming re-issue of this pattern. The size expansion is important, and I’ll be curious to see what, if any, sizing tweaks are made to the existing sizes.
Waistband
The waistband on the Shop pants deserves some attention for its clever design. The Shop waistband is constructed from 4 pieces: 2 left and 2 right, each side having one inner and one outer piece. Once constructed, the waistband resembles a flattened “U” shape, with the straight ends cut parallel to the grainline and a slight curve around the center back.
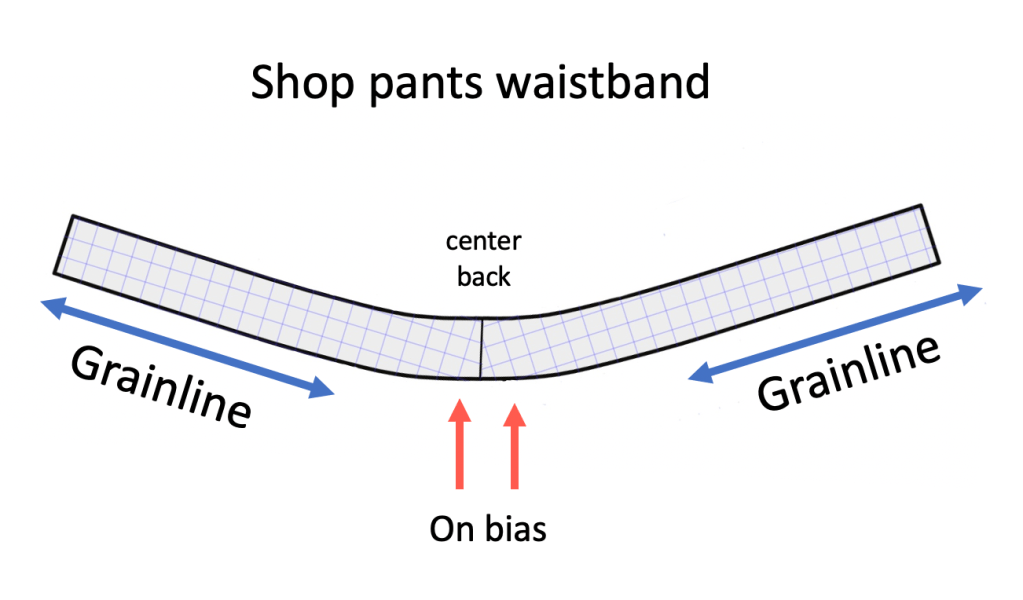
The curve at the center back creates a little flare in the back of the waistband, as you can see in the scale model below. This means the waistband will be less prone to gaping in the back, a common complaint for straight waistbands.
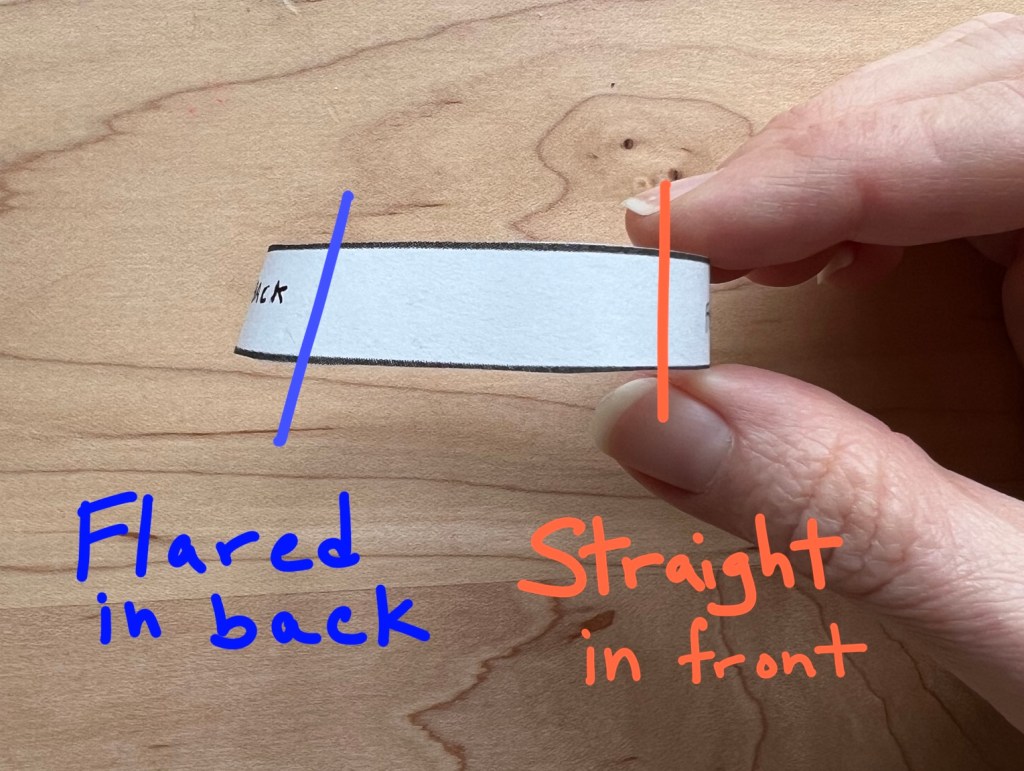
Because the curved portions of the waistband are cut on a slight bias, this area of the waistband is also a little more flexible, while the straight portions are more stable. It’s tempting to think this shape gives you the best of both worlds: comfort and flexibility of a contoured waistband, but the stability of a straight one.
By comparing the Shop pants waistband design with a few other contoured waistbands, we can see some important differences.
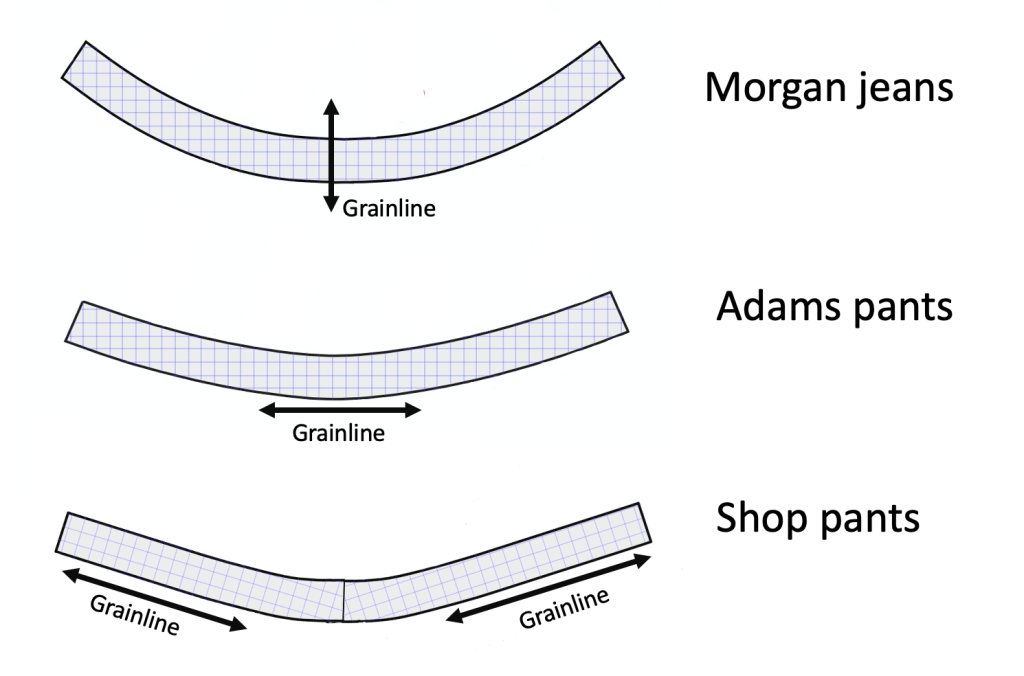
Both the Morgan and the Adams waistbands are evenly curved from end to end, and because they are 2-piece waistbands (no center back seam), the ends of the waistband must be cut on bias while the back is on the straight grain, which is the opposite of the Shop pants.
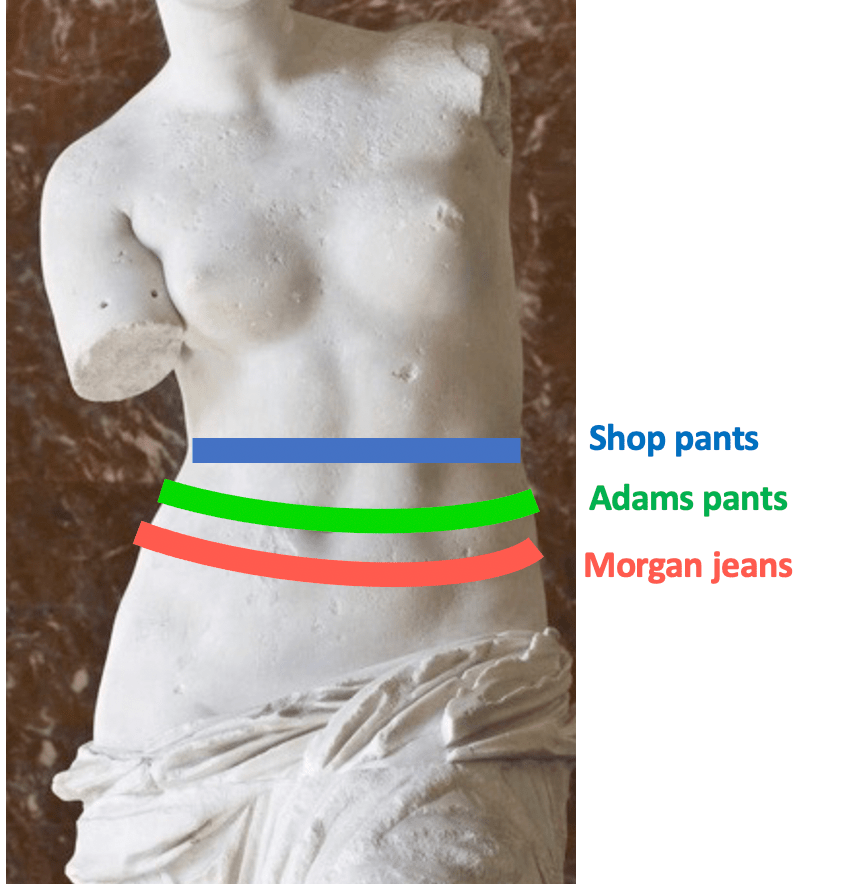
The degree of curvature in the waistbands is dictated by the intended location of the waistband and an assumption of how curved the body is there. Because the Shop pants are high waisted, a straighter waistband was chosen.
Each design has its own benefits and trade offs. If you like the stability of a high, straight waistband, but often see gaping in the back, then the Shop pants waistband is worth a try.
The trade-offs for the Shop waistband are that a 4-part waistband takes a little more effort to construct than a 2-part waistband, and the center back seam becomes bulky where the 4 interfaced pattern pieces are stitched together.
By my count, the bar tack for the center back belt loop on the Shop pants must traverse 14 layers of 8 oz (or heavier) fabric, plus 8 layers of interfacing. My machine can usually handle 13-14 oz denim jeans without issue, but it struggled with the rear bar tack on the Shop pants. If your machine is not up to the task, here are a few ideas to try.

Tips to remove bulk from the waistband
- Hammer bulky seams with a mallet before sewing. I use a rubber mallet or a rawhide mallet for jewelry-making. Hammer individual seams on a smooth, hard surface.
- Use a lighter weight fabric for the inner waistband pieces, such as a quilting cotton or the same fabric as your pocket lining.
- Trim the interfacing pieces by a scant 1/2″ on all sides before fusing (effectively removing the seam allowance).
- Move the position of the center back belt loop. Instead, place two belt loops on either side of the CB waistband seam, or criss-cross them to form an “X”, avoiding the bulkier areas.
Construction
The Open Studio sewalong videos for the Shop Pants are clear and easy to follow, and they provide a helpful visual if you are new to some of the steps like installing a zipper fly. The written instructions are also clear, and I particularly liked the detailed description and measurements provided for attaching the zipper.

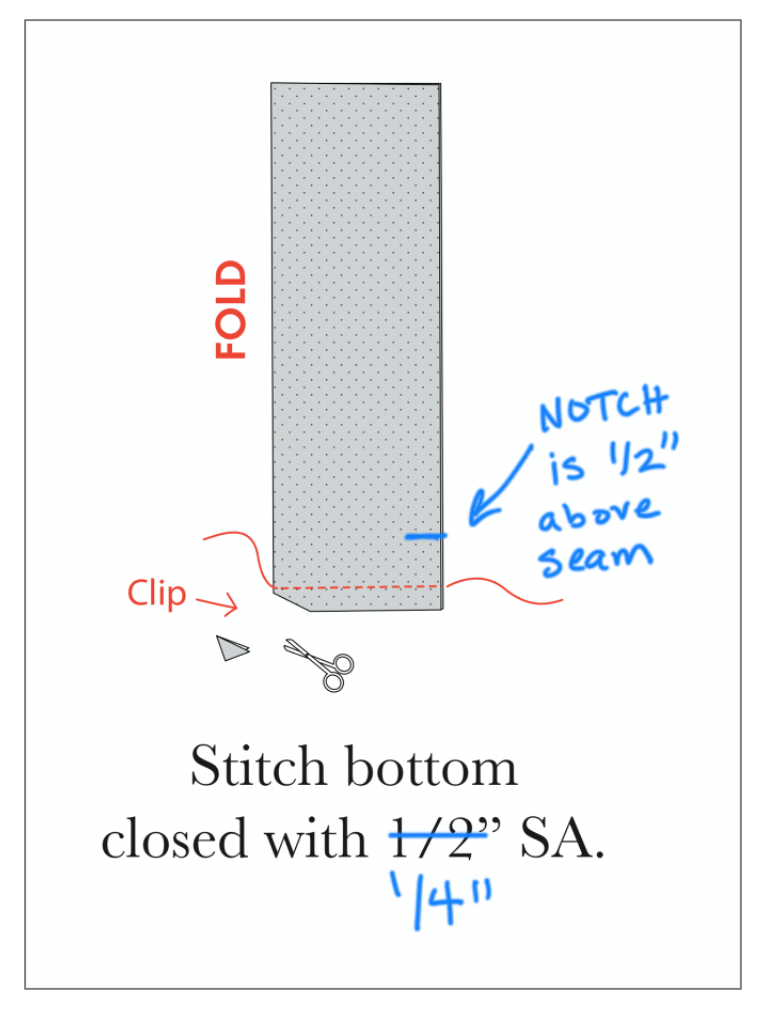
There is a discrepancy between the written instructions and the sew along video on step 18 of the zipper fly construction; when assembling the fly extension, I’d recommend a 1/4″ seam allowance rather than a 1/2″ SA. If you are using the recommended zipper length, the smaller seam allowance will ensure that your zipper will align properly with the fly extension.
Fitting with Top Down Center Out
My hip circumference is 42″ and I cut the size 4, which corresponds to a body with a 41-42.5″ hip. Using Top Down Center Out, I customized the circumference of the waistband first, settling on about 1″ of positive ease (and ignoring the size chart).
Next, I fit the toile according to the Top Down Center Out workflow. To my delight, I was able to fit this toile in about 5 minutes. Not all patterns come together so quickly, but I’m always grateful when they do.
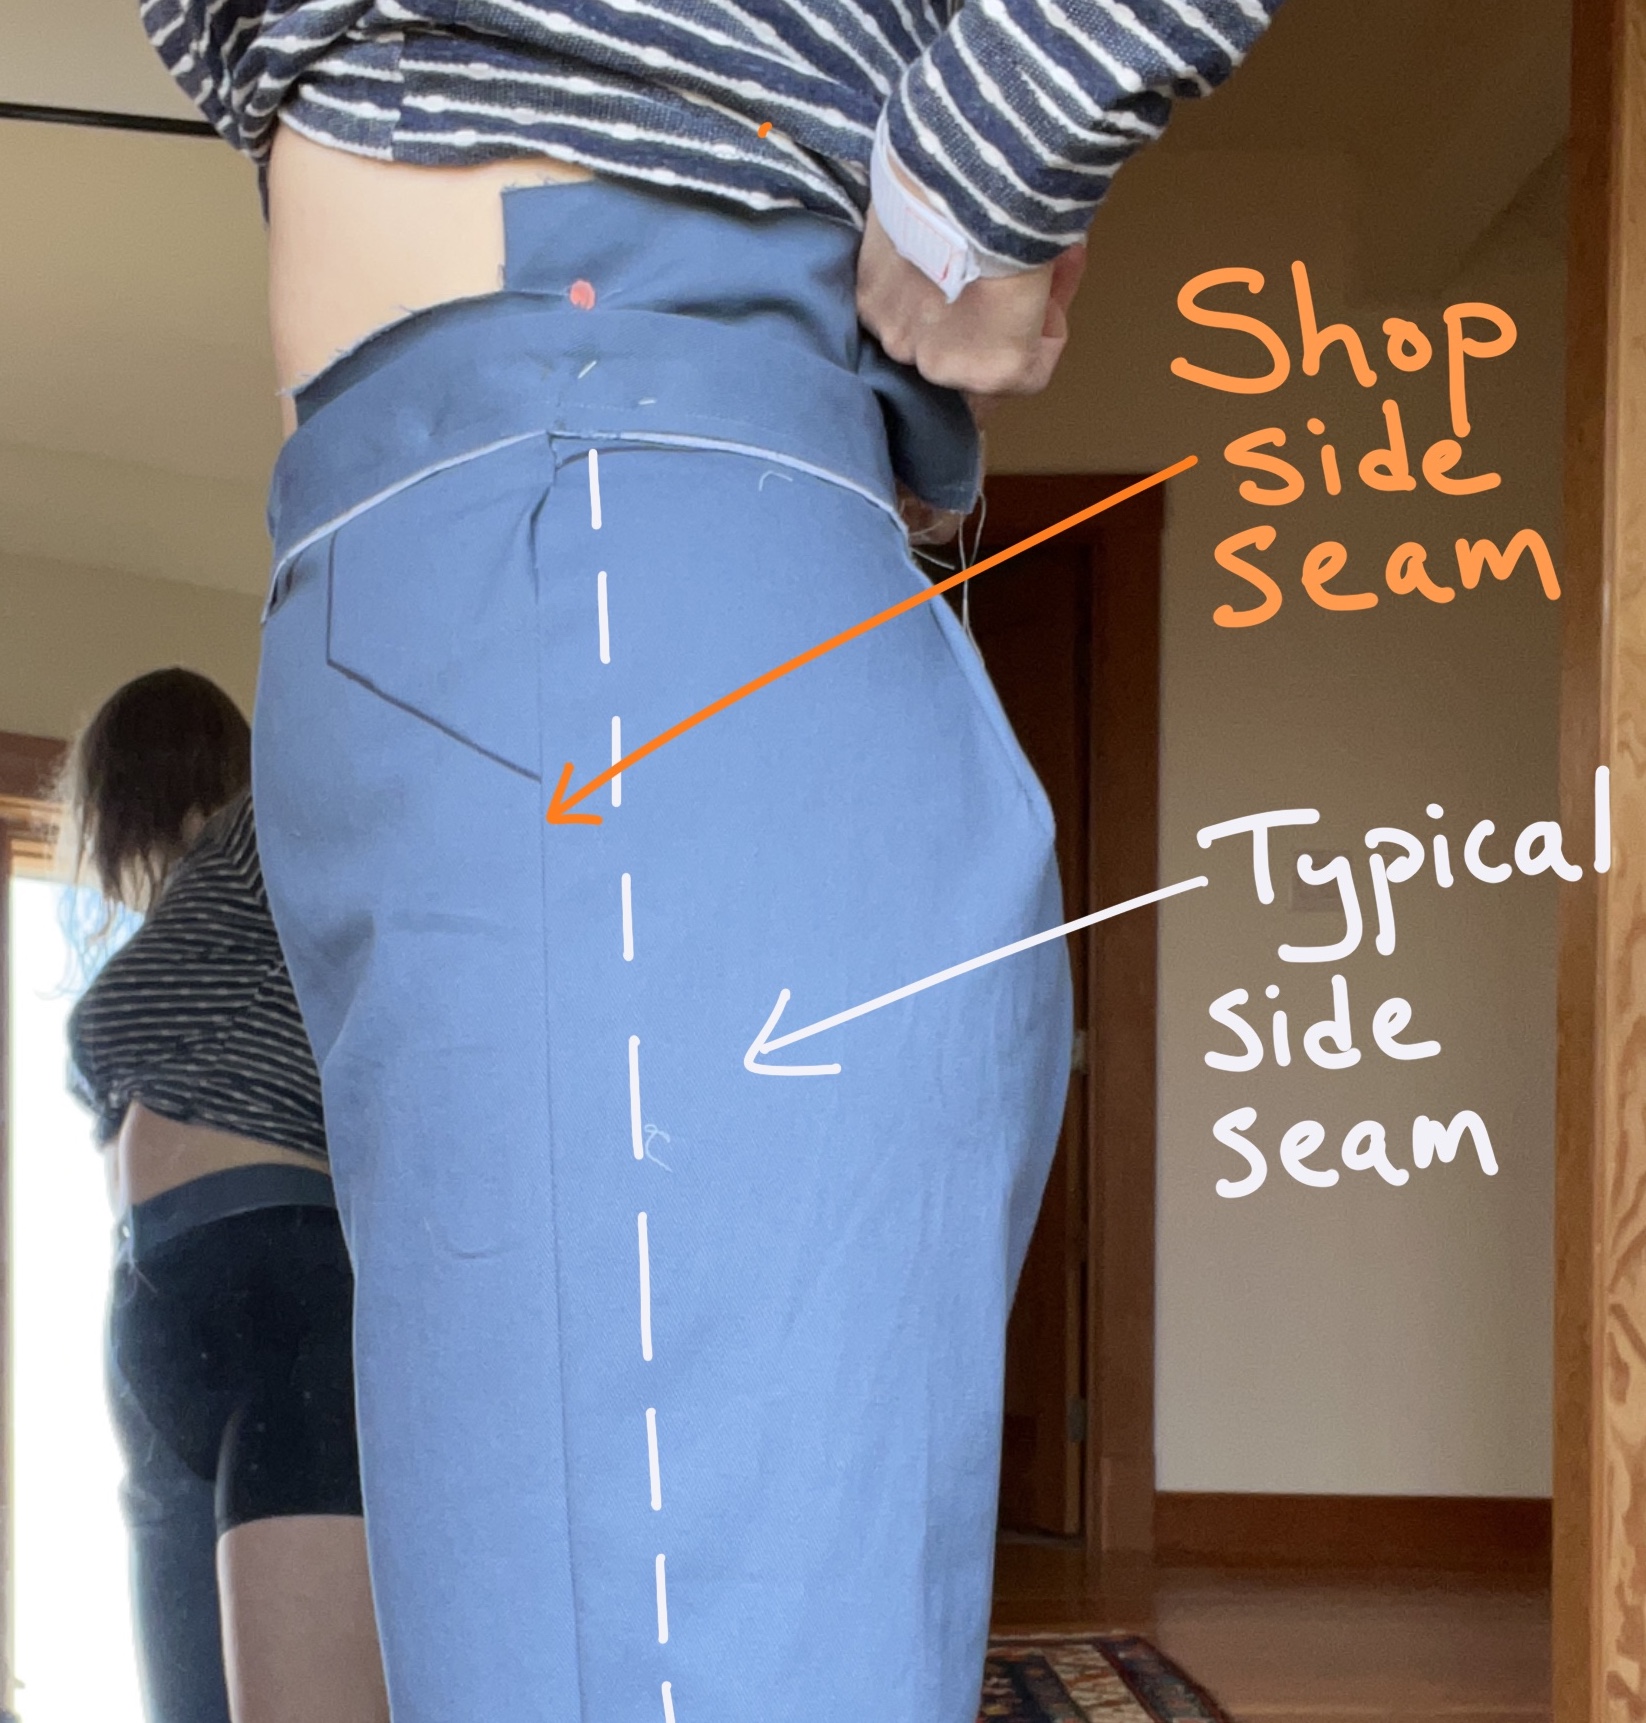
If you are using Top Down Center Out, be aware that the side seam on the Shop pants is intentionally placed toward the front of the body. I didn’t realize this at first and inadvertently introduced a sharp curve at the very top of my side seam. A quick re-pin and the side seam was straight again.
In the end, my adjustments were:
- Add 3/4 inch to the rise, tapering to 1/2 inch at the center back
- Increase the dart intake by 3/4 inch total
- Taper the side seams by 1/2 inch at the waistline
- Lengthen the leg by 2 inches (next time I will do 3 inches)
I did not adjust the hip circumference on the size 4, which gives me about 1.5 inches of hip ease and is enough to move around comfortably. Since I am using a twill fabric for my final garment, I expect the fabric to grow slightly and add a little more ease as it’s worn.

Final Thoughts
After wearing the pants for about a week, I am very happy with the fit and the function of this pattern. Although the waist and hip are relatively close-fitting on this pair, the ample room in the thigh and leg mean that I can sit, squat, bend, and move in full comfort. I even wore these pants hiking and was very comfortable.


The Shop pants work well with a fabric that has low drape and moderate structure to show off the barrel shape. I used an 8 oz brushed cotton twill from sellfabric.com for this pair, which has a velvety hand and a tight weave; I think it’s the perfect substrate for these pants. Despite being a twill, these pants have kept their shape in the waist, hip, and seat and have not become baggy after several days of active wear.


The only area that has stretched a little is the top corner of the pocket, likely because the front pocket is cut on a bias and it sees a fair amount of strain as one sits and bends. Next time, I may add a little strip of interfacing along the edge of the pocket opening to see if that helps.

All in all, I’m very happy with my Shop pants, and I love the fit. If you are able to overlook the sizing issues, then this pattern is worth trying, especially if you are using Top Down Center Out. I’ve already got a second pair on my list for spring, and I look forward to the re-issue of this pattern coming soon.


Leave a comment