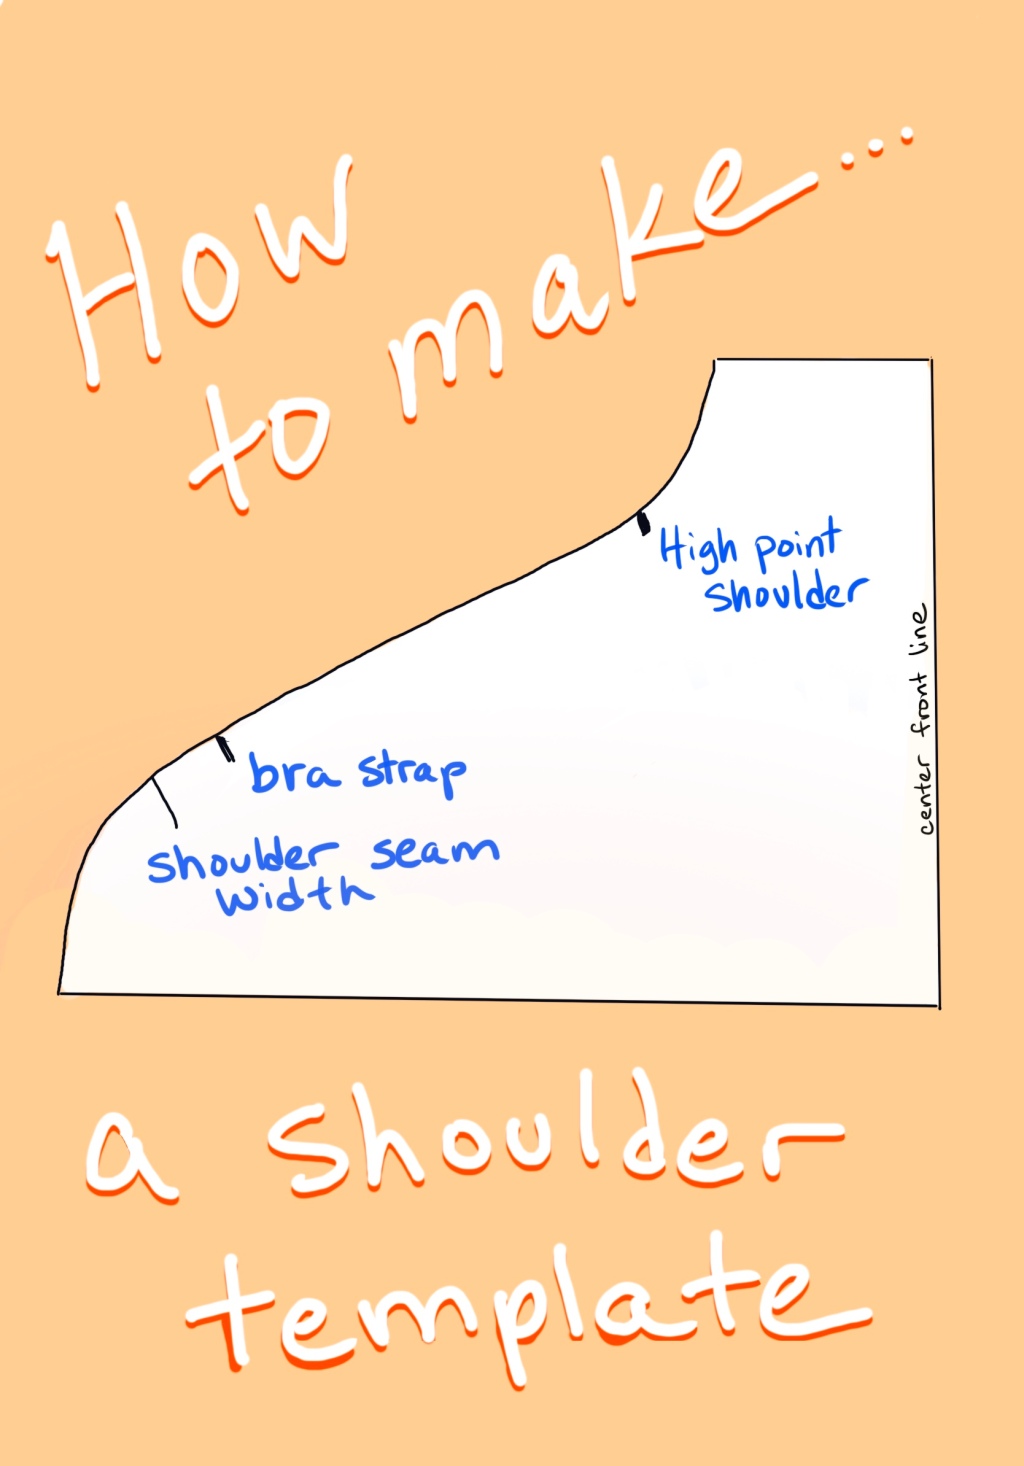
Achieving the perfect fit for a bodice begins with the shoulders. A shoulder template is a great way to quickly check the shoulder width and slope on a new pattern to see if any adjustments are needed before you start sewing. In today’s post, I’ll walk you through how I made my template and how I use it.
There are a variety of ways to make a shoulder template. A popular method is to have a partner trace the outline of your shoulder slope onto a piece of paper taped to a wall, as explained in this video from Threads. However, if you rely solely on the instructions on the Threads video, you may not end up with an accurate copy of your shoulders.
I asked my husband, an engineer with a healthy appreciation for accuracy and precision, to follow the instructions in the video to trace my shoulder. We did the tracing twice and ended up with two very different shoulder outlines that were almost 1 inch different in some places. We quickly discovered that keeping your pen perfectly level with respect to two dimensions (up-down and side-to-side) as you are sliding it along a fulcrum, aka your shoulder, is extremely difficult to do.
So we developed some tweaks to the method to get a more accurate template.
Step 1: Tracing
Tape some paper to a wall and stand as close to the wall as possible without changing your natural posture. My shoulder blades just barely touched the wall and my feet were hip distance apart, weight balanced equally on both feet. Your partner will trace the outline of both of your shoulders and neck onto the paper. For the partner who is tracing:
- Fix the pen in the center of your vision and move your head in exact unison with the pen as you trace. This helps you maintain a visual lock on the angle of the pen and makes it easier to hold in a fixed position as you trace.
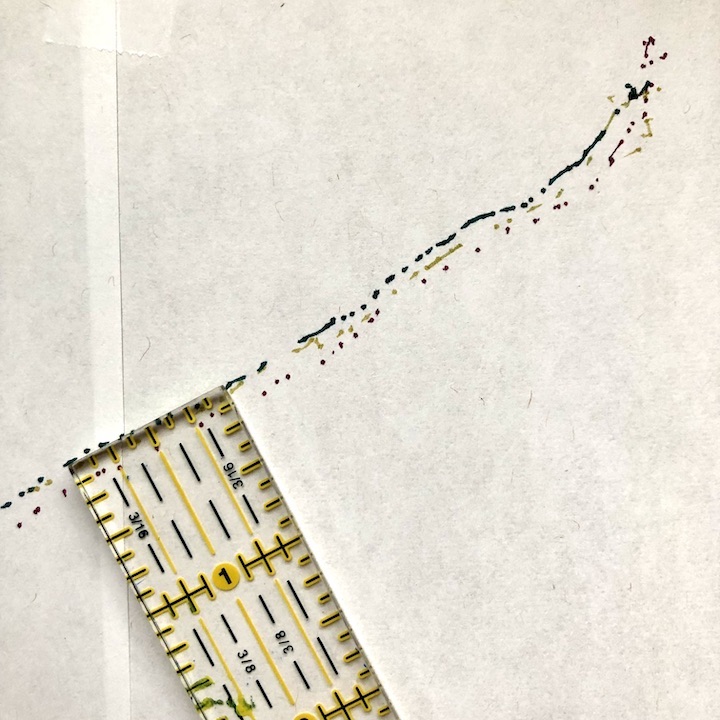
- Instead of tracing a line, mark the shoulder position with dots. I found it much easier to control the pen and ensure that it was consistently level if I wasn’t also dragging it along my husband’s shoulder and the paper behind him. Use a pen or a marker for this, not a pencil.
- Go slowly. The faster you move the pen, the less control you have.
- Trace multiple times. A good way to improve a measurement is to repeat it, then take the average. The person who is being traced needs to be as still as possible until all tracings are complete.
- Trace your neck up to your jawline. This will help you find the template midline later.
After doing all of the above, I was able to do three tracings of my husband’s shoulders with up to 3/16 inch difference between the dotted lines in the most divergent places. That’s much better than the original 1-inch difference we saw at first!
Step 2: Take the average and subtract the radius of your pen (yes, really)
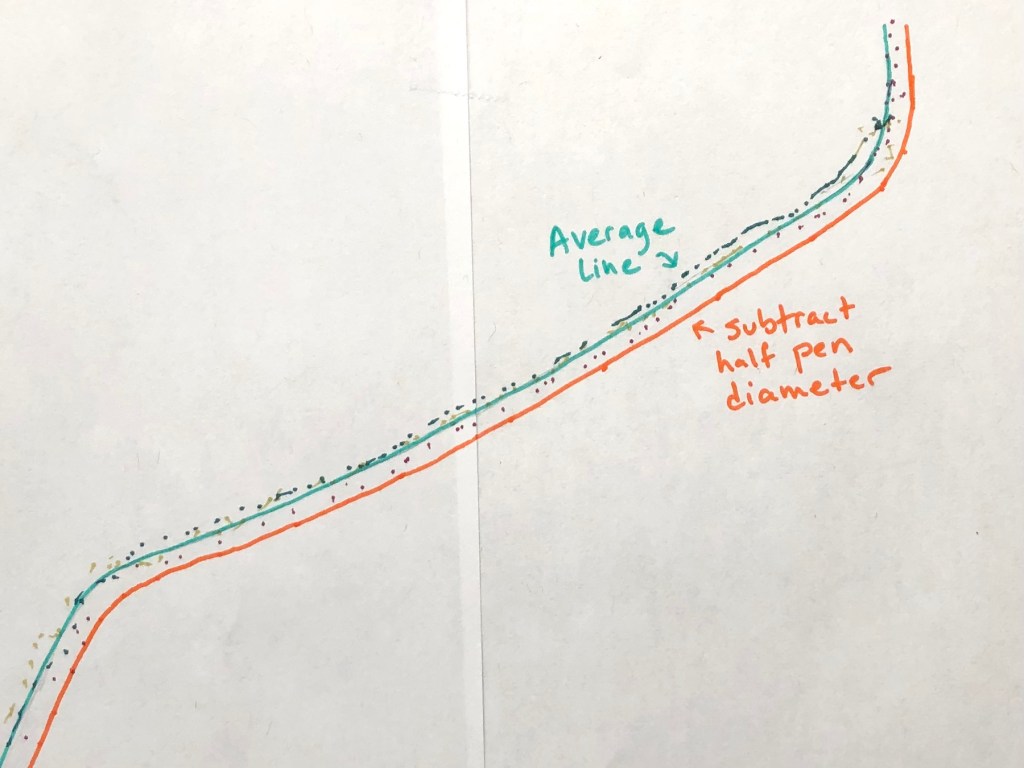
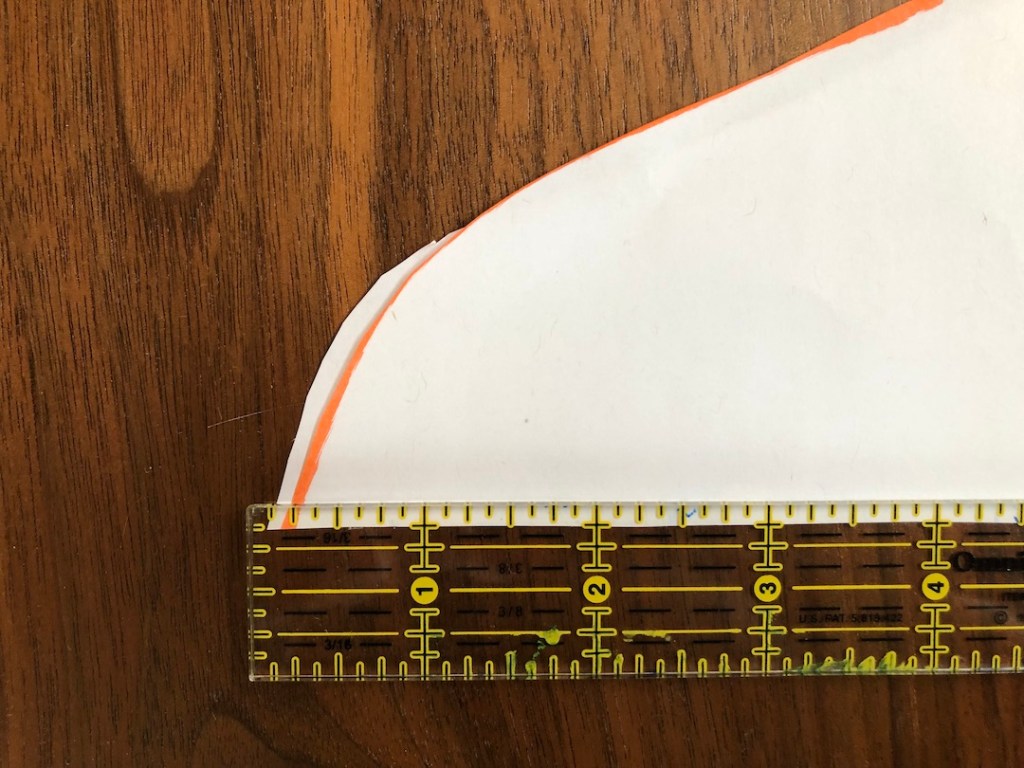
Take the average of all the dotted lines. I used a pencil to freehand a line that passed through the middle of the spread of dots at any given point along the tracing. A French curve can help tidy up the curves if needed. When you’re happy with your line, mark it in pen (below, in cyan).
Measure the diameter of the pen that you used to trace the shoulder. I held my pen against a ruler and noted the width. Divide this number in half. My pen was 3/8 inch wide, so half is 3/16 inch. Draw a new shoulder outline that subtracts this amount from the line you just drew (below, orange). The orange line is now your true shoulder outline.
Step 3: Validate your template
A quick way to validate the tracing is to compare the width of your neck to the width of the neck on your tracing. This is why it’s important for your partner to trace the full length of your neck so you have enough real estate to work with. Your neck width should be the same or extremely close to your template neck width.
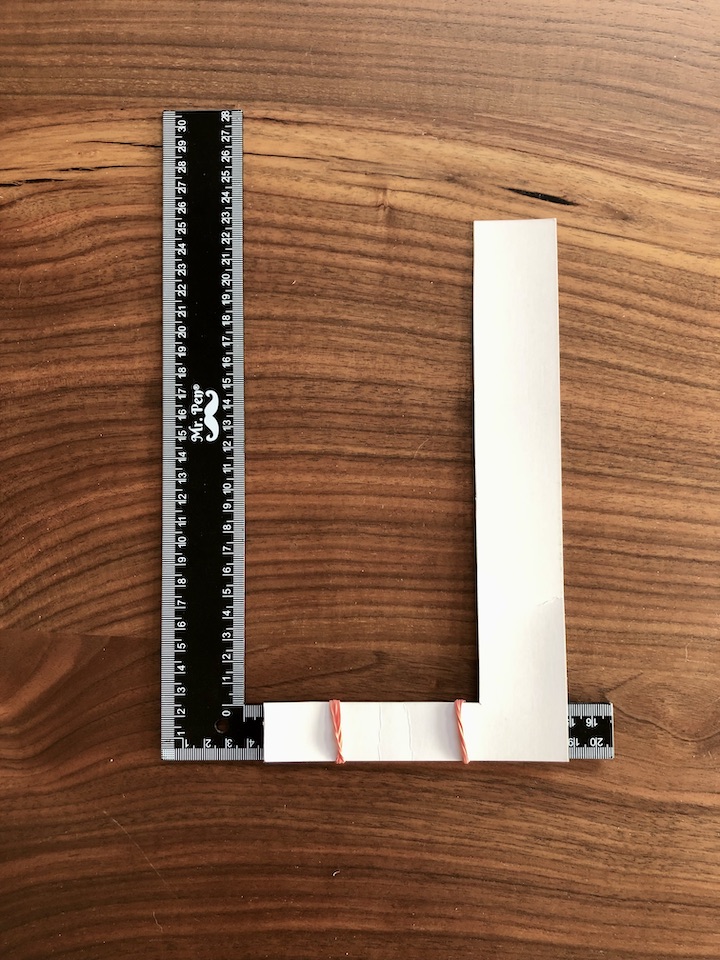
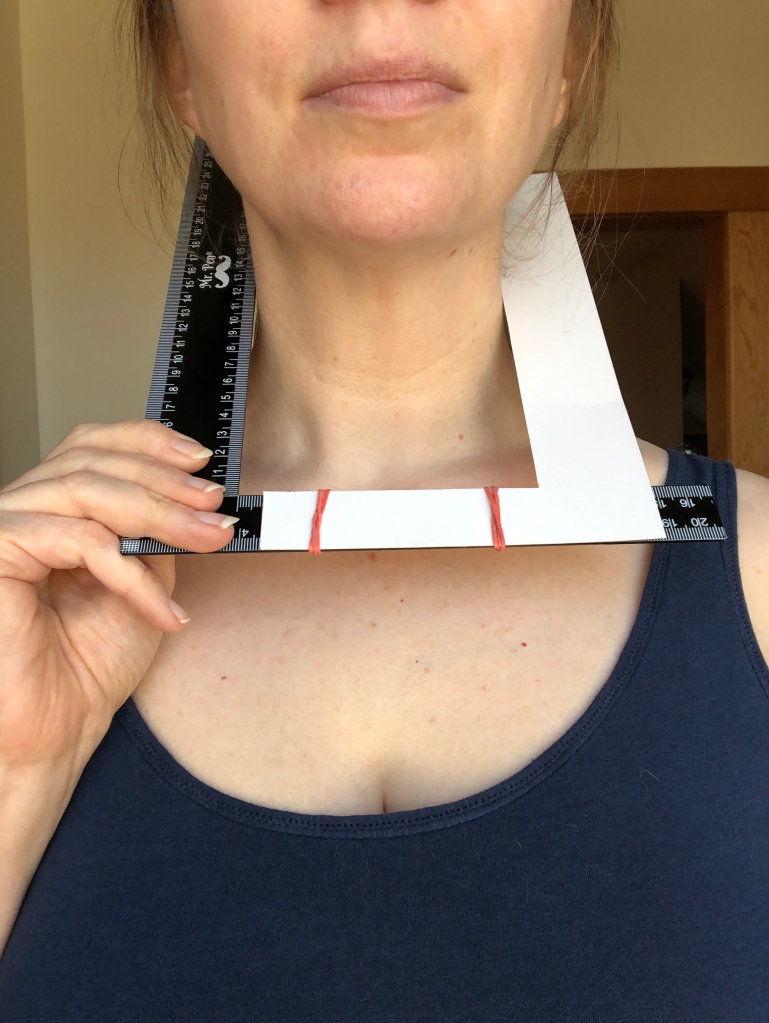
To measure the width of your neck, use two L-square rulers bound together with rubber bands to create a kind of calipers. I only have one L-square ruler, so I cut out a cardboard copy of it and then banded the two together. Credit goes to Michele Win for this idea.
Necks are soft, so this can be a bit tricky to measure exactly. Make sure that neither side of the calipers is digging into your neck, just lightly touching. When in doubt, take multiple measurements and average them.
My neck width is 4.25 inches wide and so is my template. So far so good.
Step 4: Find the midline
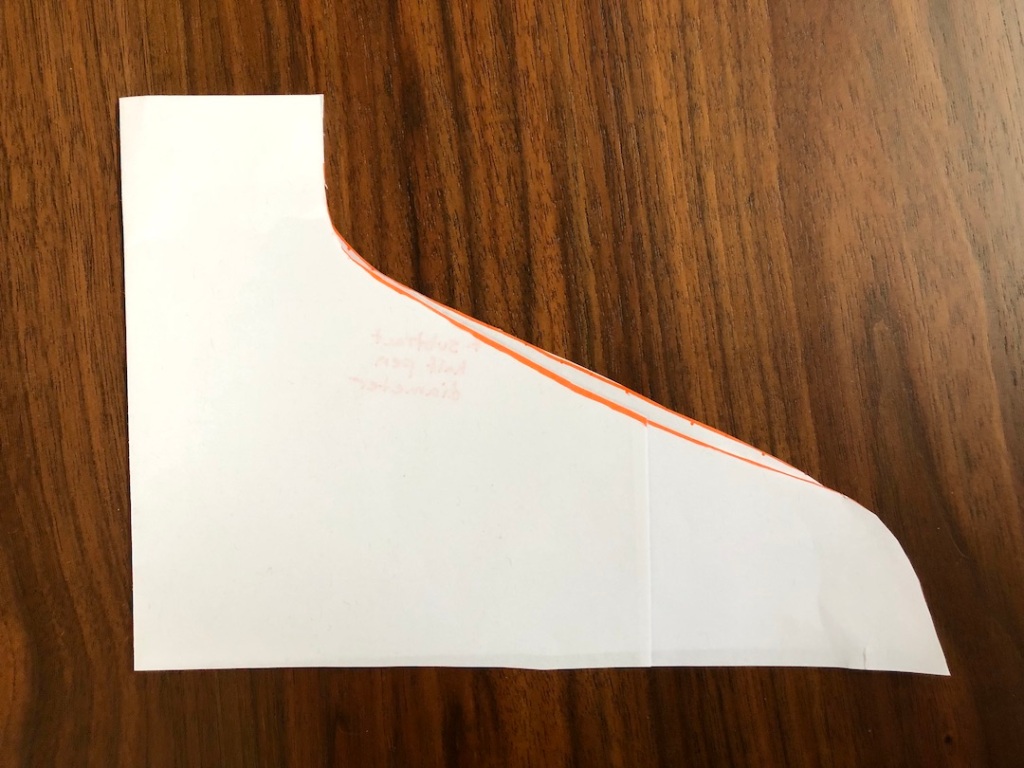
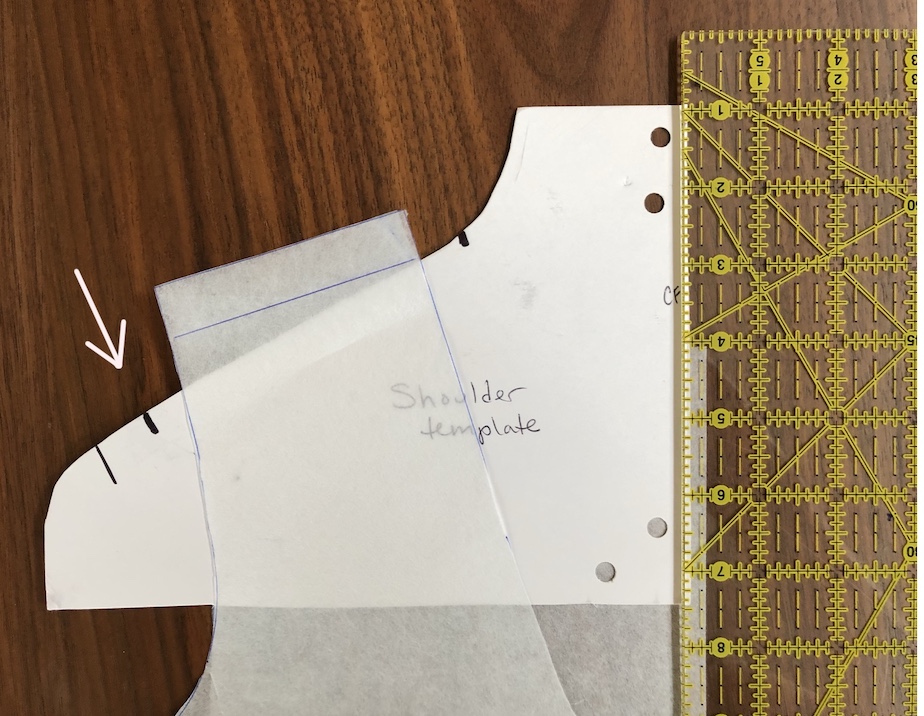
Next, cut along the true shoulder outline with the pen radius subtracted away (the orange line in the example above). Find the midline by folding the template in half and carefully matching the sides of the neck together. The shoulder slopes on either side of the template may not match! So don’t force them into alignment.
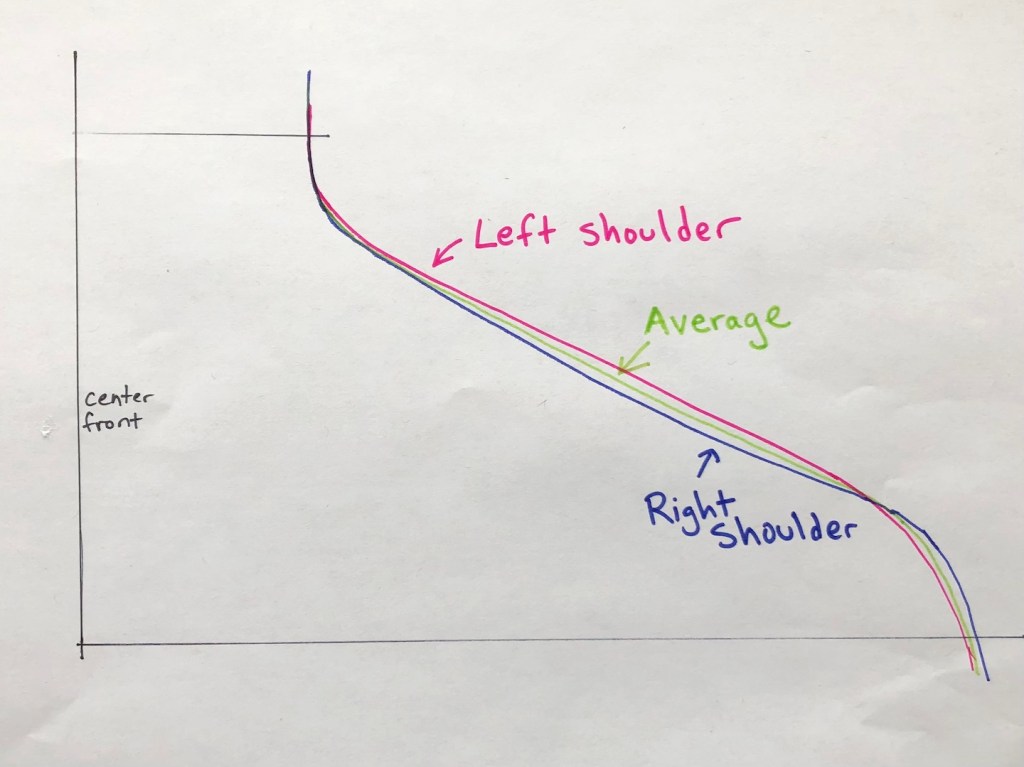
Below is my husband’s folded template with the sides of the neck aligned. On one side, you can see that his shoulder slope is not completely identical and the lines diverge by about 3/16 inch. On the other side, you can see there is about 1/8 inch difference in the width of his shoulders.
The asymmetry could be due to actual body differences on the left and right, accumulated inaccuracies in tracing, or some combination of both. I decided to average the differences between both sides to make one template, but you could also make a separate left and right template if you plan to modify either side of a garment differently. These differences average out to one or two 16th of an inch, so unlikely to noticeably affect any future fitting adjustments.
Once you are satisfied with the alignment of left and right sides of the template, make a crease down the center and draw this midline on the tracing. I used the same method described above to average the left and right template into one. Then I cut out my averaged template and transferred it to a piece of cardstock for extra longevity.
Step 5: Annotate
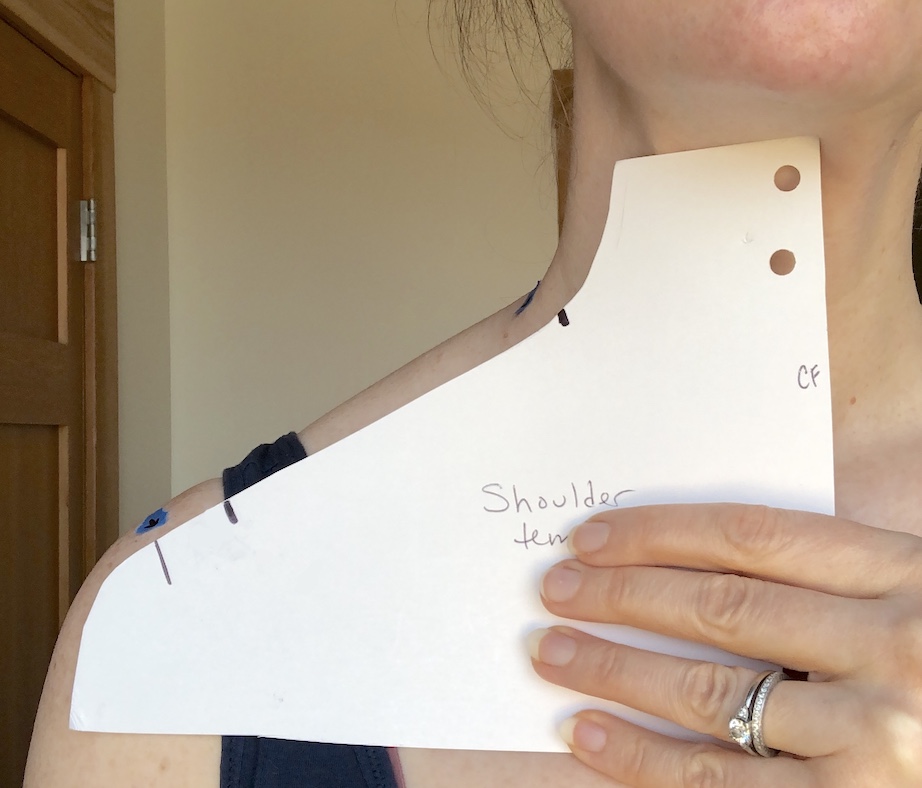
I marked my shoulder template in three key places: 1) high shoulder point to indicate high necklines and collar placement 2) bra strap location (helpful when making tank tops), and 3) preferred location for the finished edge of the shoulder on a sleeved, woven bodice.
Your high shoulder point is the point where your neck and shoulder meet, and on my template, it marks the location of a comfortable high neckline or collar. I locate this spot on my body and place a small piece of tape or a sticker there. Then I can measure the length between that point and the outer edge of my bra strap on both sides, take the average, and mark it on my template. Repeat those steps for your preferred shoulder width on a sleeved bodice.
I use these annotations as reference points, not hard rules. For example, plenty of shirts have slightly dropped shoulders where the shoulder width will be wider than this template. Other times, the shoulder seam is intentionally narrow, like when accommodating a puff sleeve. In both cases, the template helps me see how wide or narrow shoulder seam will be on my body relative to the natural end of my shoulder, but it doesn’t necessarily mean that I need to change the pattern.
Below, I’m holding the template slightly lower and to the center so you can compare the shape of my shoulder to the template. This is a good way to check your work once you’re done.
Step 6: How to use your template
I use my shoulder template to check the shoulder slope of patterns and to check where necklines and armscyes will fall. For tank tops, I also use it to see where the tank top will hit my shoulder relative to my bra straps.
Something to keep in mind when measuring the shoulder slope on a pattern is that the front and back slope may not be the same. On woven tops, this is normal. On knit tops, I’ve noticed a lot of patterns use the same slope for front and back.
This video from In House Patterns does a nice job of describing how to find the slope of your pattern if the front and back aren’t the same, but the same steps apply to all patterns. Briefly:
- On front and back bodice, mark your seam allowances at the shoulder, armscye, and neckline. Fold along the shoulder seam so you can compare the stitching lines directly.
- Line up front and back pieces so that the grainlines are parallel. The center front and center back lines do not have to be flush with each other, just parallel.
- Align the front and back pieces at the exact point where the neckline seam meets the shoulder seam. You can put a pin in this intersection or tape the pieces down.
- Look at the slope on the front and back pieces, if they are different, find the midpoint that bisects the angle. That’s the shoulder slope of the pattern.
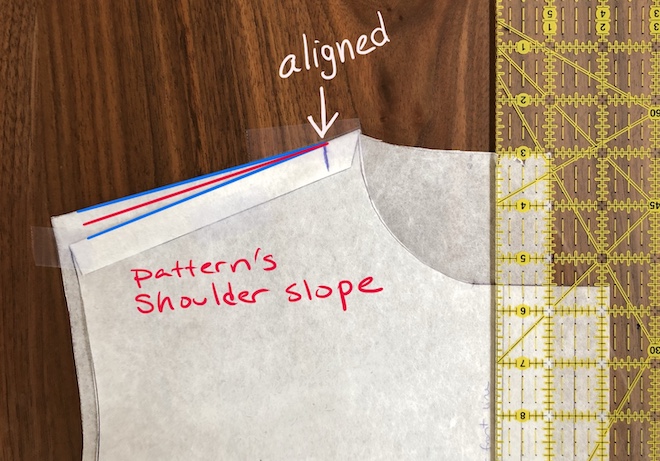
Once I’ve aligned front and back pieces, I place my shoulder template on top of the front bodice piece and align the center edge of my template with the center front of the front pattern piece.

Above, you can see that I need to increase the slope of my pattern by 3/4 inch compared to the red line. The yellow arrows highlight that the neckline of the pattern will hit slightly below my high shoulder point (which is good, I know it will be comfortable), and the finished edge of the pattern’s shoulder will hit slightly inward from the natural end of my shoulder (outer black line on the template).
Side note: I’ve marked the armscye seams in blue, and they aren’t trued on this pattern. The back of the Pattern Scout Birdie pattern is wider than the front at the shoulder seam, so I fixed that in subsequent toiles.
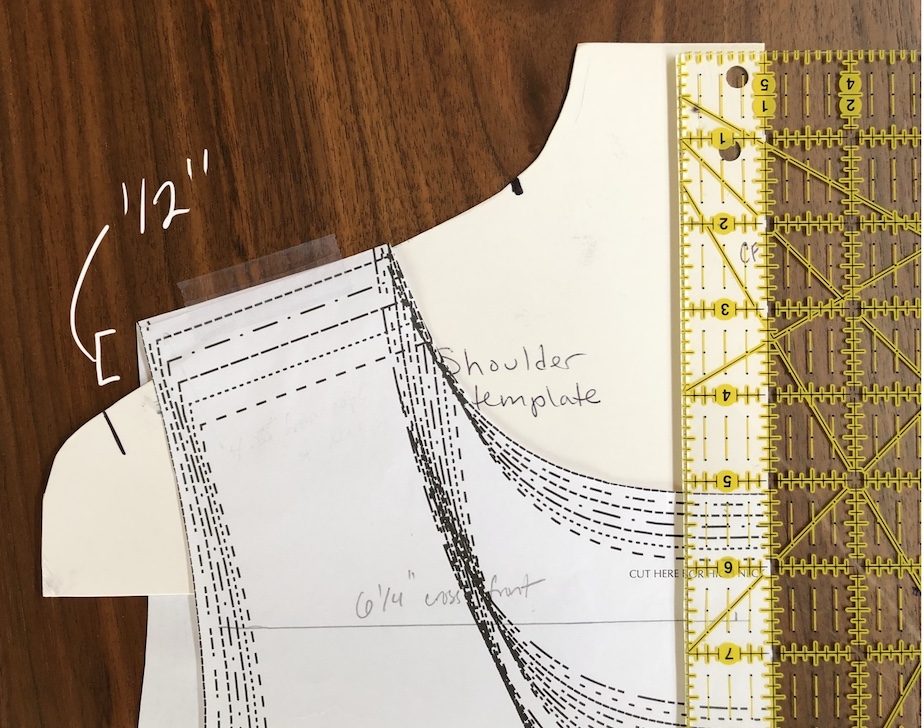
Below is another example using the Cashmerette Concord t-shirt. Here, the front and back pattern pieces have the same shoulder slope. Notice that the armscye seam falls about 5/8 inch inward from the end of my shoulder (long black line on the template). That’s fine for a t-shirt, but may explain why I saw some straining across the sleeve cap in my previous post.
Finally, let’s look at a tank top pattern. Below is the Pattern Scout Hana tank. Front and back pattern pieces have the same slope, but you can also see that the Hana shoulders are drafted to sit in the middle of my shoulder, so my bra strap will show (white arrow). This is fine with me, but I could use this template to know how much to widen the shoulder if I wanted more coverage.
Summary
In summary, making an accurate shoulder template takes a little effort, and you have to enlist the help of a partner, which is not always ideal or feasible. If you can, though, a template can be an immensely helpful tool that gives you a visual reference when studying a pattern. This template can also save you time when trying a new pattern, because you can calculate whether you need major shoulder adjustments before you toile.

Leave a comment