
I’m a big fan of the Elbe Textiles aesthetic, so I bought the new Townsend Shirt pattern immediately when it launched. I’ve been wanting to make a shirt like this for a while, and with a quick hack to the front bodice, this pattern really delivered on my vision. In today’s post, I’ll discuss the fit and drafting of this pattern, as well as some special considerations for working with striped or plaid fabrics.
A little housekeeping note: I originally published a version of this post on Threadloop, a popular and growing platform for sewists. It’s a website for organizing and sharing sewing projects, similar to Ravelry. I’ve been a member of Threadloop for a few years and highly recommend checking it out if you are not already a member (it’s free to join). I post all of my projects there in great detail, some of which then make it over to this sewing blog.
Design
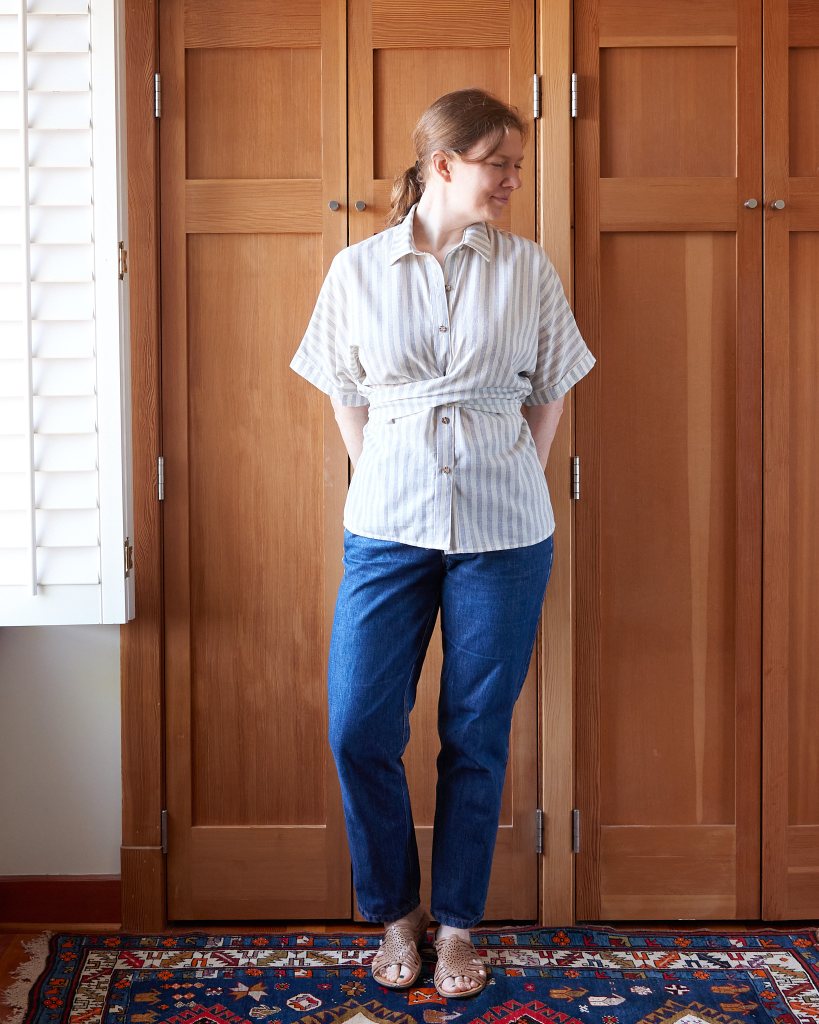
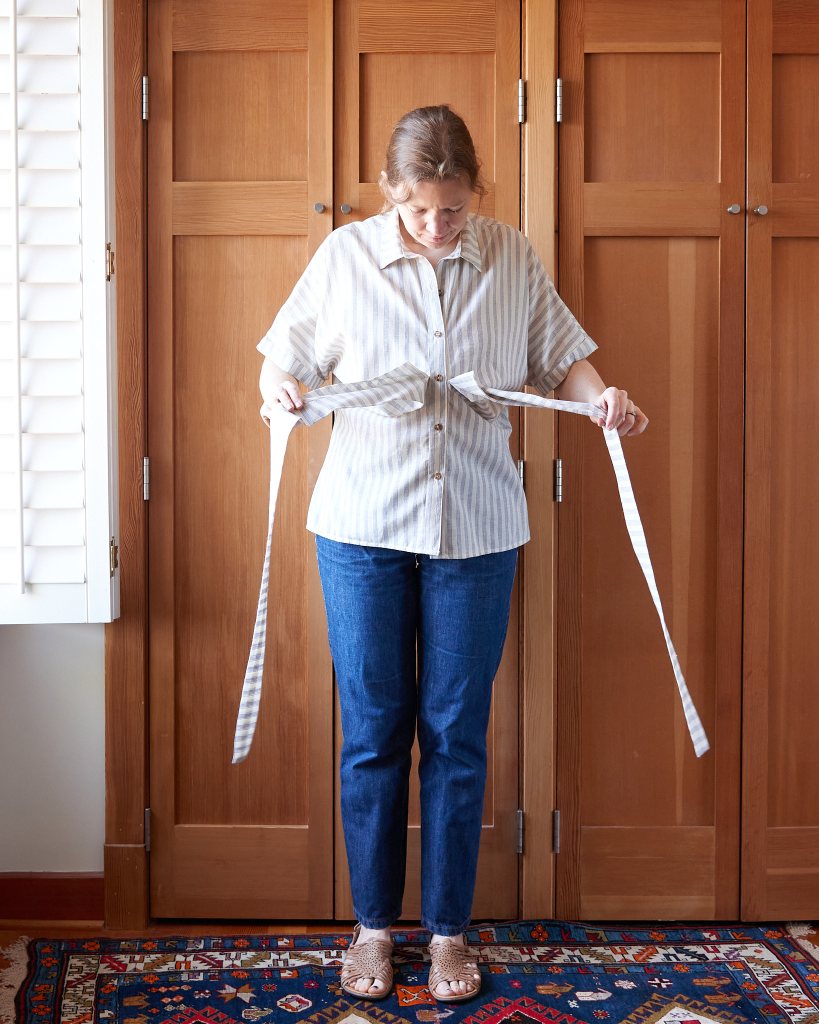
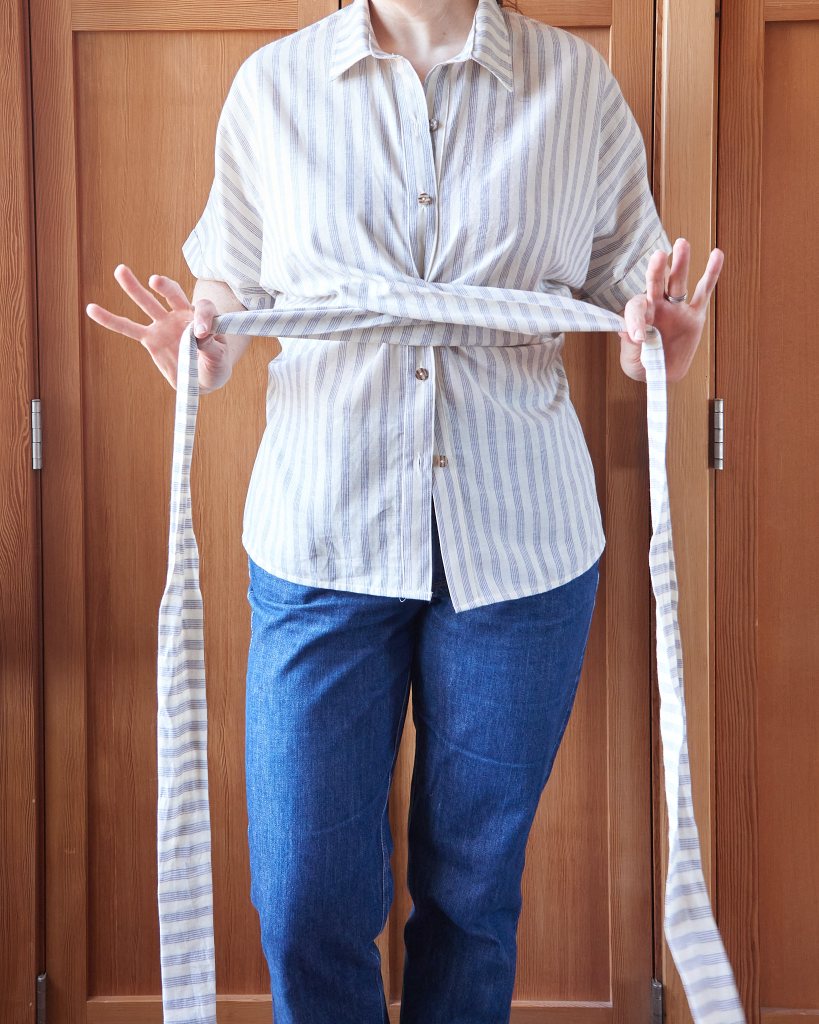
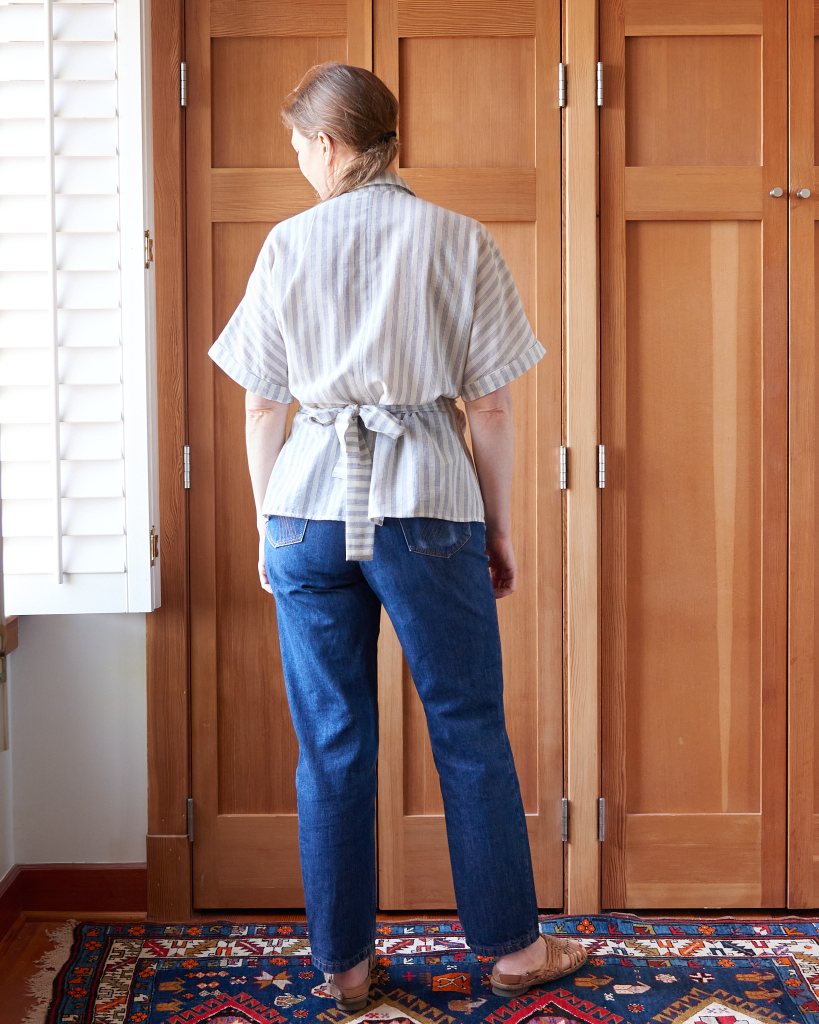
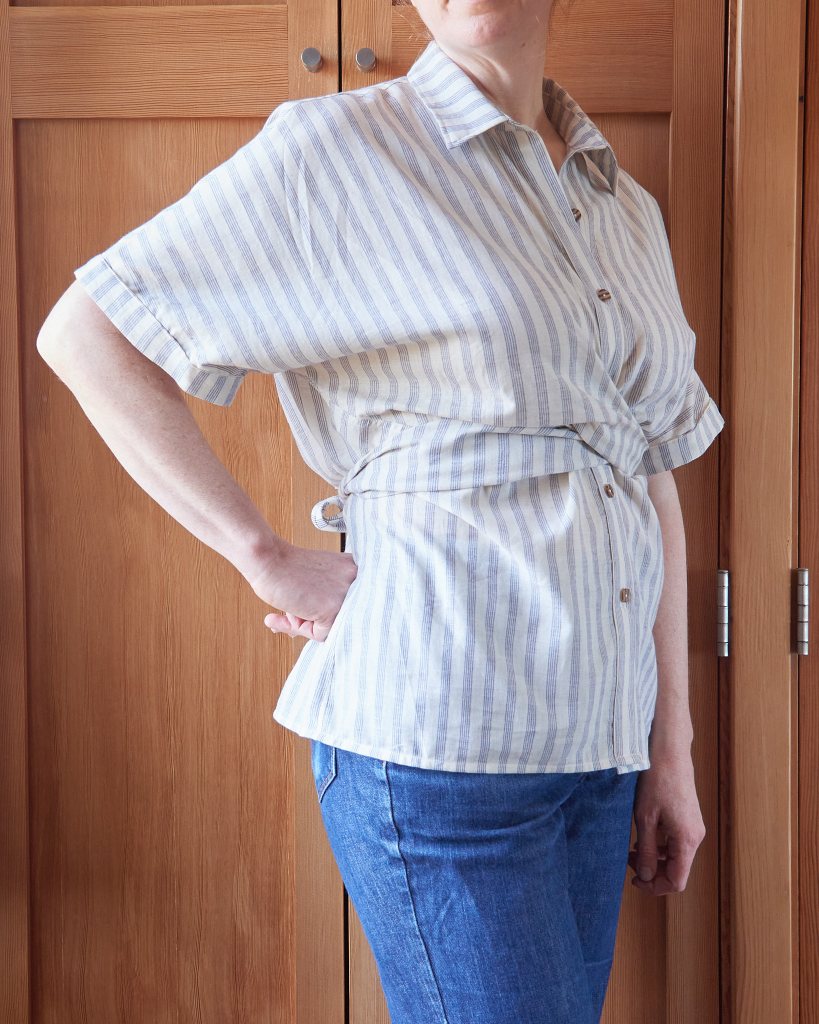
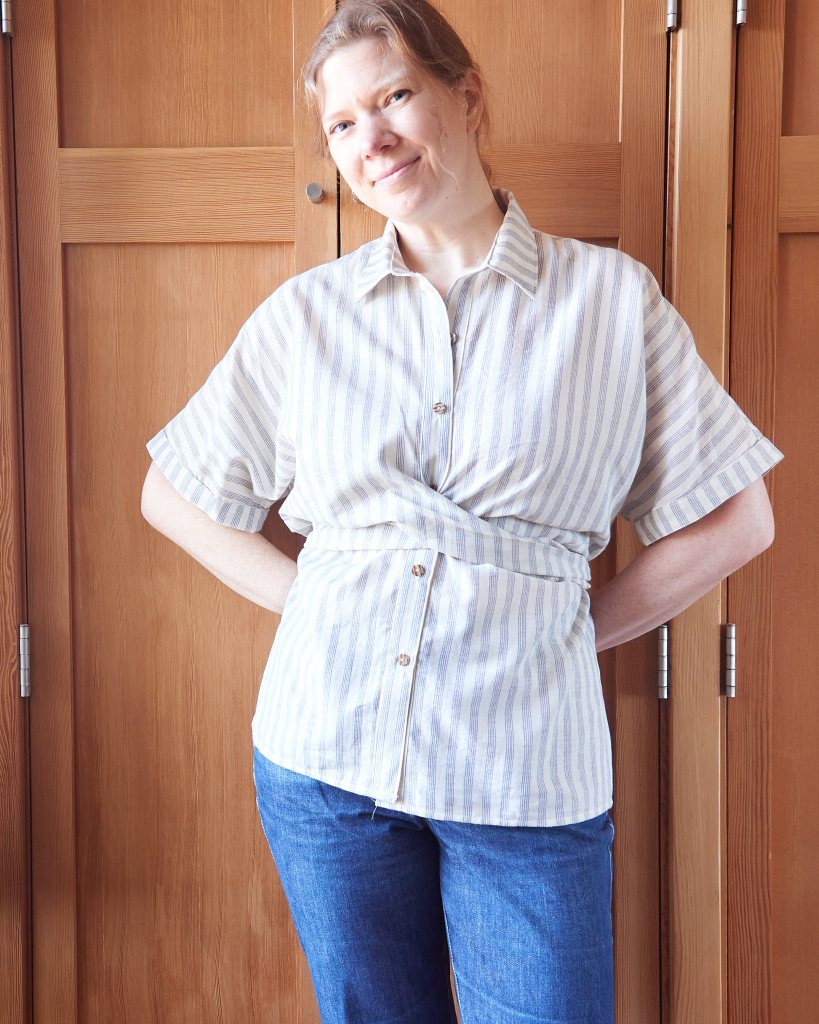
The Townsend shirt has a front button placket and two collar views: one with just a stand and one with a stand plus a collar. The shirt has a generous grown-on sleeve that ends around elbow length. Wrap ties built into the front bodice cross over the button stand and tie in back to cinch the waist.
I love a shirt with clever drafting and this pattern delivers exactly that. Most tops like Townsend have side ties that are sewn into the side seam and wrap the body from the side. Not true for Townsend.
The Townsend ties originate from the center of the shirt, on either side of the placket. As a result, the ties can be wrapped a little bit looser around the body but they stay in place around the waist since they are anchored at waist-level on the front, unlike a side-seam tie. I don’t like the feeling of having my torso wrapped tightly all day, so the Townsend is much more comfortable to wear, in my opinion.
Sizing and Fit
Townsend goes up to a 57 inch (144cm) bust, and unlike Elbe Textiles’ other patterns, it does not offer multiple cup sizes. The shirt has a generous amount of ease in the bust, so most cup sizes should be accommodated by the draft. Elbe Textiles has a blog post on modifying the bust ease if needed.
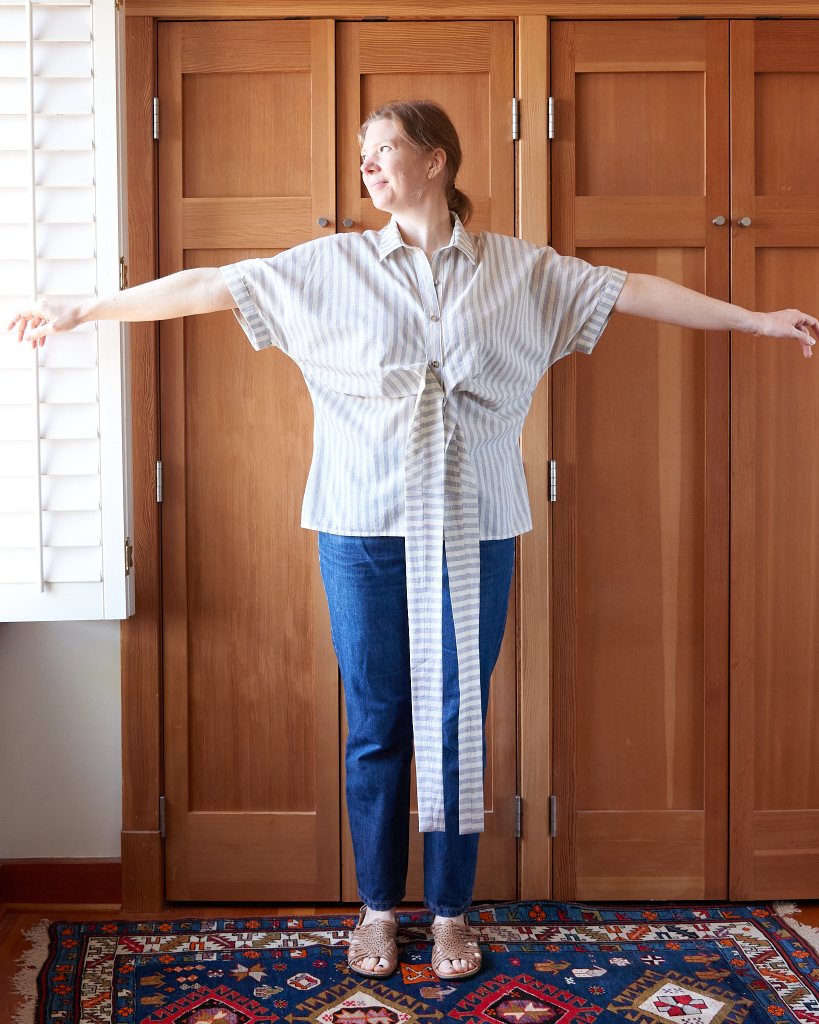
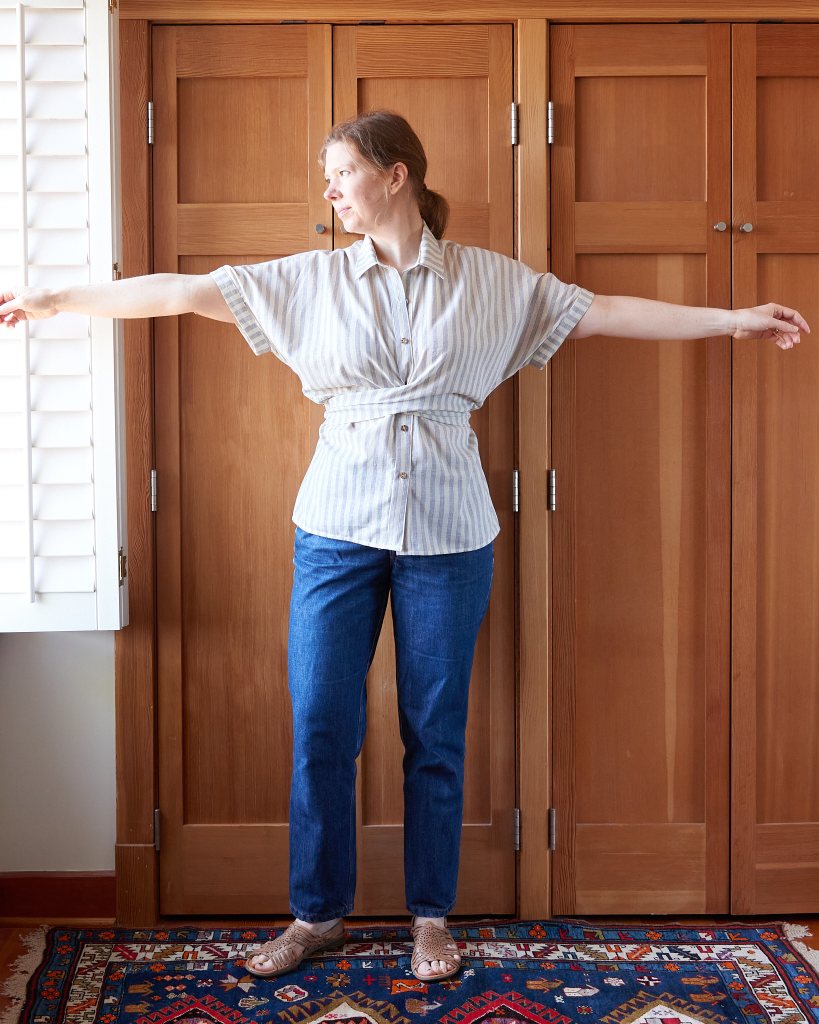
When untied, the Townsend fit is VERY relaxed through the shoulders and chest. I knew this was not a fitted top but I was a bit surprised at just how much volume there is. I have a 39” bust so I am a size E. According to the size chart, I should have 8 inches of positive ease in the chest, but it feels like more than that since my bust is in-line with the large sleeve openings. I’m not exactly sure how the 8” of ease is being estimated here.
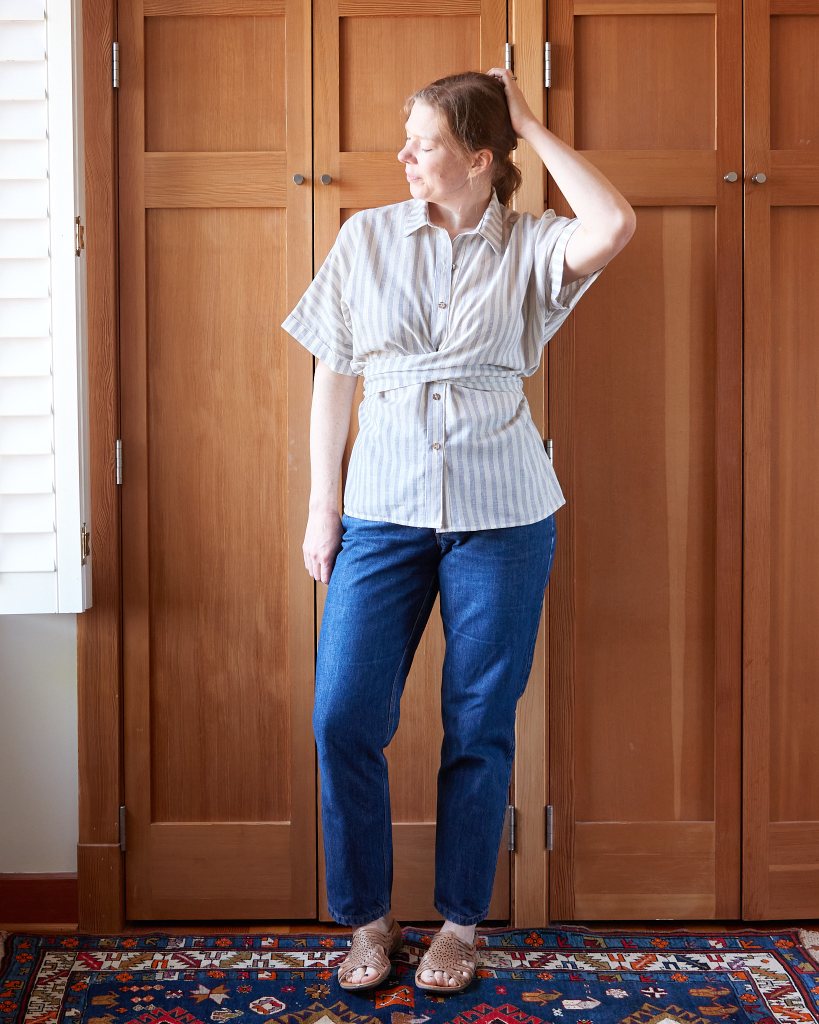
Despite the voluminous feel of the shirt when untied, everything cinches down once the tie is wrapped and secured. The top completely transforms when tied, and I really like the final look of the defined waist with the looser chest/shoulders.
Like most grown-on sleeves, the sleeve opening/armpit is several inches away from the body, and there are some consequences of this style. First, it is possible to glimpse a bra or bare skin if you raise your arms just so. The longer, elbow-length sleeve minimizes how flashy the armhole is, and overall I’d say Townsend is less flashy than many other grown-on-sleeve tops in my collection, but more flashy than a shirt with a set-in sleeve..
The second consequence of the loose arm opening is that the whole top gets pulled up and out of the waist tie when I raise my arms past 45 degrees. So after wearing this shirt for a day, I found had to re-adjust the bodice under the tie fairly often if I was being more active. If I pinch out width in the bodice to bring the armhole closer to the body, this issue improves, but it alters the “look” and silhouette of the top, so I will probably not change anything for subsequent Townsends.
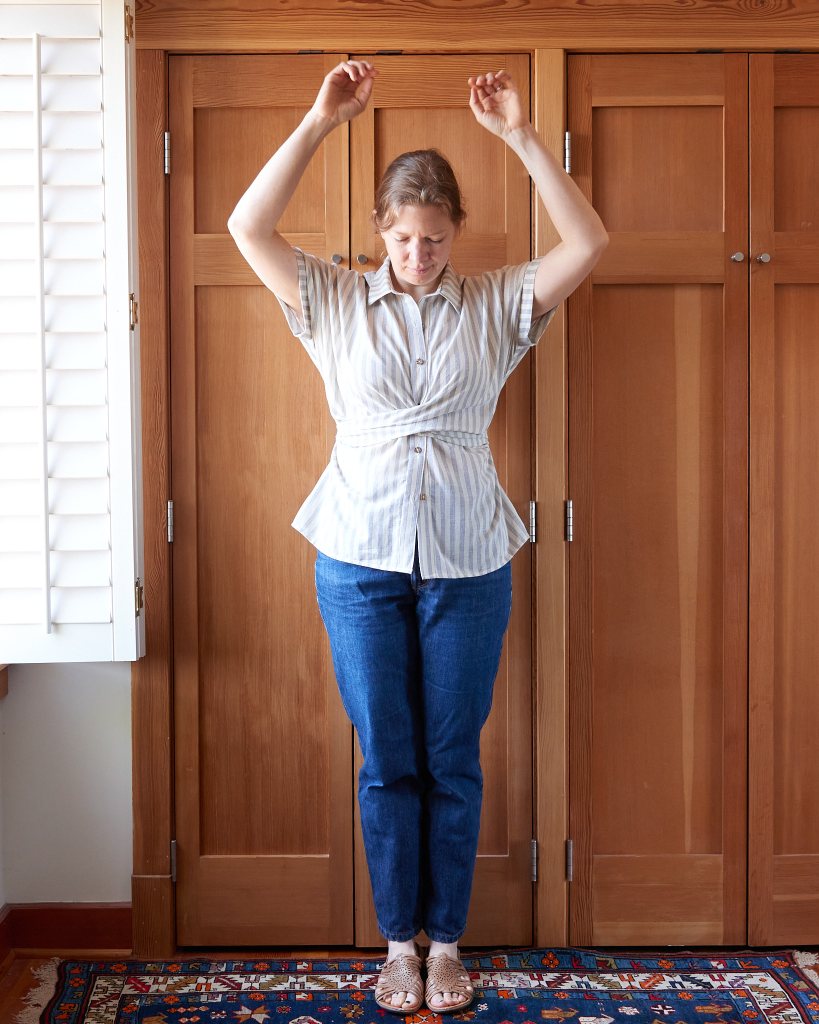
The Townsend sleeves are also quite long. Originally they were elbow length on me, and I am 5’10” with long arms. I ended up taking some length out of the sleeve by attaching the facing on the inside of the sleeve as directed in the instructions, but then folding it again to the outside of the shirt and sewing it down. This effectively shortened the sleeve by about 1.25″, and as a bonus now my facing with contrast stripes is visible on the outside.
Working with Stripes
As I mentioned above, the drafting on this top is very clever, and the tie is essentially “grown on” in the front bodice, rather than being a more traditional tie attached to the side seam. However, this drafting has some consequences for using fabrics that have geometric patterns, like stripes or plaids.
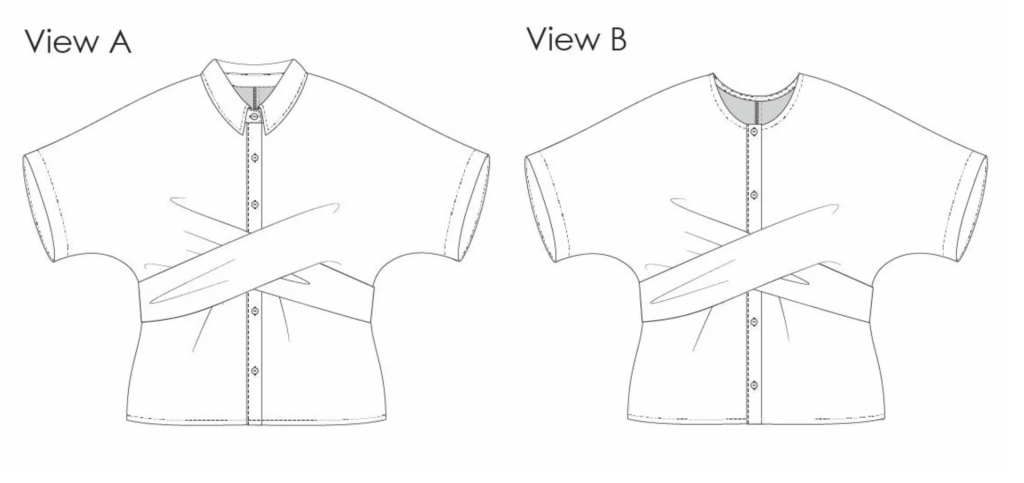
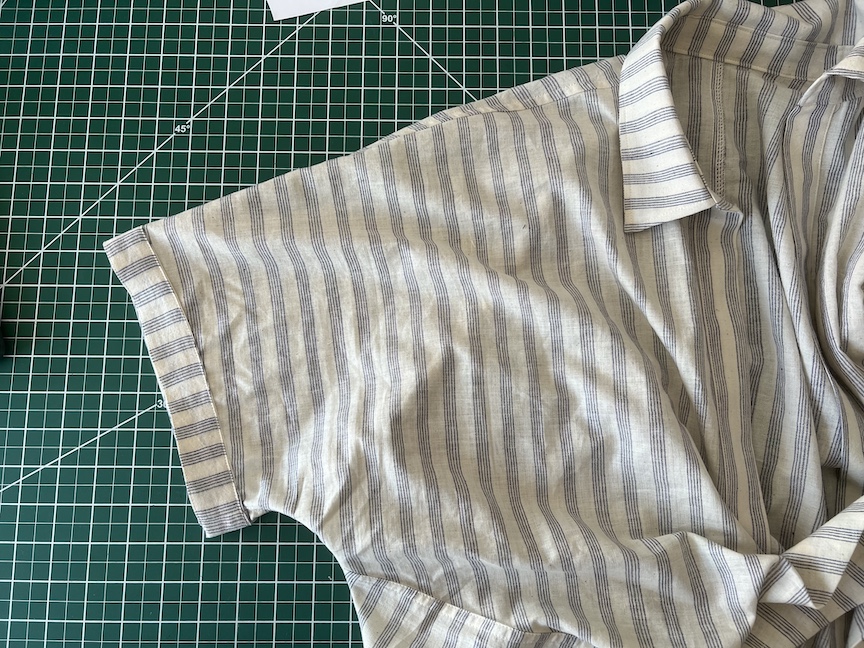
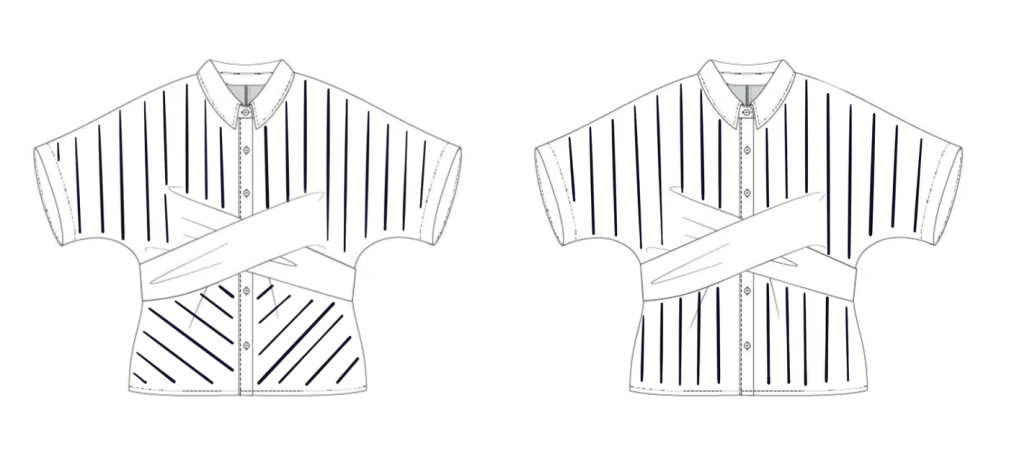
I wanted to make this top with a striped fabric, but I didn’t love the idea of the stripes not being vertical on the lower half of the bodice. As laid out above, if I cut the front bodice with the stripes aligned vertically at the neckline and upper chest above the tie, they become diagonal below the tie (below, left).
While this is a cool design feature seen elsewhere in ready-to-wear clothing, it was not the look that I wanted for my Townsend. I wanted vertical stripes from neck to hemline (below, right).
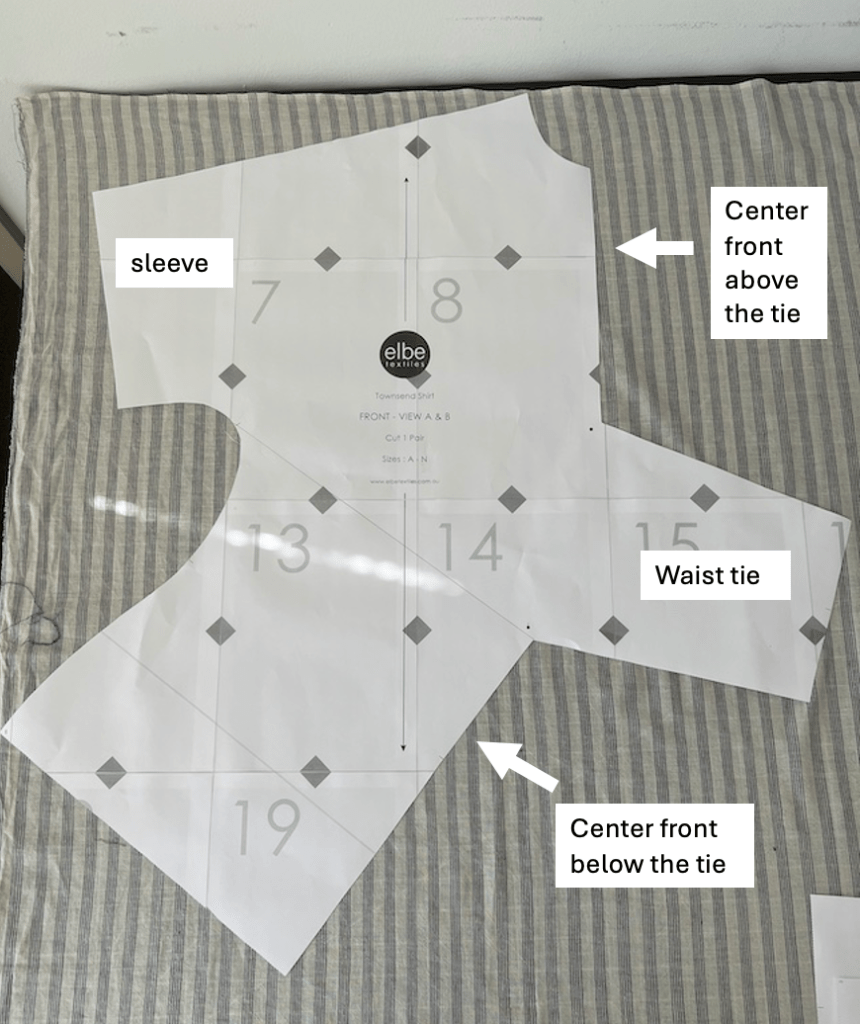
My solution was to cut the bodice piece right below the grown-on tie, then cut an upper and lower bodice both on-grain. Once sewn back together, the top will have vertical stripes running the length of the bodice.
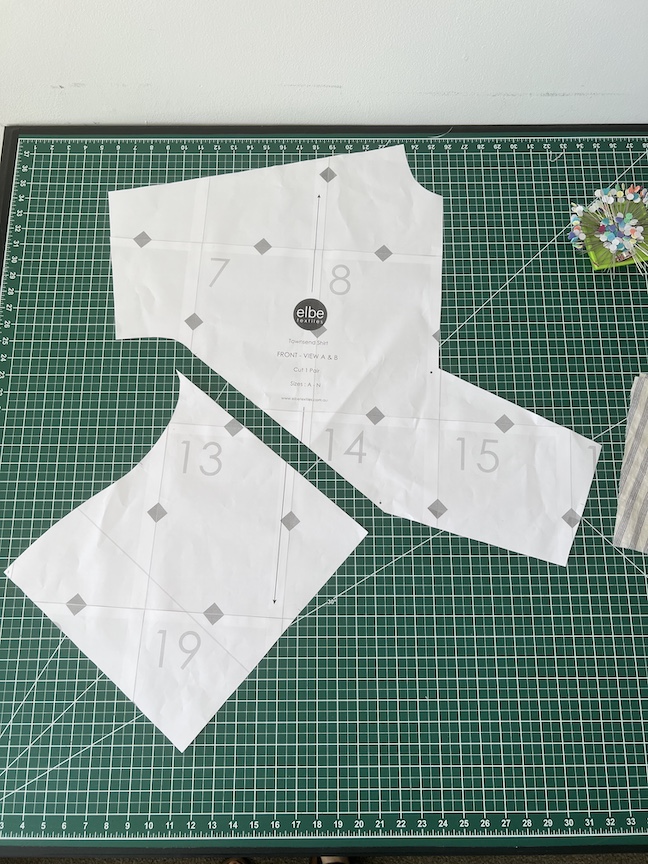
I used the Elbe textiles blog post on pattern alterations to decide on how to cut the front bodice. Essentially I cut right below the tie, creating two front pieces for the bodice which are joined with a seam.
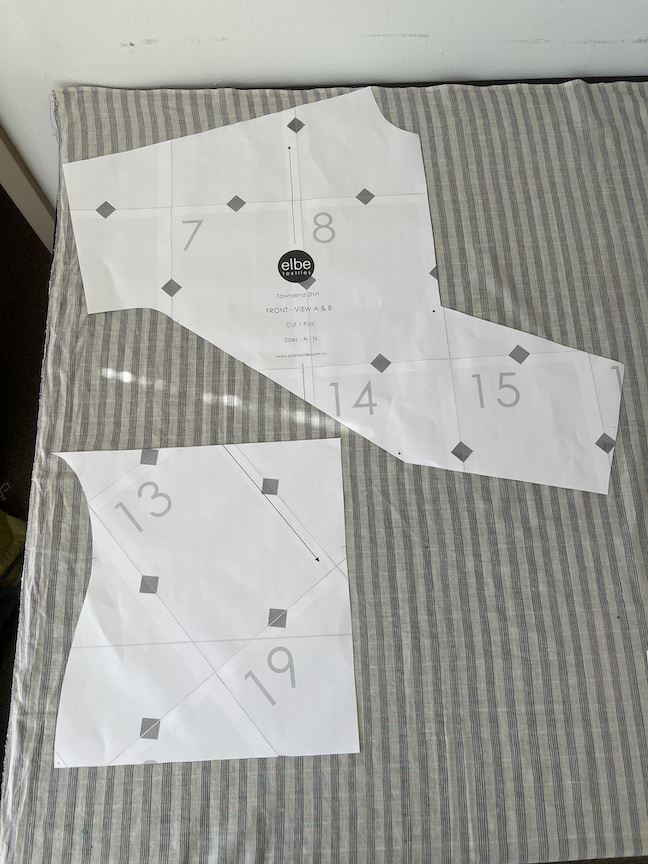
Now the lower half of the bodice can be placed on-grain, and the striped will appear to be vertical along the entire front of the shirt. When I cut out these two pieces, I added back a 5/8″ seam allowance so that I could flat fell these two pieces back together. The seam line that I created will get covered up by the tie when the shirt is worn, and the stripes appear vertical from neck to hemline.

About a week after the pattern launch, Lauren shared this same hack for a dress version of the Townsend (she cut her front pattern piece at the waistline, slightly lower than I did). She sliced her pattern to make the fabric usage for the dress more economical, and to avoid any strange draping from a long, heavy piece of fabric cut on bias only in the front of the dress.
Fabric choice and bias cut edges
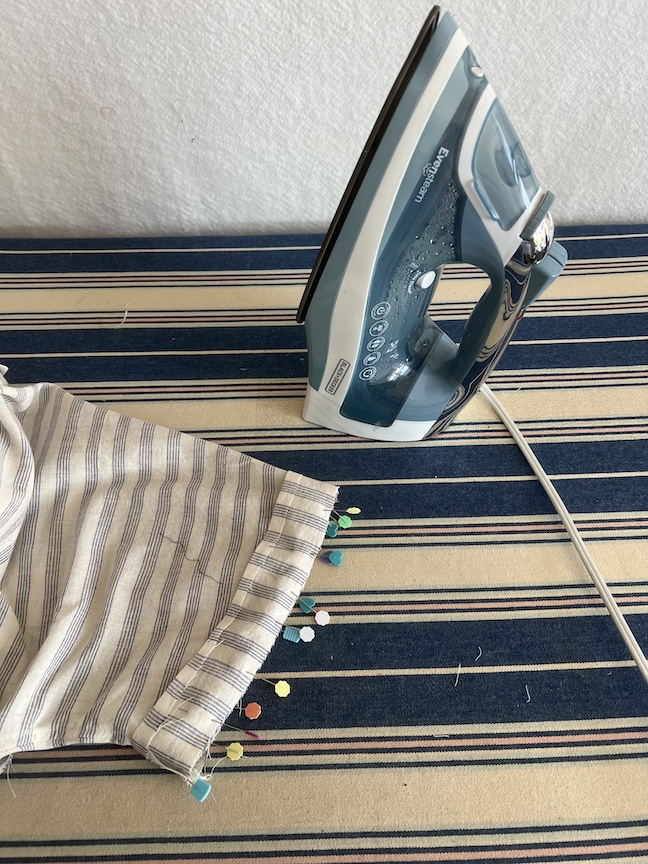
I chose a thin cotton with a loose weave for my Townsend, and it is prone to growing with minimal handling. All of the cut edges of the pattern that are on bias or slightly on bias expanded during the course of construction, especially the collar and the sleeve hem. I used steam, lots of pins, and some gentle easing to get things to lay nicely. But be aware that if using a linen, silk, rayon, or loosely-woven cotton, there are a lot of areas of this shirt that will want to grow as you are working on it.
All of this affirms my decision to cut the lower front bodice on-grain. Not only do I like the look better, but I think this fabric would have been a real challenge to force a bias-cut lower half of the bodice to match up with the button placket.
For an easier time with construction, the best fabric choice for this pattern is probably a tightly woven, high quality cotton shirting, which will be more stable than other fabric types and less prone to growing along bias cut edges.
Final thoughts
I’m a big fan of the Townsend shirt, and it delivers a fun and comfortable twist on the traditional button-up. My only gripe about this pattern (and all Elbe Textiles patterns) is that the seam allowance included is only 3/8 inches, which limits the kinds of seam finishes one can do. I’m a big fan of flat felling seams on my button ups, so for the next Townsend, which will probably be a dress hack, I will add some seam extra allowance.
Overall, the Townsend is a clever pattern with an easy fit that’s very adjustable for body fluctuations. Like many of Elbe Textile’s designs, this pattern will definitely be a wardrobe staple for me.

Leave a comment