
When Daughter Judy Patterns launched recently, the Adams pants immediately caught my eye for their unique style lines and fresh design. We haven’t seen many patterns like this one in the indie sewing pattern industry: Adams is a modern take on the classic jean, and I knew immediately I had to make a pair.
Fit
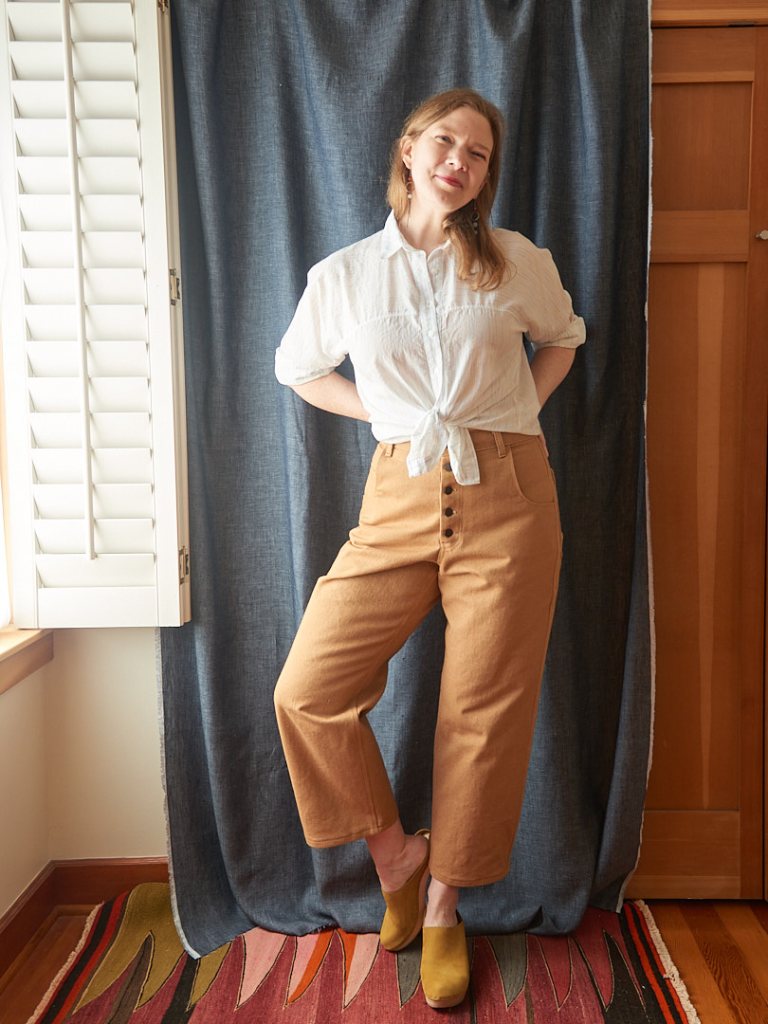
The Adams pants come in two size ranges: DD (0-20) up to a 49 inch hip, and JJ (16-34) up to a 66.5 inch hip. The pattern is described as a “painter’s pant” or carpenter jean, which means it is fitted at the waist but relaxed through the hip with a straight leg. The waistband is designed to hit slightly below the natural waist, and the size chart indicates there should be about 2.5 inches of ease in the hip.
I couldn’t tell from the product photos how much ease was designed in the crotch seam, so I contacted the designer. Chelsea wrote back to say that “the crotch should sit 1-1.5 inches below the body”, and “the pants should feel a bit roomy”. The product photos for the Adams reflect this description, and you can see beautiful, gentle folds of denim on the front and back of the pants. This unique fit is what drew me to this pattern in the first place, and what makes it stand out among all of the other indie jeans patterns.
Some of the advice on Instagram is to size down in the Adams pants. Several posts also mention taking out inches in the inseam and/or hip, which will effectively remove ease from the crotch seam and hip to “slim” the pattern, bringing it closer to the body. While this is absolutely a valid personal decision (and even mentioned in the pattern instructions), I chose not to size down because I want to honor the original design intent, which is a roomy and relaxed fit.
It’s worth mentioning that these jeans may feel a bit outside of your comfort zone if you’re used to wearing the closer-fitting styles like the Persephone pants or the Ginger jeans. All of the extra ease in the design creates excess fabric around the hip and through the crotch, which allows for easy wearing and a full range of movement. This was a common style before stretch denim became popular, and one that I love. It’s making a comeback in the fashion world right now with the revival of 90’s styles, and I couldn’t be happier about it.

Fitting
This style of jean is not represented in most fit books, and if you apply the conventional wisdom to try to eliminate all drag lines from these pants, you’ll be editing out some or all of the ease in the design. Since I like the design as is, I tried not to overfit these and stayed true to the 1.5 inch dropped crotch and the 2.5 inches of hip ease.
I chose a size 14 according to my hip measurement, and I used the Top Down Center Out method to fit these pants. Starting with the waistband, I removed several inches and increased the contouring so that it would sit comfortably about an inch below my natural waist

I tried a few different adjustments while fitting. But I found that all I needed was a ¼ inch wedge added to the top of the pants front and back, starting at the side seam and tapering to nothing at center front and center back. This additional fabric balanced the pants on my body and eliminated some minor puling below the back crotch. I also took in the back darts by 1/2 inch, and took out another 5/8 inch at the top of the side seam to meet the waistband (shown below for the back only).

One of the central tenants of Top Down Center Out is if you respect the design, then the design will respect you back. In other words, the less you change about a pattern’s drafting, the easier it will be to map onto your body. The Adams pants are an example of this for me: when I tried reducing the crotch ease from what was intended, I introduced other fit issues in the leg that I would have had to chase down if using conventional methods (likely with a crotch curve adjustment or some other major alteration). But if I kept the fit true to the intended design, the pattern only needed very minor tweaks to fit well.


Drafting and Construction
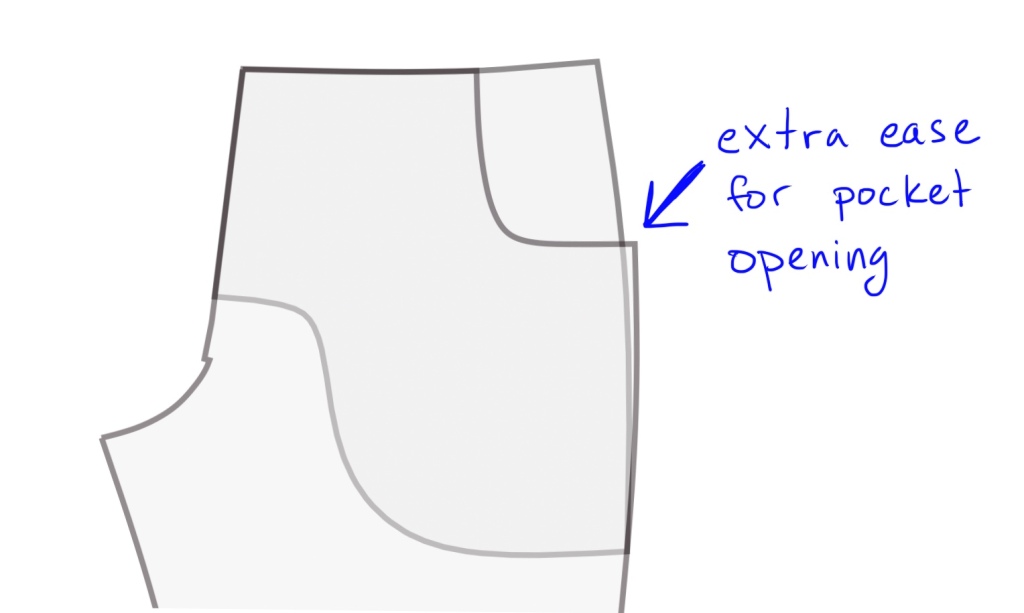
The drafting is beautiful, and there are some lovely details that make this pattern comfortable and easy to wear. For example, the pocket opening is drafted with a little extra ease compared to the pocket bag, which means that the pockets have a smidge of extra room at the opening for your hand to fit in. We see this same technique used as a style element in the pockets of patterns like the ES Clyde work pants or the Peppermint pocket skirt, but here it’s used more subtly to increase comfort and wearability.
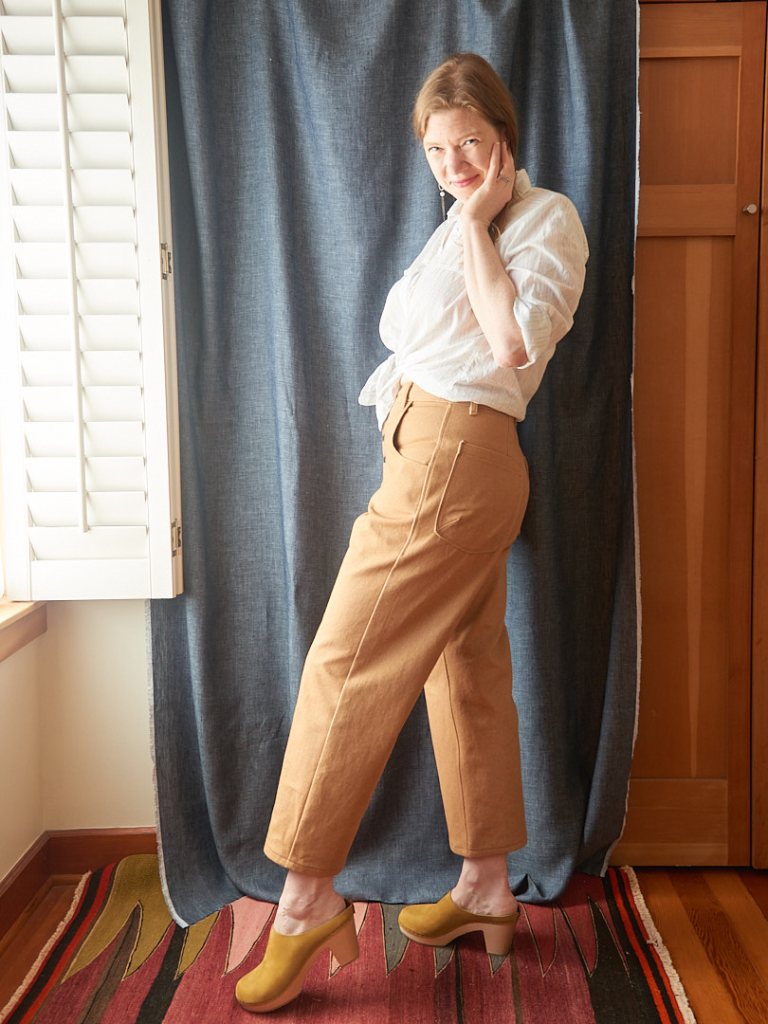
Speaking of pockets, Adams is a pattern for all the pocket aficionados out there. I love the HUGE front pockets on the Adams. They are almost 8 inches deep, and I can fit my entire hand in them up to my wrist. The elongated down swoop of the front pockets balances the dropped crotch on the front of the pants, and lends a beautiful proportion to the design.
I also love the unique, darted pockets in back. They add a sculptural shape, and they show off the structure of your denim, twill, or other heavyweight fabric. I love the way the volume in the back pockets echos the volume in the rest of the garment, and facilitates the transition from roomy leg to fitted waist. Plus, they just look incredibly cool.


Like others have said, the instructions for these pants are advanced. You need to know your way around a jeans pattern and ideally have constructed one or more pairs before. So, beginners may want to start elsewhere and work up to this pattern.
I chose a 100% cotton 13 oz. washed denim from Stone Mountain Daughter for my Adams pants, and at times it was quite a workout to fit these bad boys under my presser foot, even after hammering the bulkier seams. The denim is still a bit stiff now, but will be even more beautiful as they soften with wear. A heavier denim, like I used here, gives the pants more of a “workwear” vibe. For a softer look, I think the sweet spot would be an 11 or 12 oz denim, and I plan to make a other pair in a lighter weight to compare. I also have some corduroy that I am dying to make into Adams pants, which will be perfect for fall.
All in all, I absolutely LOVE the pants and this pattern. I feel like Katherine Hepburn when I wear these, and they remind me of all the carpenter pants and vintage jeans that I adored in the 90’s. They are easy to wear and to style, and they are incredibly comfortable. Needless to say, these will be getting a lot of wear for years to come.


Leave a comment